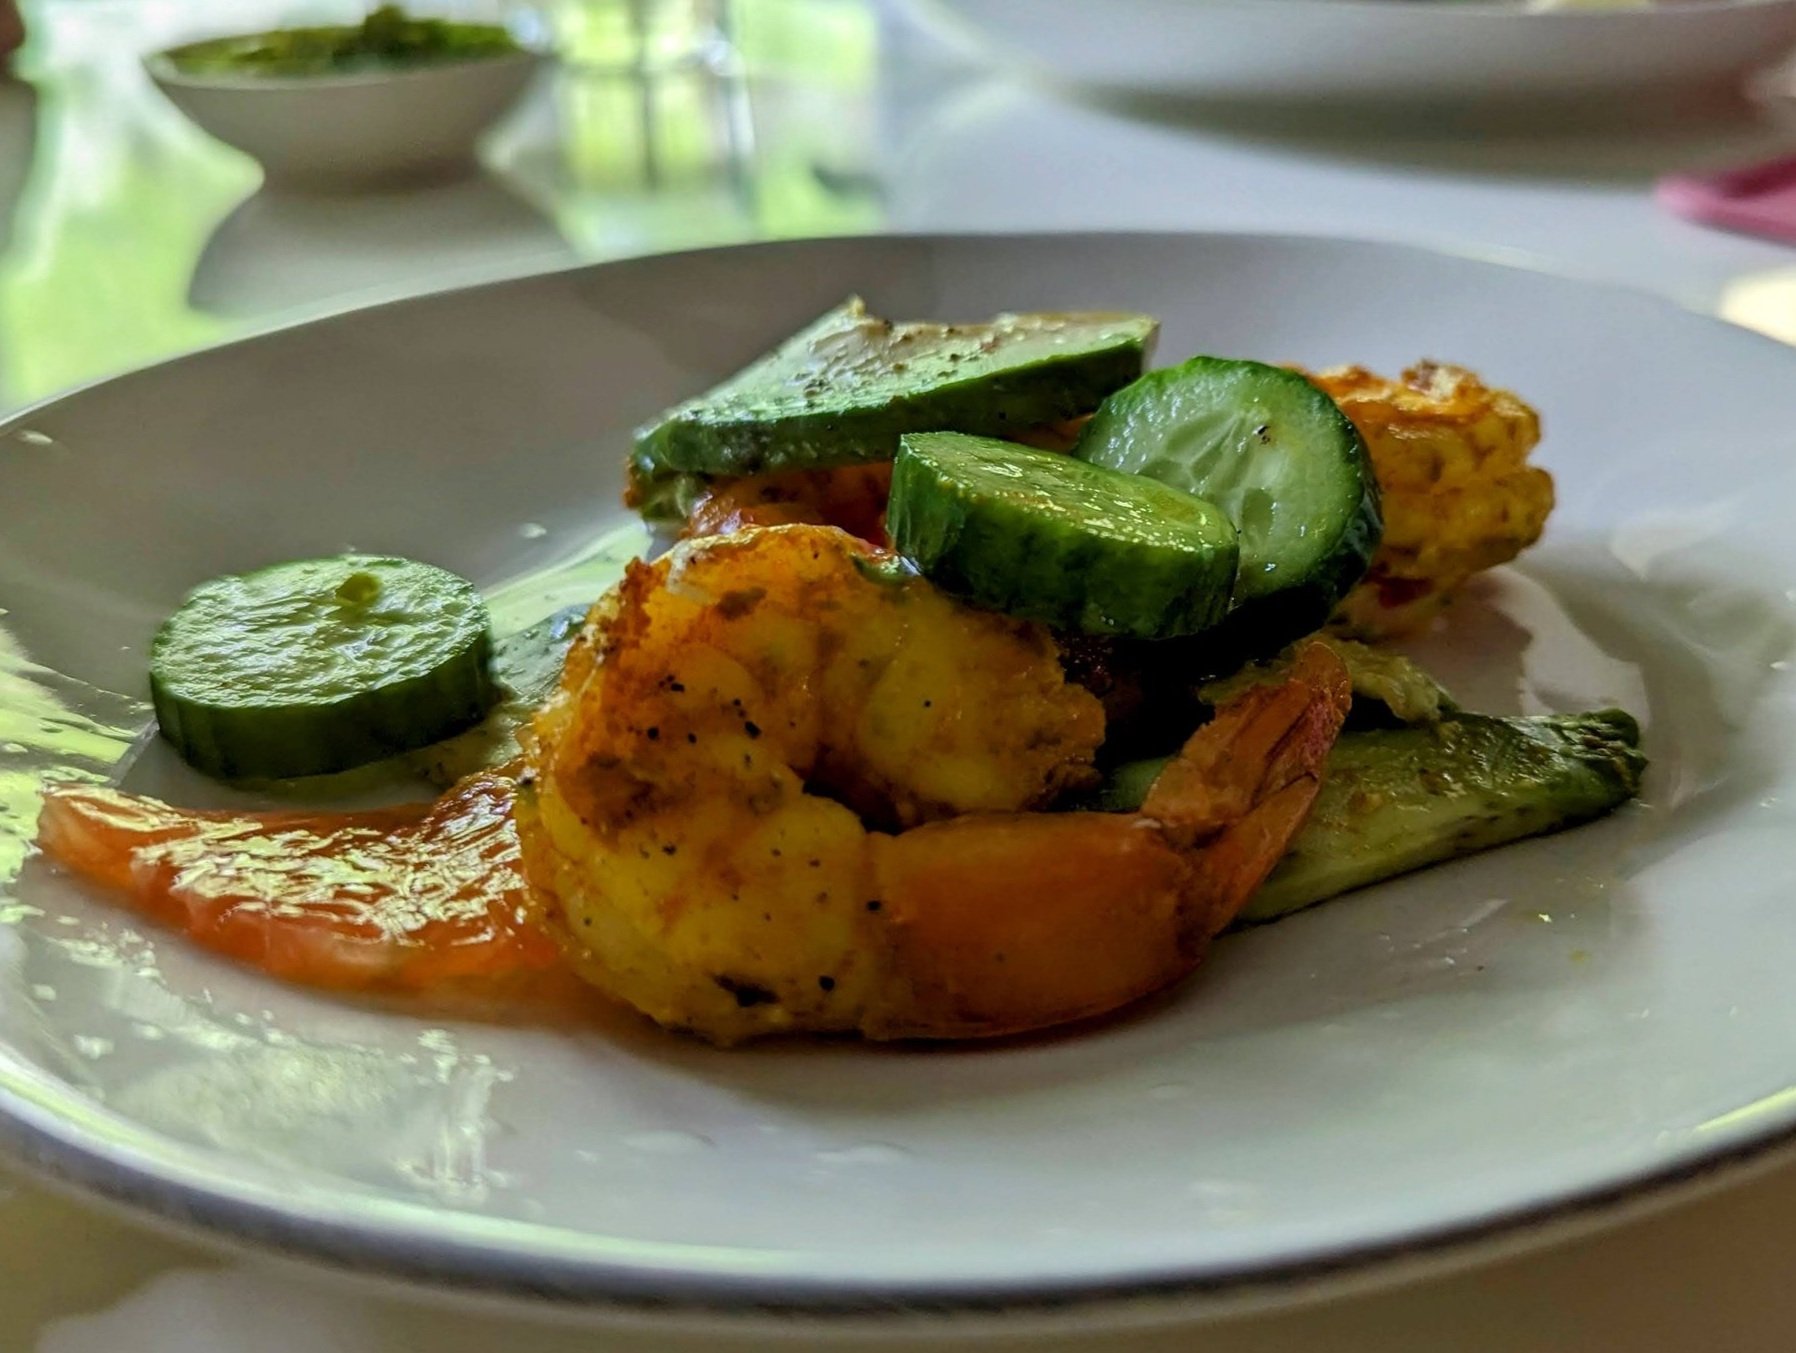
Turmeric Shrimp with Citrus & Avocado
By all appearances, this dish should be a summer dish - it’s light, flavorful, colorful. And it’s absolutely perfect for summer - but to my immense enjoyment, all of these ingredients are easily available over the winter. Juicy cucumber and tart grapefruit bring freshness, with spice from the chile and turmeric balanced by creamy avocado…

By all appearances, this dish should be a summer dish - it’s light, flavorful, colorful. And it’s absolutely perfect for summer - but to my immense enjoyment, all of these ingredients are easily available over the winter. Juicy cucumber and tart grapefruit bring freshness, with spice from the chile and turmeric balanced by creamy avocado. A squeeze of lime lifts the flavors and makes this great for a high acid white wine: pass the sauvignon blanc, please. It makes for a really nice change from typically meaty, carby, starchy winter fare (not that I don’t love a good stew).
I love shrimp - but challenges to their habitat and unregulated international farming practices make it challenging to know the best shrimp to buy for sustainability and flavor. If you have access to never frozen wild shrimp, you’re in for a treat. For the rest of us: Look for wild shrimp that is frozen without chemicals (ask the fishmonger) or frozen farmed shrimp with a certification (look for the abbreviations GAA or BAP on the packaging). Above all, finding a seafood retailer who you trust is the best way to get consistently high quality seafood, so try a few places and don’t be afraid to ask questions.
The safest, easiest way to thaw frozen shrimp is in your fridge overnight. But, if you’re like me and frequently have need for a quicker solution, you can place a bag of frozen shrimp in cold water (use a heavy plate to keep it fully submerged) and change the water every 30 mins until thawed (30-90 mins total).
Turmeric Shrimp with Citrus & Avocado
Time: 20 || Servings: 4 as an app, 2 as a main || Source: I Dream of Dinner (so you don’t have to) by Ali Slagle
Shrimp - 1 lb, peeled and deveined
Turmeric - 1 tsp
Salt (kosher)
Seedless English cucumber - 1
Grapefruit (can also substitute tangerine or pineapple or a combination)
Jalepeno or serrano pepper - 1
Olive oil - 2 tbsp
Avocado - 1
Lime - 1
Once your 1 lb of shrimp is defrosted, peeled, and deveined, pat it dry and toss it with 1 tsp turmeric and 1 tsp kosher salt.
Cut the cucumber into one inch chunks. Scatter on a serving plate and season with salt.
Remove the skin from the grapefruit. Cut the top and bottom off of the grapefruit, so you can just see the fruit inside. Place it on the cutting board on a flat side, then cut away the peel, including all the white pith, following the curve of the grapefruit. Once the peel is fully removed, slice the grapefruit in half, then slice into half moons. Scatter the grapefruit over the cucumbers and season with salt.


Heat a skillet on medium-high and add 2 tablespoons of olive oil. Slice a jalepeno in half and place cut side up in the pan. Add shrimp to the pan and cook for one minute. Turn shrimp and cook on the other side until opaque, one to two more minutes. Scatter shrimp over the grapefruit. Remove jalepeno from the pan and mince; scatter jalepeno (to taste) over the dish.
Cut the avocado in half and remove the pit. Use a spoon to scoop slices of avocado over the shrimp.
Cut the lime in half. Squeeze half the lime over the entire dish. Cut the other half into wedges for serving.
Season the whole dish to taste with olive oil, flaky salt, and pepper, then serve.


Bamboo
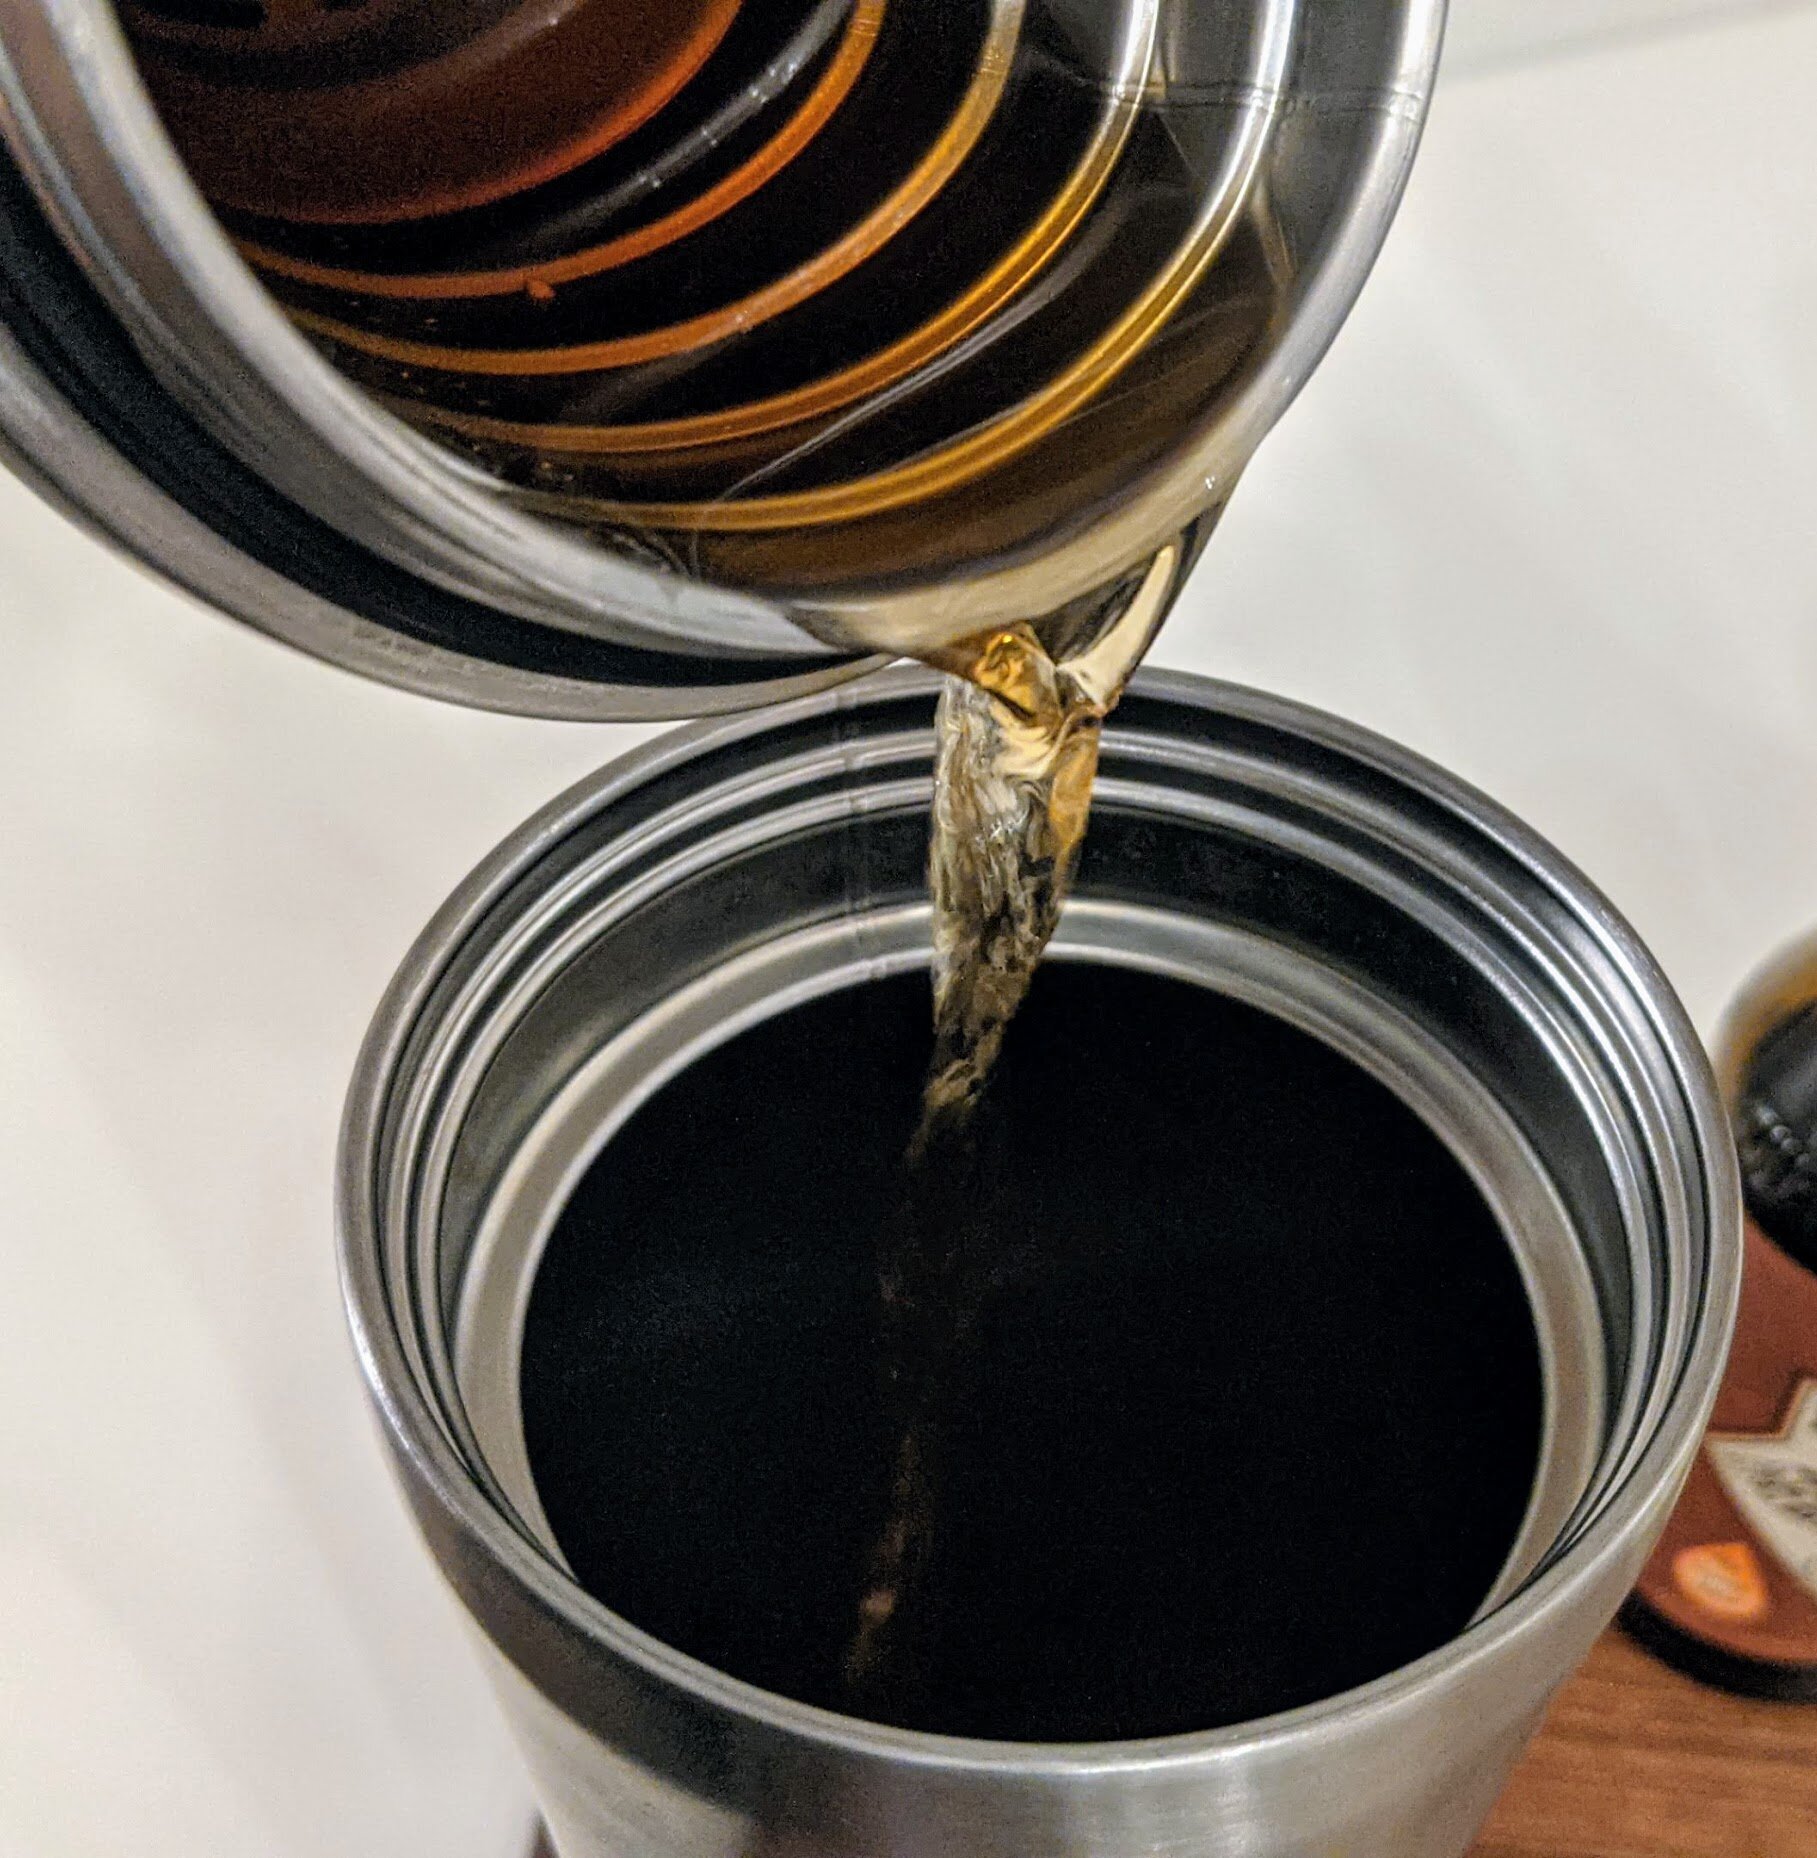
Happy Friday!!! You made it through another week - let’s celebrate with a cocktail! This is a sherry-based cocktail, which means you’re getting a bright copper color and acidity balanced with toasty almonds, dates, and salt. Balanced with two types of vermouth, this is a simple, tasty cocktail to start your evening. This recipe comes from The Cocktail Codex from the bartenders at NYC cocktail bar Death & Co - my partner, Joe, reverently refers to this book as “the cocktail bible”.

Happy Friday!!! You made it through another week - let’s celebrate with a cocktail! This is a sherry-based cocktail, which means you’re getting a bright copper color and acidity along with with flavors of toasty almonds, dates, and salt. Balanced with two types of vermouth, this is a simple, tasty cocktail to start your evening. This recipe comes from The Cocktail Codex from the bartenders at NYC cocktail bar Death & Co - my partner, Joe, reverently refers to this book as “the cocktail bible.”


This cocktail originated in Japan and is a variation on a martini, with sherry swapped in for the gin. It has three simple ingredients: dry vermouth, vermouth blanc, and sherry. These all happen to be fortified wines, so it’s worth taking a moment to look at what those are. Allow me to geek out for a moment.
Vermouth is an aromatized, fortified wine. This means it’s usually a fairly neutral wine, typically white, that’s steeped with herbs or other botanicals for a number of weeks, then combined with sugar and additional alcohol to bring the total ABV between 16% and 18%. The amount of sugar is what differentiates the different types of vermouth, increasing as you go from dry to blanc to sweet vermouth. For an aperitif, vermouth can be drunk over ice or as a spritz with some soda - it’s a great way to get to know what you like across types and brands.
Sherry is also a fortified wine, but it’s unflavored by botanicals. All sherry is aged in oak barrels, but different approaches to its aging lead to different types of sherries. Very dry sherries are biologically aged - this means they are aged in barrels left partially empty (in contrast to wine barrels, which are totally filled) to allow a layer of yeast (“flor”) to form, protecting the wine from oxygen and interacting with the wine to impart flavor. Richer sherries are oxidatively aged - this means they don’t form a layer of yeast but are instead exposed to oxygen and concentrate over time. And some sherries, like the amontillado sherry used in this cocktail, are created using a mix of both methods.
Ultimately, all of this cool wine transformation is combined to form this delicious and unique cocktail. Toasty and nutty, balanced with acidity and sweetness, this drink is a great way to welcome the weekend.
Bamboo
Time: 5 minutes || Servings: 1 || Source: The Cocktail Codex
Amontillado sherry - 1 ½ ounces, preferably Lustau Los Arcos
Blanc vermouth - ¾ ounce, preferably Dolin
Dry vermouth - ¾ ounce, preferably Dolin
Orange bitters - 2 dashes
Lemon twist, for garnish
Combine the sherry, vermouths, and orange bitters and stir over ice. Strain into a Nick & Nora glass. Express the lemon peel by twisting it over the glass to release the essential oils, then rub the cut side of the peel around the edge around the glass. Place the peel in the drink or on the side of the glass as garnish.
Skirt Steak with Shallots & Mustard
I didn’t go to Europe until I was well into my twenties, and of course Paris was one of the first places I experienced. Paris is an intimidating place and I was rightfully intimidated by everything: language, culture, customs. I didn’t know how to order properly, or that it might cost more to sit than stand at a coffee bar, or that clothing dryers are wildly uncommon in Paris apartments. But I would brave anything - the humiliation of trying to make a request in halting French to discover that the person spoke perfect English, English menu price-gouging, being fully ignored by waitstaff - for the food.

I didn’t go to Europe until I was well into my twenties, and of course Paris was one of the first places I experienced. Paris is an intimidating place and I was rightfully intimidated by everything: language, culture, customs. I didn’t know how to order properly, or that it might cost more to sit than stand at a coffee bar, or that clothing dryers are wildly uncommon in Paris apartments. But I would brave anything - the humiliation of trying to make a request in halting French to discover that the person spoke perfect English, English menu price-gouging, being fully ignored by waitstaff - for the food. French food is rich, and heavy, and glorious - and then, of course, there’s the wine. So when I returned home, I sought out cookbooks that would help me to understand what I had eaten and, of course, recreate it at home.


This recipe comes from a book published in the 1980s: Parisian Home Cooking, by Michael Roberts. Mr. Roberts is an American chef who trained and spent lengths of time in Paris. He got the idea to document what real Parisians - his friends - cooked when they were cooking at home. I love it for capturing the moment and feeling of eating in France before it became very globalized, and I adore the black and white photos of Parisians queueing at the market and examining giant rounds of cheese. This approach to French cooking makes it more accessible, which is its own version of inspiration.


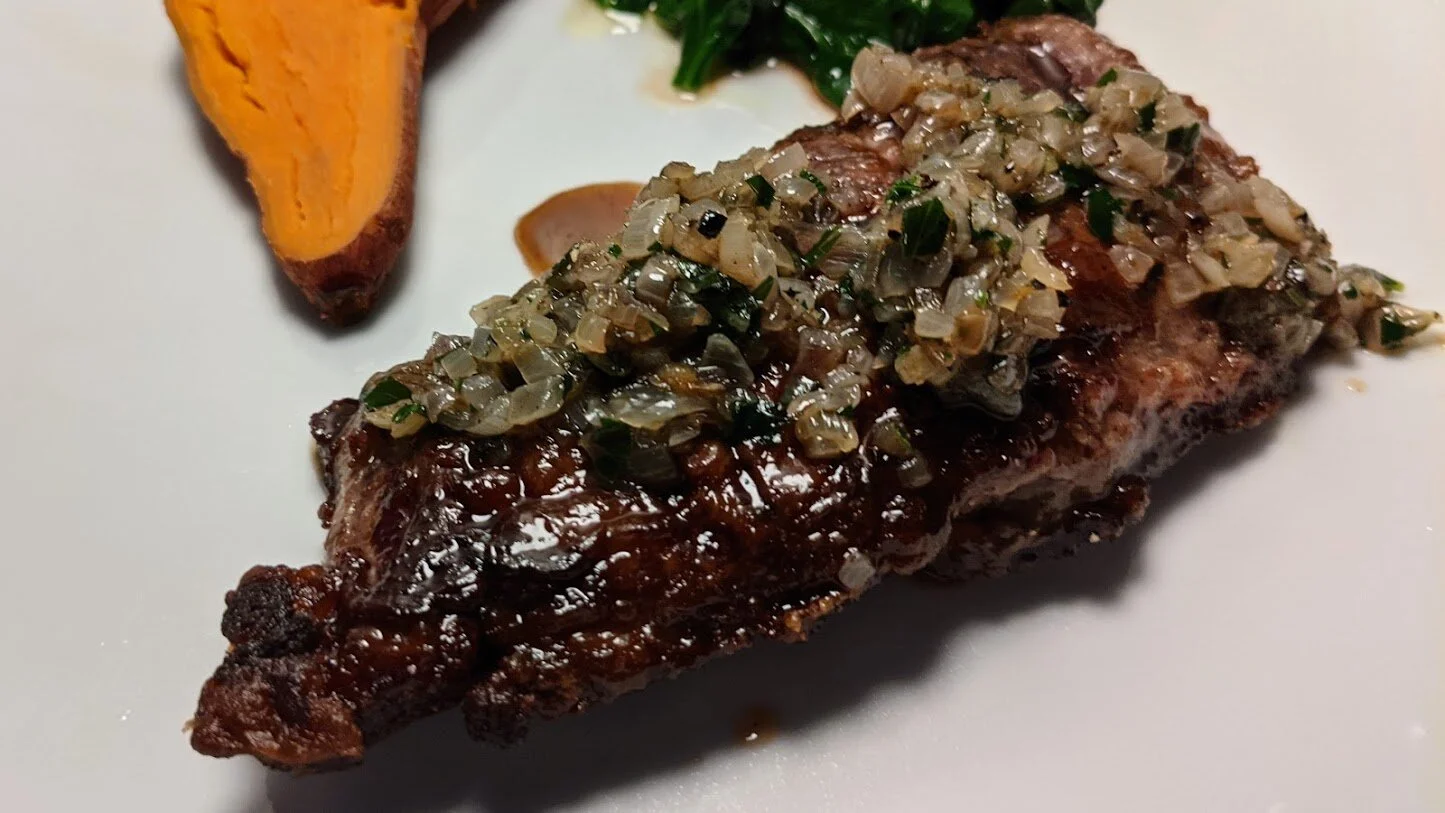
This recipe is for a skirt steak covered in tender shallots. Skirt steak is an intensely beefy cut taken from the diaphragm of the cow. It has a very distinct grain to it and should be cooked to rare or medium-rare to avoid it becoming tough. All steak is more tender when it’s cut across the grain, and it’s all the more important to follow this guideline for this cut. Although you might associate French cooking with sauces (and butter, and buttery sauces), here there is no sauce, outside of the shallots and the wine used for deglazing; instead, sharp and acidic mustard balances the richness of the dish.
With some steamed spinach or sautéed asparagus and roasted potato, this is a straightforward dinner - but quite good and, dare I say, evocative of an evening in Paris.
Skirt Steak with Shallots & Mustard
Time: 15 || Servings: 4 || Source: Parisian Home Cooking
Shallots - 3/4 cup, minced
Butter, unsalted - 3 tbsp
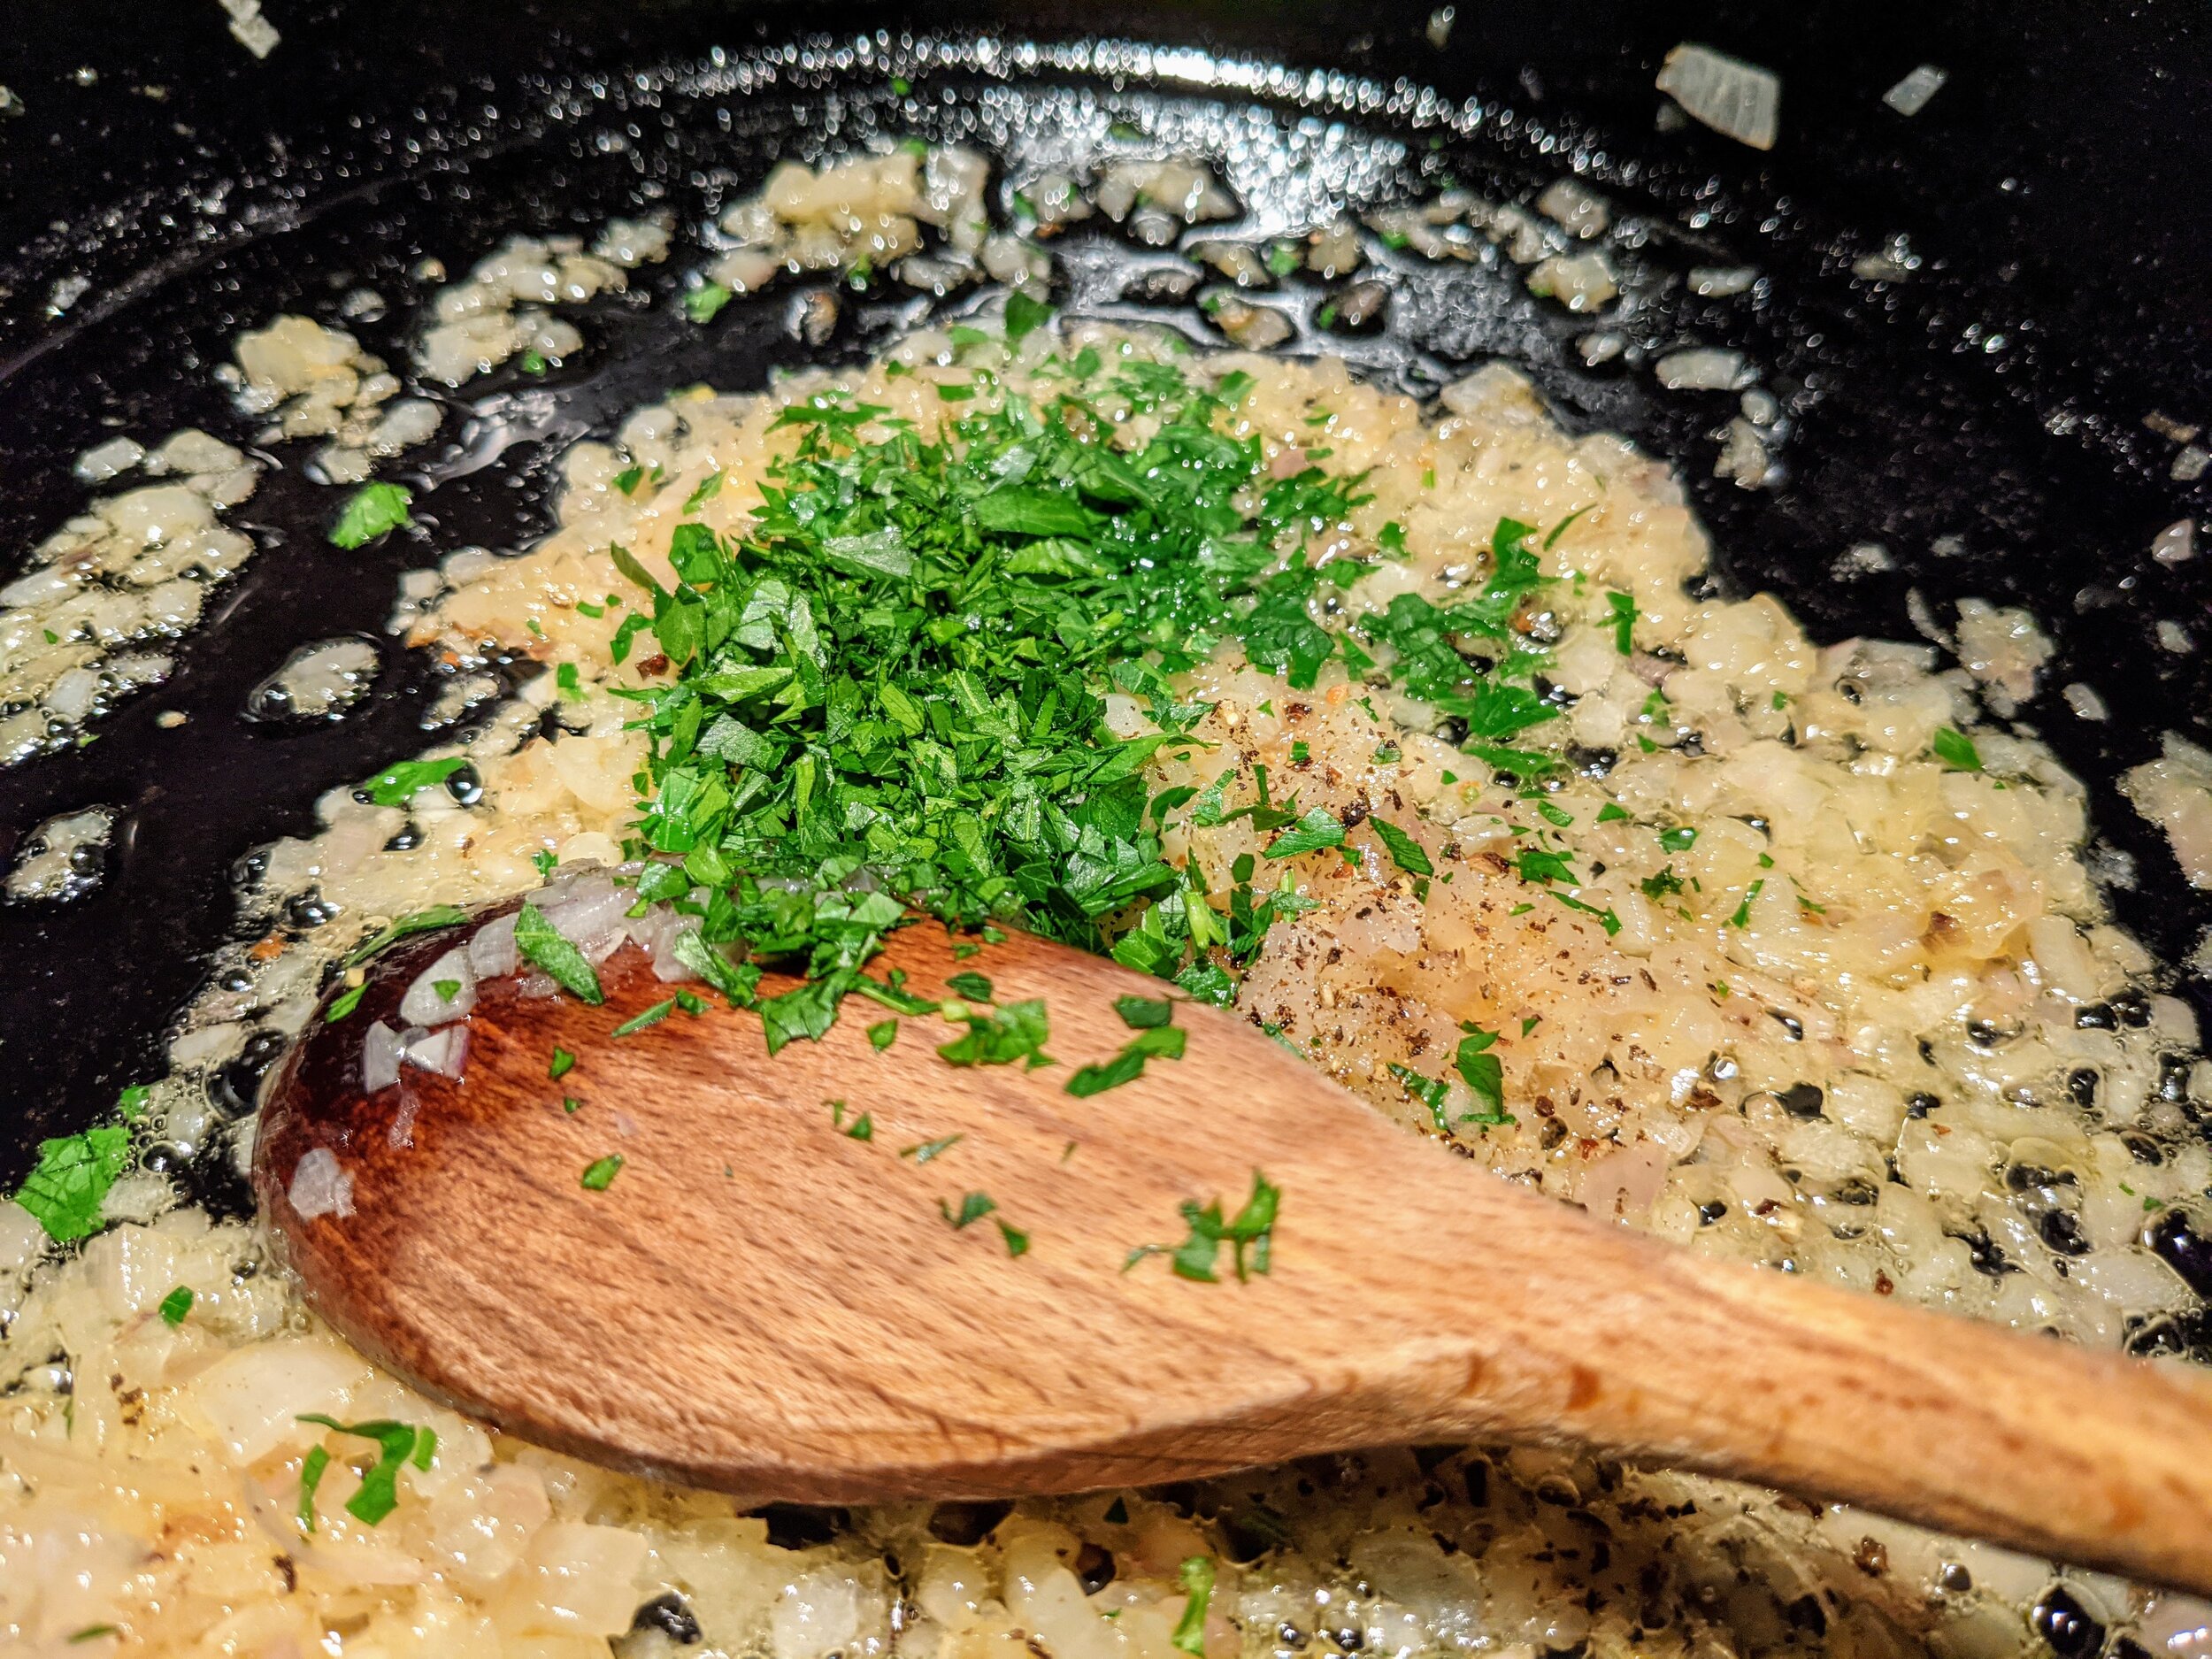
Parsley - 1 tbsp, chopped
Skirt steak - 4 6-oz strips
Dry white wine, such as Chardonnay - 1/4 cup
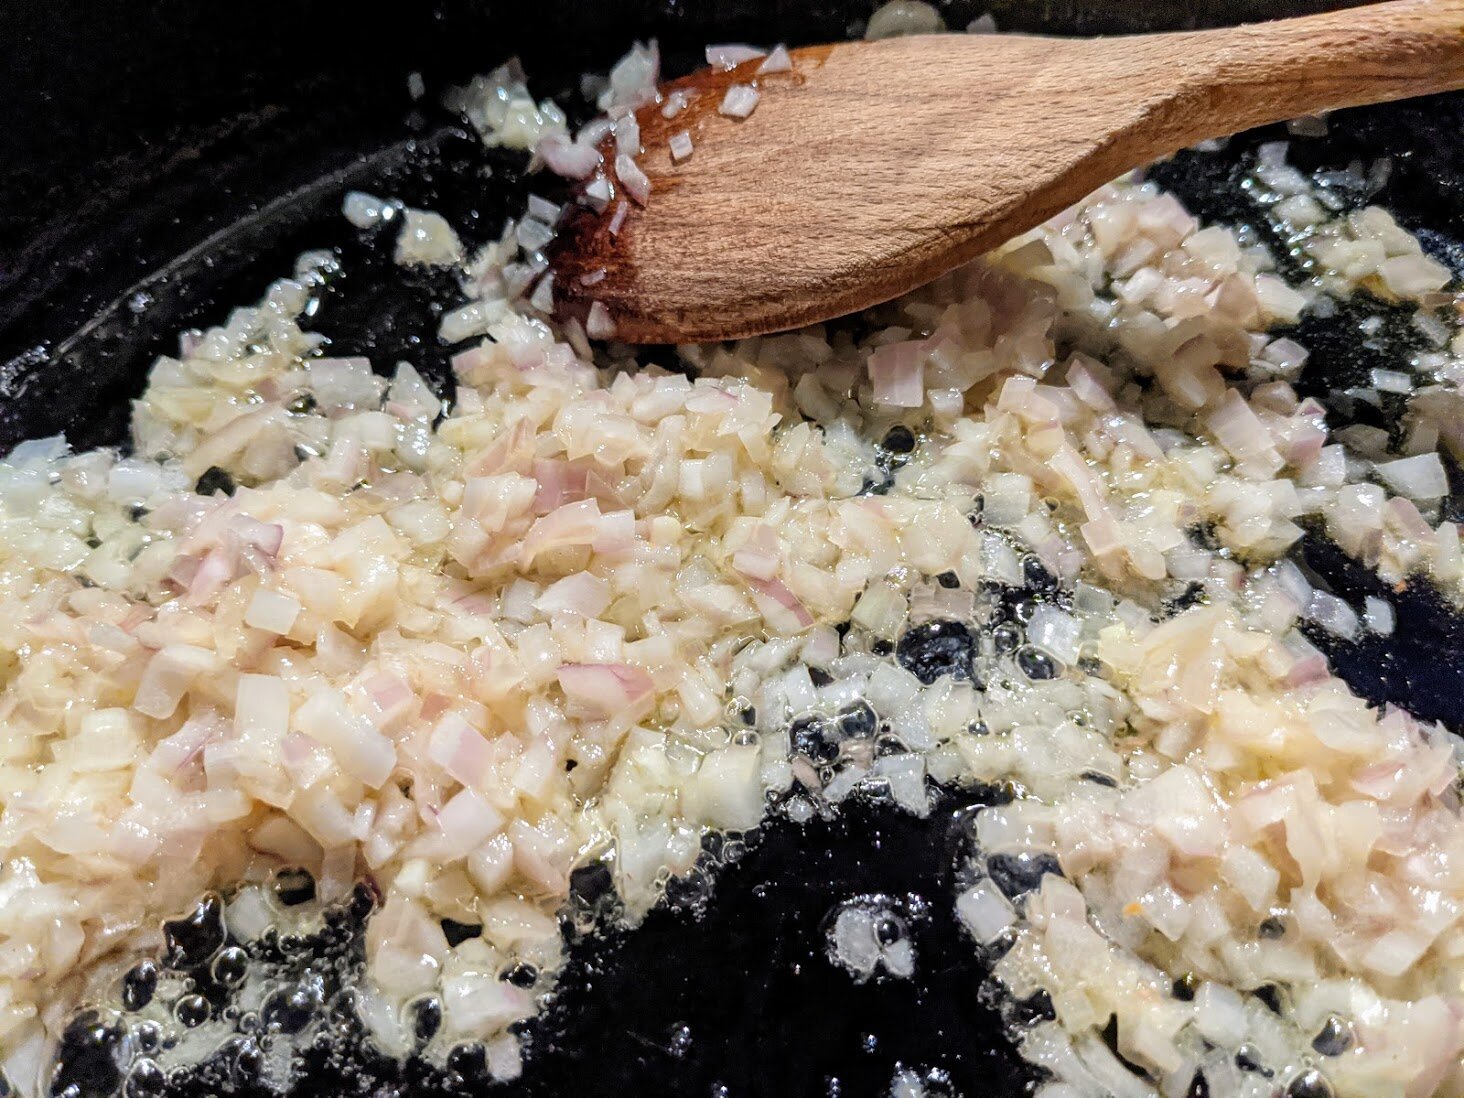
Heat a cast iron pan or other large, heavy skillet over medium high heat. Melt butter, then add shallots and cook until softened but not browned, 5-7 minutes. Season with a pinch of coarse salt and black pepper, mix in the parsley, and transfer to a small bowl. Keep warm by covering with foil or a kitchen towel.
Place the same skillet over high heat. When smoking hot, add the steaks. Season steaks with pepper and cook for 3 minutes undisturbed. Turn the steaks over and season with salt and pepper. Cook for another three minutes for rare, and up to five minutes for medium. Transfer steaks to your serving dishes.
Place the same skillet over low heat. Deglaze the pan by adding the white wine and using a wooden spoon to scrape up any brown bits that have stuck to the pan. Reduce the wine to a scant tablespoon, then mix it into the bowl of shallots.
Slice the steaks if desired, cutting against the grain. Spoon the shallots over the steaks and serve.

French Onion Soup
French onion soup is so simple, so inexpensive, and so classic. The sweet onions, gooey cheese, and soaked bread is so comforting, eating it is like getting a warm hug from the inside. Slicing the onions for this dish is a bit of a chore - but it’s French onion soup, so I guess you expected to slice onions? And caramelizing them to achieve the deep, nutty brown sweetness of your onion soup dreams takes time, but largely unattended time. Your patience will be well rewarded.

French onion soup is so simple, so inexpensive, and so classic. The sweet onions, gooey cheese, and soaked bread is so comforting, eating it is like getting a warm hug from the inside. Slicing the onions for this dish is a bit of a chore - but it’s French onion soup, so I guess you expected to slice onions? And caramelizing them to achieve the deep, nutty brown sweetness of your onion soup dreams takes time, but largely unattended time. Your patience will be well rewarded.


I pulled this recipe from The Food Lab by J. Kenji López-Alt, a heavy tome of a book detailing everything from how to make canned beans taste good to how to make perfectly crispy roasted potatoes (outlining several trials leading to success). If you like understanding the science behind cooking, I highly recommend - this is a book for geeks who like to eat good food. Mr. López-Alt explains that your onion eating needs are best served by slicing onions from tip-to-tip (or, if you want to think of your onion as a globe, from pole-to-pole). So that’s what we do here, for 5 pounds or 7 cups of onions. I suggest that step one is sharpening your knife (or grabbing your mandoline).
Once sliced, this abundance of onions goes into a dutch oven with some butter and salt to sweat out over very low heat for 2 hours. Over this time, the onions collapse down to a more reasonable amount, surrounded by their sugary juices. The heat goes up, the water evaporates, and the onions turn sweet and deeply browned. Simmer with some fresh herbs, sherry, and chicken stock, and your soup base is done. A chunky slice of baguette, a healthy dose of shredded cheese (metaphorically speaking), and trip to the broiler officially make this French onion soup.


Make sure to use broiler-proof bowls for this - crocks or ramekins or whatnot. In a pinch, you could cover a sheet pan with some foil, broil the cheese directly onto the bread, and then add it to your soup. But then you’d probably want to make sure the soup is piping hot and add some additional cheese to melt into it… because, you know, cheese.
French Onion Soup
Time: 3 hours || Servings: 4 || Source: The Food Lab
Yellow onions - 5 lbs, about 7 cups, thinly sliced pole to pole
Butter, unsalted - 4 tbsp
Salt - 1 tsp
Sherry - ¼ cup
Chicken stock - 6 cups
Bay leaves - 2, fresh or dried
Thyme - 6 sprigs fresh, or 1 tsp dried
Gruyere or Swiss cheese - 8 oz, about 2 cups grated
Baguette - sliced 1/2 inch thick, either a day old or toasted
Use a large Dutch oven or other heavy bottomed pot with a tight fitting lid. Place pot over medium heat and melt butter. Add onions and the salt. The pot will be full of onions - it will seem ridiculous, but it will cook down to a reasonable amount over time. Cook for about 5 minutes, stirring now and then with a wooden spoon, until the onions have begun to soften and wilt a bit. Cover the pot with the lid (if it’s not tight fitting, cover with aluminum foil and then the lid) and reduce to the lowest heat possible. Cook for 2 hours, giving the onions a stir every 45 minutes or so, until the onions are completely tender.
Remove the lid and foil, if using, and increase the heat to medium-high. The onions will have released a lot of water. Cook for about 15 minutes, stirring frequently, until the liquid has evaporated and you see a brown crust starting to form on the bottom of the pot. This is the start of your caramelization! Deglaze the pan by adding 2 tbsp of water and scrape up the brown crust with a wooden spoon. Distribute the onions evenly over the bottom of the pot, then let it cook for another 5 minutes, undisturbed, until the brown crust develops again. Repeat this pattern of deglazing and undisturbed cooking until the onions become a deep golden brown and taste sweet and delicious. This might take 4 or 5 total cycles.
Once your onions reach the desired color, add the sherry, chicken stock, bay leaves, and thyme to the pot. Bring the liquid to a boil, then reduce to a simmer. Simmer, uncovered, for 15 minutes. The stock will reduce slightly and turn dark. Taste and season with salt and pepper. Discard the bay leaves and the thyme sprigs, if using.
Heat the broiler. Place four broiler-proof bowls on a baking sheet (I used large ramekins). Distribute soup among bowls, top with a slice of baguette and the shredded cheese. Slide the pan under the broiler for about 5 minutes, keeping an eye on it, until the cheese is melted and turning brown in spots. Serve piping hot.
Note: After the 2 hours of low heat, it won’t hurt your onions to allow them to sit without heat for a couple of hours before moving on to evaporating the remaining water and caramelizing them.

Butterscotch White Chocolate Pudding
Delicious and simple, this is butterscotch pudding with a caramelized white chocolate twist. Say what? Yep, caramelized white chocolate is a thing, and you’re going to want to try it.

Delicious and simple, this is butterscotch pudding with a caramelized white chocolate twist. Say what? Yep, caramelized white chocolate is a thing, and you’re going to want to try it.


I made this recipe at the request of my sister, Ashley, who has an inexplicable love of white chocolate. I generally object to white chocolate, which, for me, is too one-note sweet and weirdly soft and generally a liar. For those of you who still live under the illusion that white chocolate is chocolate: it’s cocoa butter, with no actual cocoa bean aka chocolate in it, masquerading as chocolate. But I’m definitely pro butterscotch pudding and I hold a strong belief that caramelization redeems just about anything. Plus, I love having a dessert ready made in my refrigerator that I can pull out and seem like an effortless boss.

Overall, this was pretty simple to put together. Combine brown sugar, egg yolks, alcohol, and toasty cardamom. Melt the caramelized white chocolate in some milk, enjoy the amazing smell, then combine everything and strain. Pour it into ramekins, cover and put them in a pressure cooker to steam for all of 9 minutes. The hardest part might be waiting for these to chill to eating temperature!
Although the original recipe calls for rum, we are solidly a whiskey household and rarely have rum on hand. I’m happy to report that the whiskey was a delicious substitution and I personally did not miss the added sweetness from the rum at all. I tend to be into less sweet desserts in general, so if you’re into rum, you do you.


This recipe does call for some special tools - first off, you need a pressure cooker or Instant Pot. Although it’s an extra tool, it helps you avoid the need to stand over a hot stove stirring vigorously while the mixture thickens up. Next, you need to have a ramekins, espresso cups, or other heatproof bowls. This also could work with a larger heatproof bowl or soufflé dish as a family style dessert (see note below).
Butterscotch White Chocolate Pudding
Time: 1 hour + 3 hours chilling || Servings: 6 || Source: Dinner in an Instant by Melissa Clark
Heavy cream - 1 1/2 cups
Whole milk - 1/2 cup
Dulcey blond chocolate or butterscotch chips - 6 oz
Large egg yolks - 5
Dark brown sugar - 1/3 cup, packed
Whiskey or rum - 2 tsp or to taste
Cardamom or nutmeg - 1/2 tsp
Kosher salt - 1/8 tsp
Crème fraîche or whipped cream, for serving
Chocolate shavings, for serving
In a heavy bottomed pan, heat the cream and milk until steaming and just starting to simmer. Be careful not to overheat and scald the milk. Turn off the heat, then whisk in the blond chocolate or butterscotch chips until melted and well incorporated.
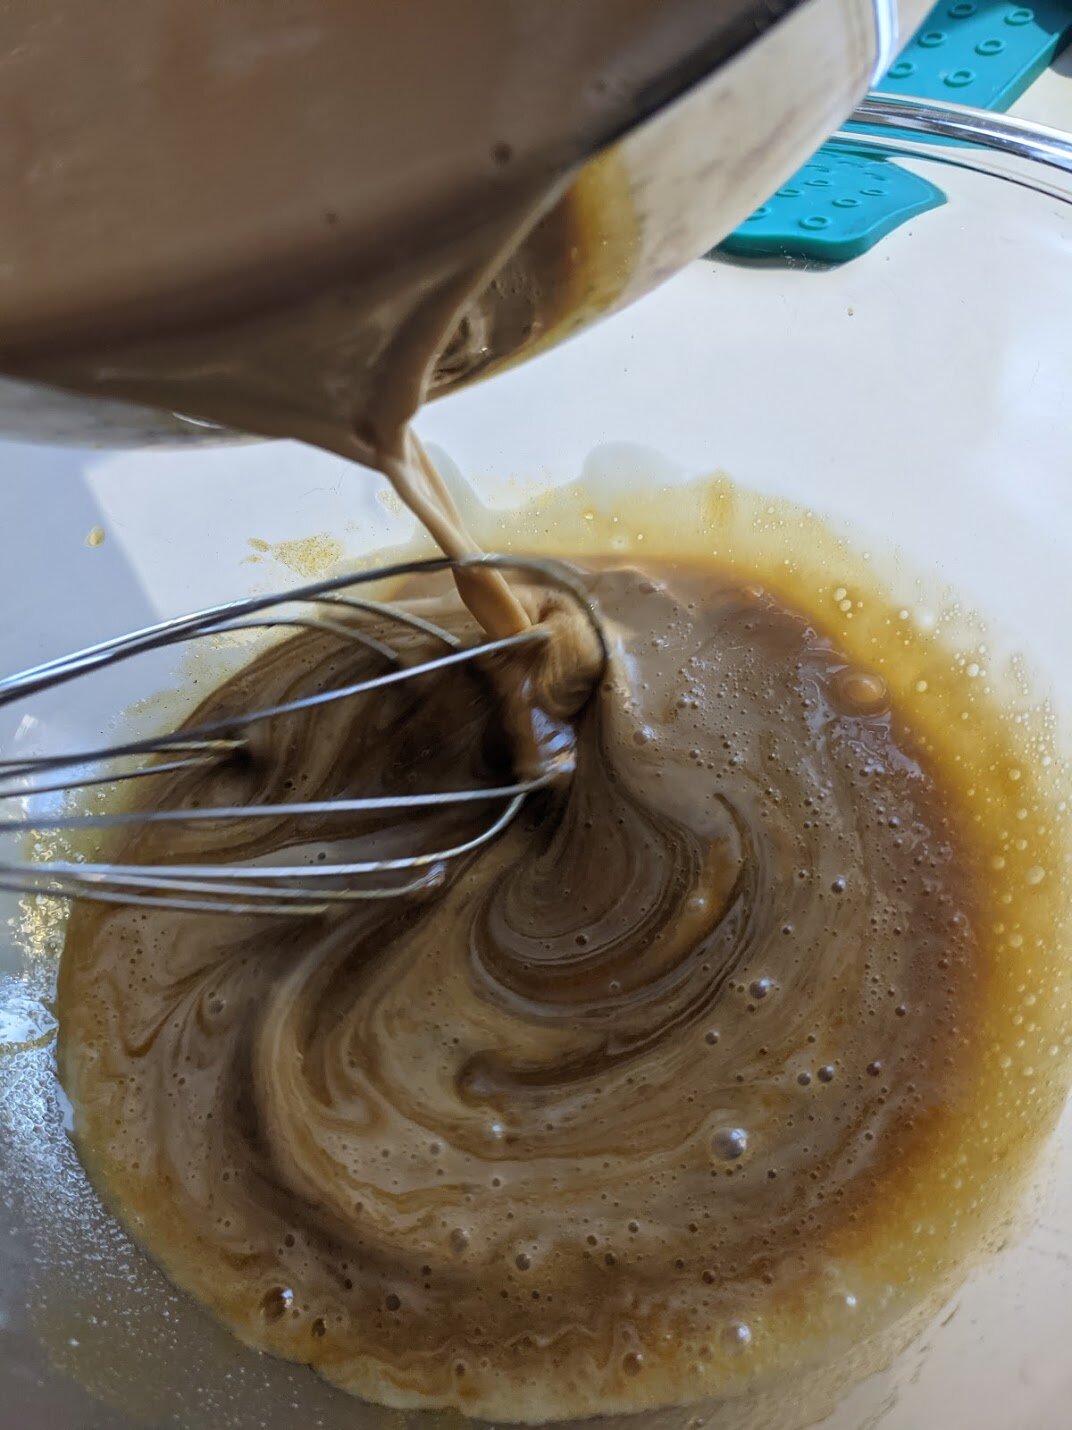
In a large bowl, whisk together the egg yolks, brown sugar, whiskey or rum, cardamom or nutmeg, and salt. Pour in the chocolate cream while whisking constantly so that you don’t cook the yolks. Continue whisking until the mixture is creamy and smooth, then pour through a very fine sieve into a bowl or measuring cup with a spout.
Choose your cooking vessel. If you want individual portions, select ramekins, espresso cups, or other heatproof cups that can hold 4 to 6 ounces. Fill the vessels of your choice with custard, then cover tightly with aluminum foil. Put a steamer rack into your pressure cooker or instant pot and fill with 1 ½ cups of water.
Arrange puddings on the steamer rack; if you have six, I recommend doing them in two batches so that they’ll cook more evenly and you reduce the chances of accidents — although you could stack them in a staggered fashion if you’re more coordinated than I am.
For the first batch, cover and seal the pressure cooker and cook on low pressure for 4 minutes. Allow the pressure to release naturally for 5 minutes, then release the remaining pressure manually. For the second batch, cook on low pressure for 5 minutes. Allow the pressure to release naturally for 5 minutes, then release the remaining pressure manually.
Once puddings are ready, remove them from the pressure cooker using oven mitts or tongs. Carefully remove the foil (be careful, there may be steam), and let the puddings come to room temperature. When cooled, cover with plastic wrap and chill them in the refrigerator for a minimum of three hours. Garnish with whipped cream or crème fraîche and chocolate shavings.
Notes:
If you prefer to caramelize your own white chocolate, heat the oven to 250°F. Cut white chocolate bars into cubes and spread out on a rimmed baking sheet. Bake, stirring every 10 minutes, for 30-60 minutes. When it’s caramelized, the chocolate will be the color of peanut butter. This has the upside of making your kitchen smell delicious.
If you’d prefer to have a single shareable pudding, or you don’t have enough small heat-proof cups on hand, you can use a 1-quart soufflé dish or other heatproof dish that will fit into your pressure cooker. In this case, cook on low pressure for 18 minutes. Allow the pressure to release naturally for 5 minutes, then release the remaining pressure naturally. Chill and garnish as indicated.
If you would like to make this ahead, the custard will keep in the refrigerator for two days before cooking. The cooked custards will keep for up three days after cooking.

Lentils with Sausage & Sage
This is the kind of dinner that will make you feel good. When we were done eating it, we said, “I feel good,” and we meant it. It tastes good, it’s filling, it’s not heavy, and it’s a quick and easy turnaround. Basically, everything I look for in a weeknight dinner.
This is the kind of dinner that will make you feel good. When we were done eating it, we said, “I feel good,” and we meant it. It tastes good, it’s filling, it’s not heavy, and it’s a quick and easy turnaround. Basically, everything I look for in a weeknight dinner.
Cooking dry lentils does take some time, to be completely honest - but, in my book, that’s easily dismissed because they can be done the night before or anytime the day you’re eating. Plus, simmering lentils with some roughly chopped vegetables never seems like much of a chore - I put it on and, while I might peek once in a while if I’m around, I pretty much check back again 90 minutes later. I used green lentils, but brown lentils would be a fine substitute. I would stay away from orange or red lentils, which tend to lose their shape and get mushy. Soak lentils for three hours, up to overnight, before cooking; this has the benefit of making them cook faster and makes them easier to digest.


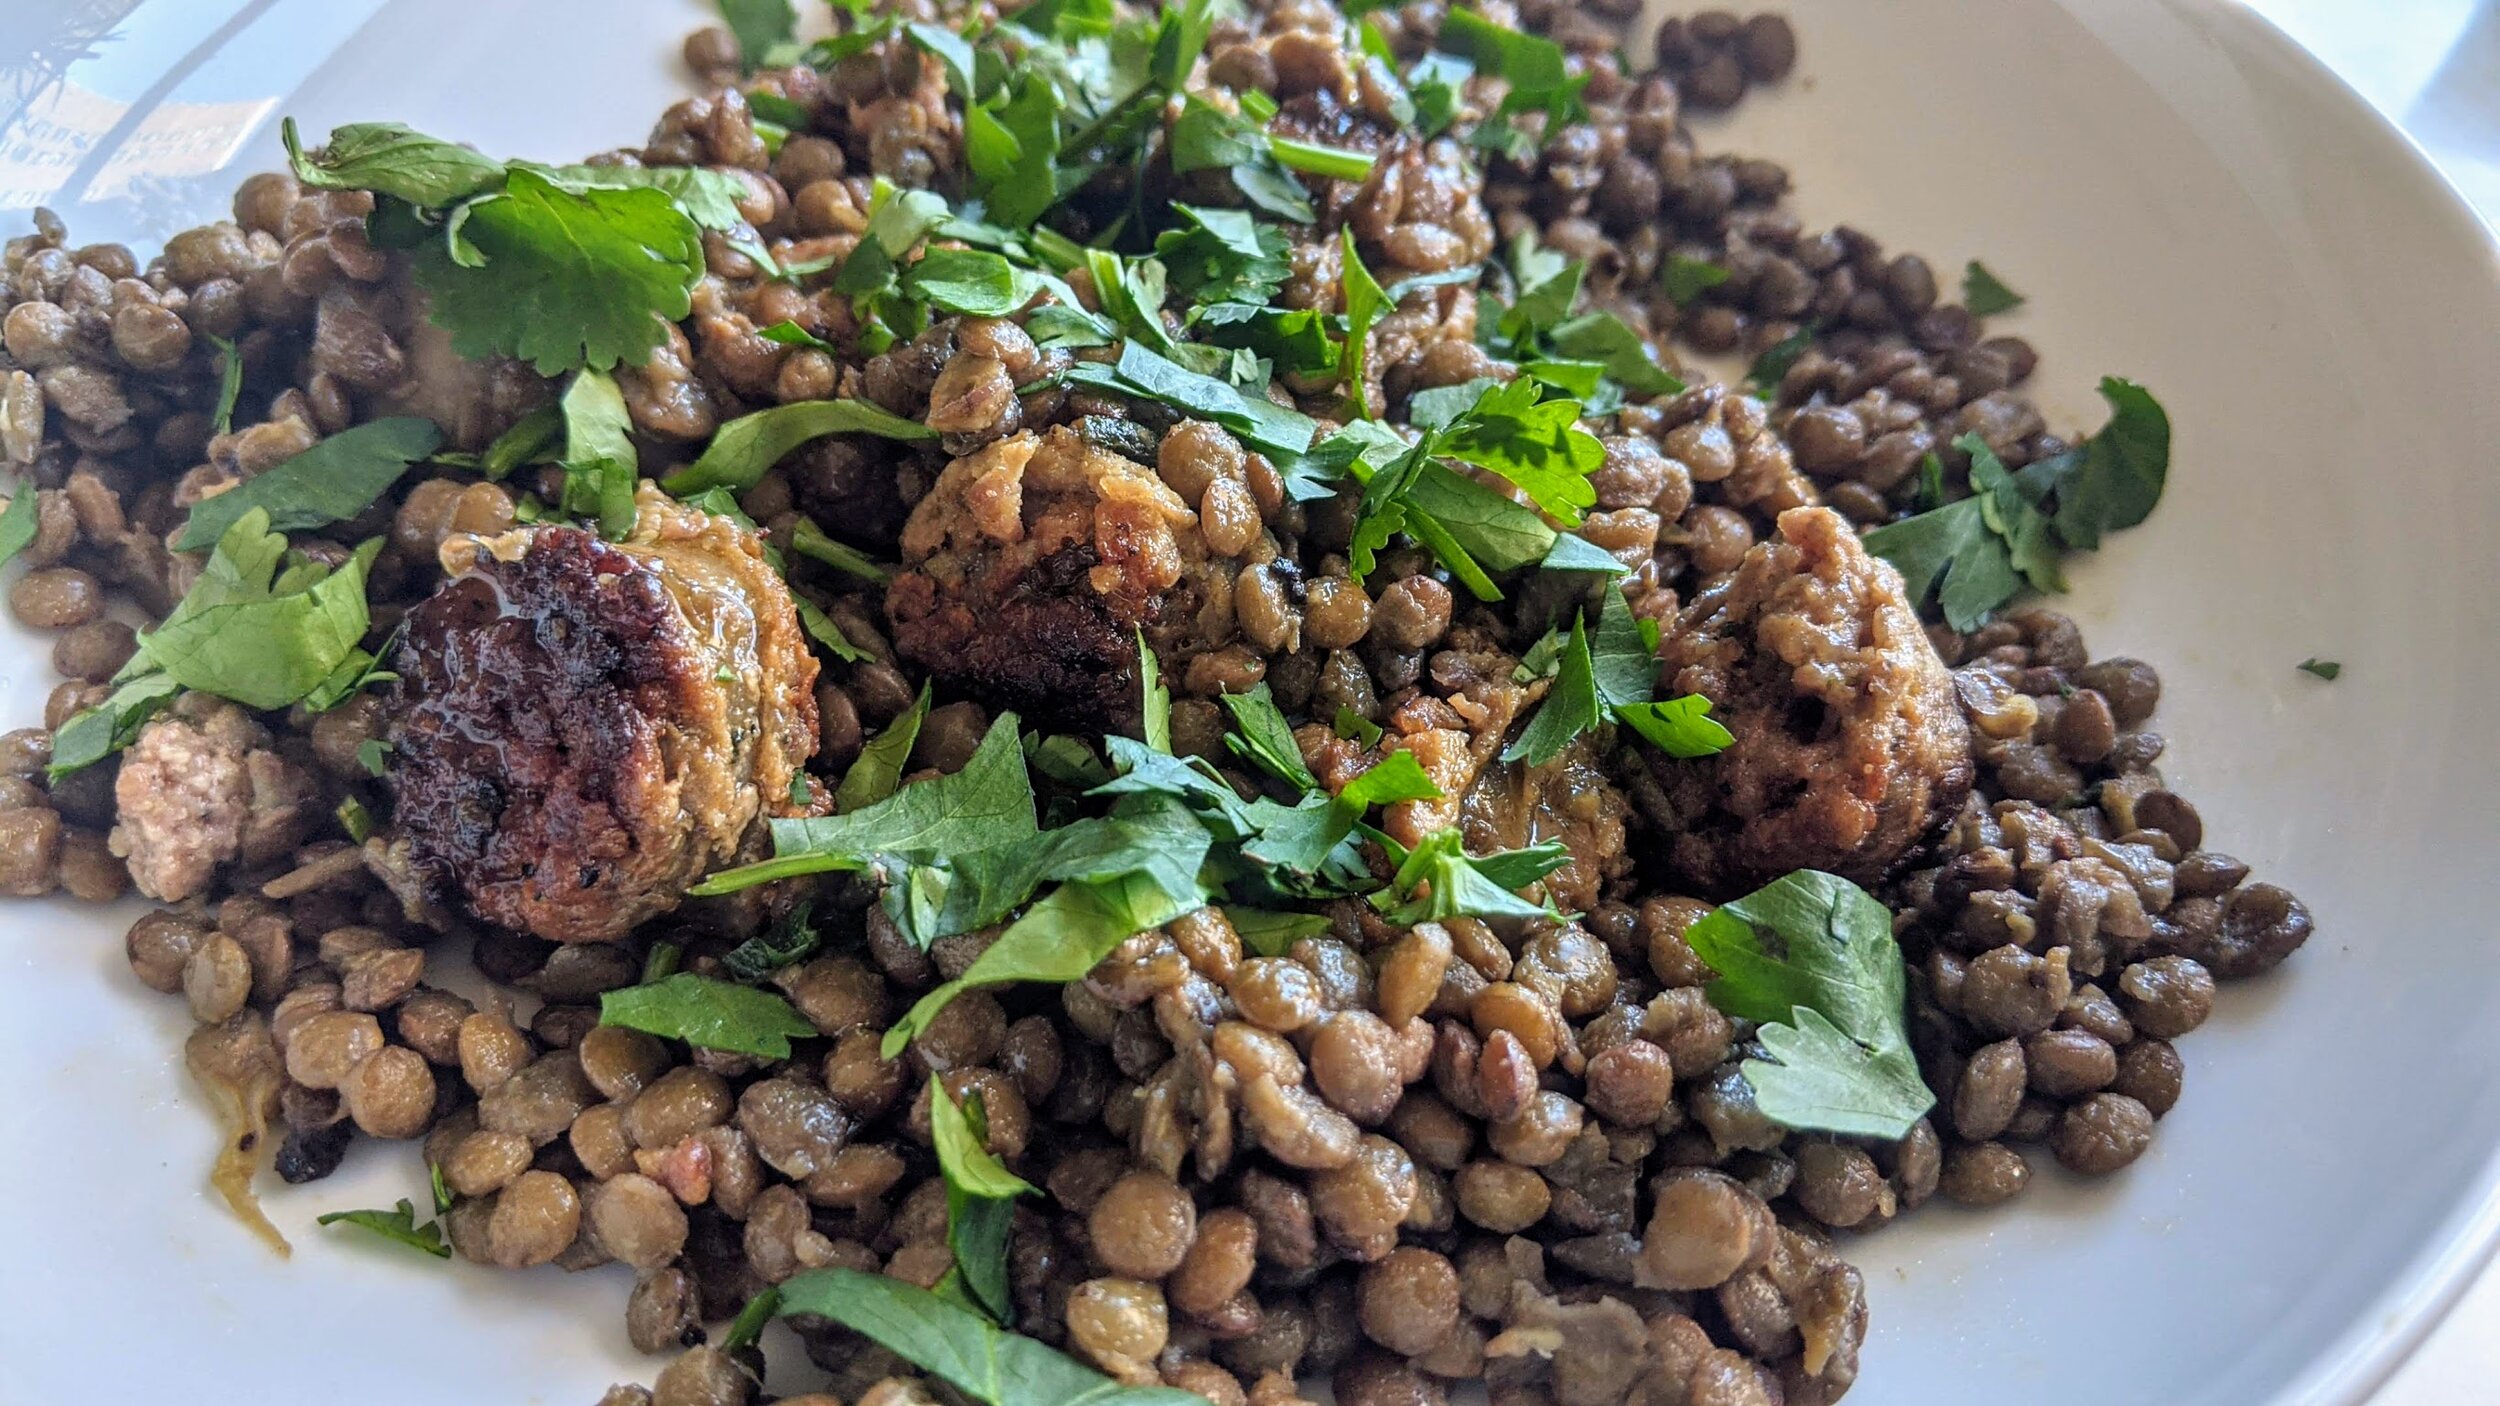
Once the lentils are done, the rest is simple: sear some sausage, sizzle sage and garlic (whole, not even chopped!) to flavor some olive oil, mix and serve. I chose to use chunks of sausage, but it would be faster cooking to use loose sausage and break it up as you cook - and you’d have the added benefit of more distributed sausage in your bites. I recommend a drizzle of olive oil and a squeeze of lemon at the end of this, along with the chopped parsley, to bring some brightness and freshness.
Lentils with Sausage & Sage
Time: 2 hours || Servings: 4 || Source: Slightly adapted from The Silver Spoon
Lentils, green or brown - 9 oz (approximately 1 ⅓ cups)
Celery stalk - 1
Carrot - 1
Onion, small - 1
Italian sausage (hot or sweet) - 4 links, around 12 oz
Olive oil - 3 tbsp, plus more for garnish
Sage leaves - 6
Garlic clove - 1
Lemon juice - 1/2 of a lemon, or to taste
Parsley - 1 tbsp, chopped
Soak the lentils for at least 3 hours, up to overnight. Discard any lentils that float to the top of the bowl. When you’re ready to cook them, drain and rinse the lentils. Place them in a pot and add water to cover; there should be about an inch of water above the lentils. Cut the onion in half and add to the pot with the celery stalk and carrot (roughly chop celery and carrot if needed to fit the pot). The vegetables should be washed but do not need to be peeled. Bring to a boil, then reduce heat and simmer for about 90 minutes, adding additional water if it drops below the lentils. Taste the lentils to determine that they are done; they should be tender to the bite, although some varieties may have more firmness. Cook until they reach your desired consistency, then drain and season with a pinch of salt.
Place a heavy bottomed pan over medium-high heat. Chop the sausages or remove them from their casing and crumble them. Add 1 tbsp of olive oil to the pan, then add the sausage. Cook, stirring occasionally, until browned on all sides, about ten minutes.
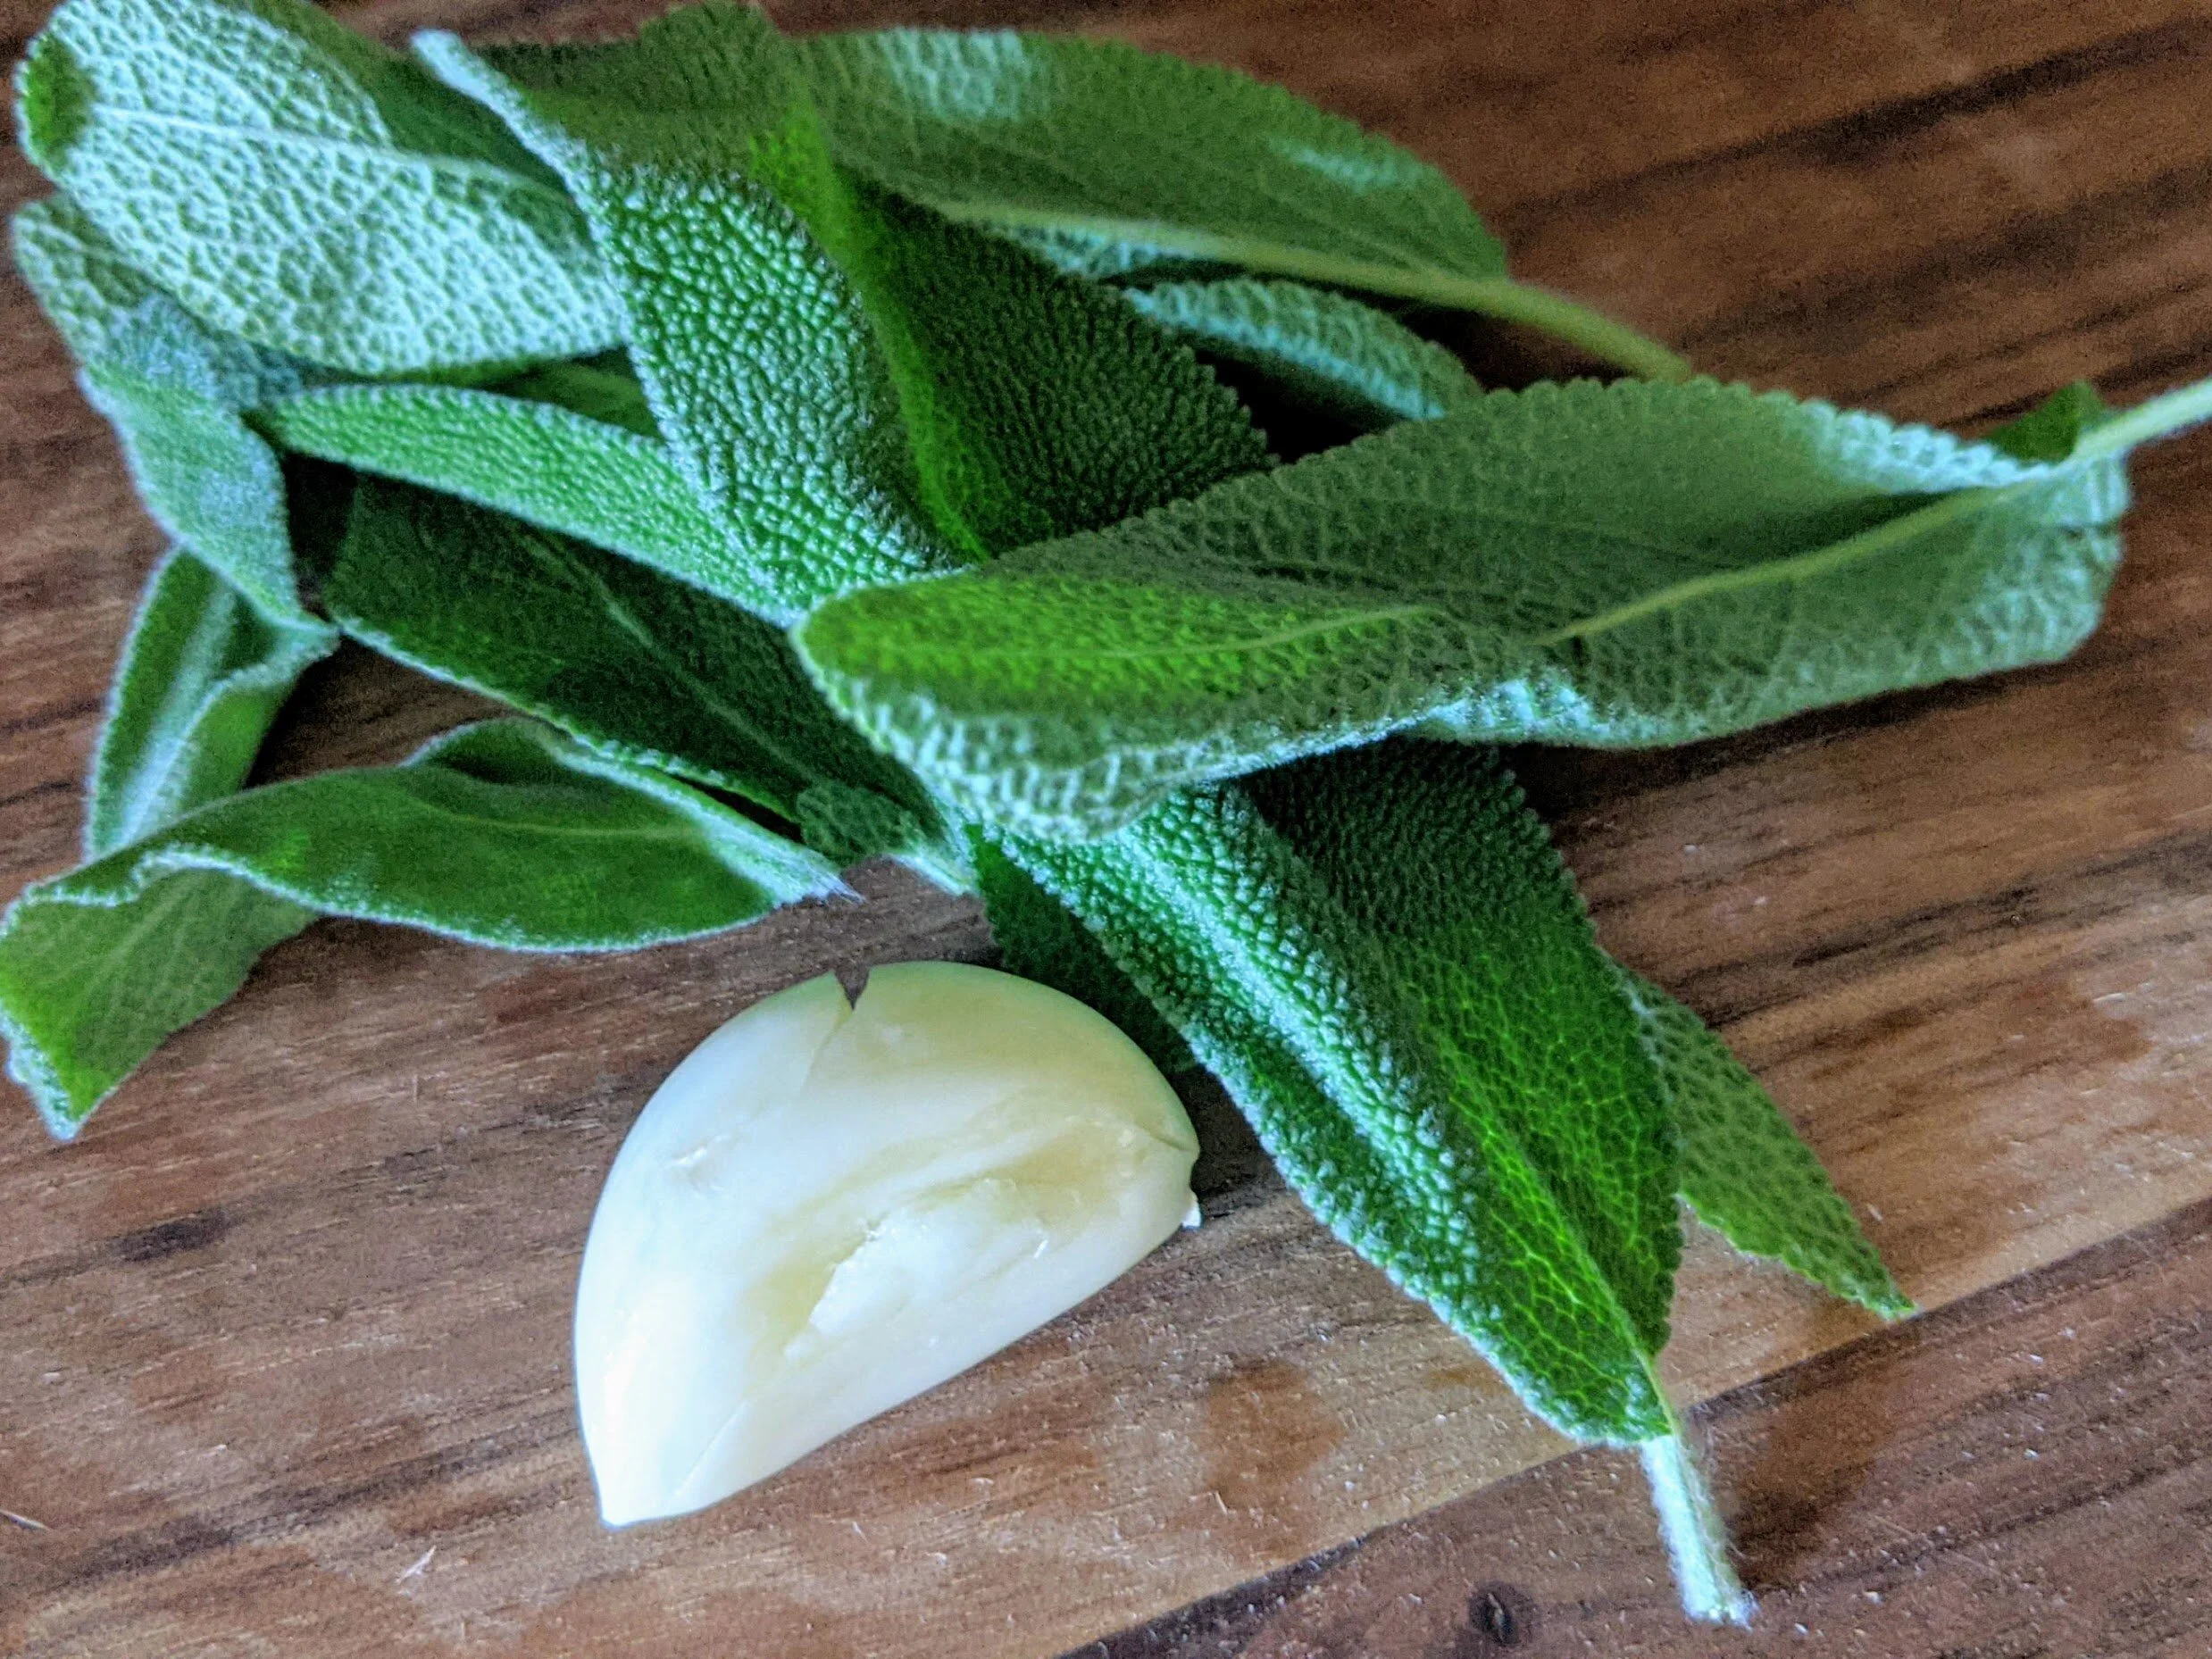
In a large pan, place the remaining 2 tbsp of olive oil over low heat. Add the sage and garlic and cook slowly until garlic is golden brown. Remove and discard the garlic. Add the sausages and lentils to the oil and remove from heat. Mix well. Serve with a squeeze of lemon, a drizzle of olive oil, and chopped parsley.
Goat Cheese Tortilla Casserole
I’ve been watching a lot of Beat Bobby Flay lately. It’s might be a little unhealthy. This is the premise of the show: Two professional chefs compete against each other for a chance to compete against Bobby. Two supposed friends of Bobby’s choose the winner of that matchup, and then the winning chef announces a signature dish that they and Bobby Flay will each make in a head-to-head competition. And then Bobby wins. The end.

I’ve been watching a lot of Beat Bobby Flay lately. It’s might be a little unhealthy. This is the premise of the show: Two professional chefs compete against each other for a chance to compete against Bobby. Two supposed friends of Bobby’s choose the winner of that matchup, and then the winning chef announces a signature dish that they and Bobby Flay will each make in a head-to-head competition. And then Bobby wins. The end.
The winning chef knows ahead of time what they’re going to be making and, one must assume, have selected something they make really well and probably practiced a lot. And then Bobby has to make it, whatever it is, on the fly - admittedly, in a kitchen he knows well, in a setting and under time pressure that he’s really familiar with. But still. Sometimes it’s something like enchiladas, and then you’re yelling at the screen, why why why would you choose something in his wheelhouse? You think you can beat him at his own game? Did you even watch the show before you signed up??? And then sometimes it’s something like goulash or spätzle and you think, absolutely no way he’ll win - and then he does. (I saw through an unreliable source that Bobby only has a 65% winning record over 18 seasons, but the only explanation I have for this is that he must have gotten better over time and his winning rate is much, much higher in recent seasons.)
If you don’t know the show, you should probably stop reading this and go watch it right now. I can wait.


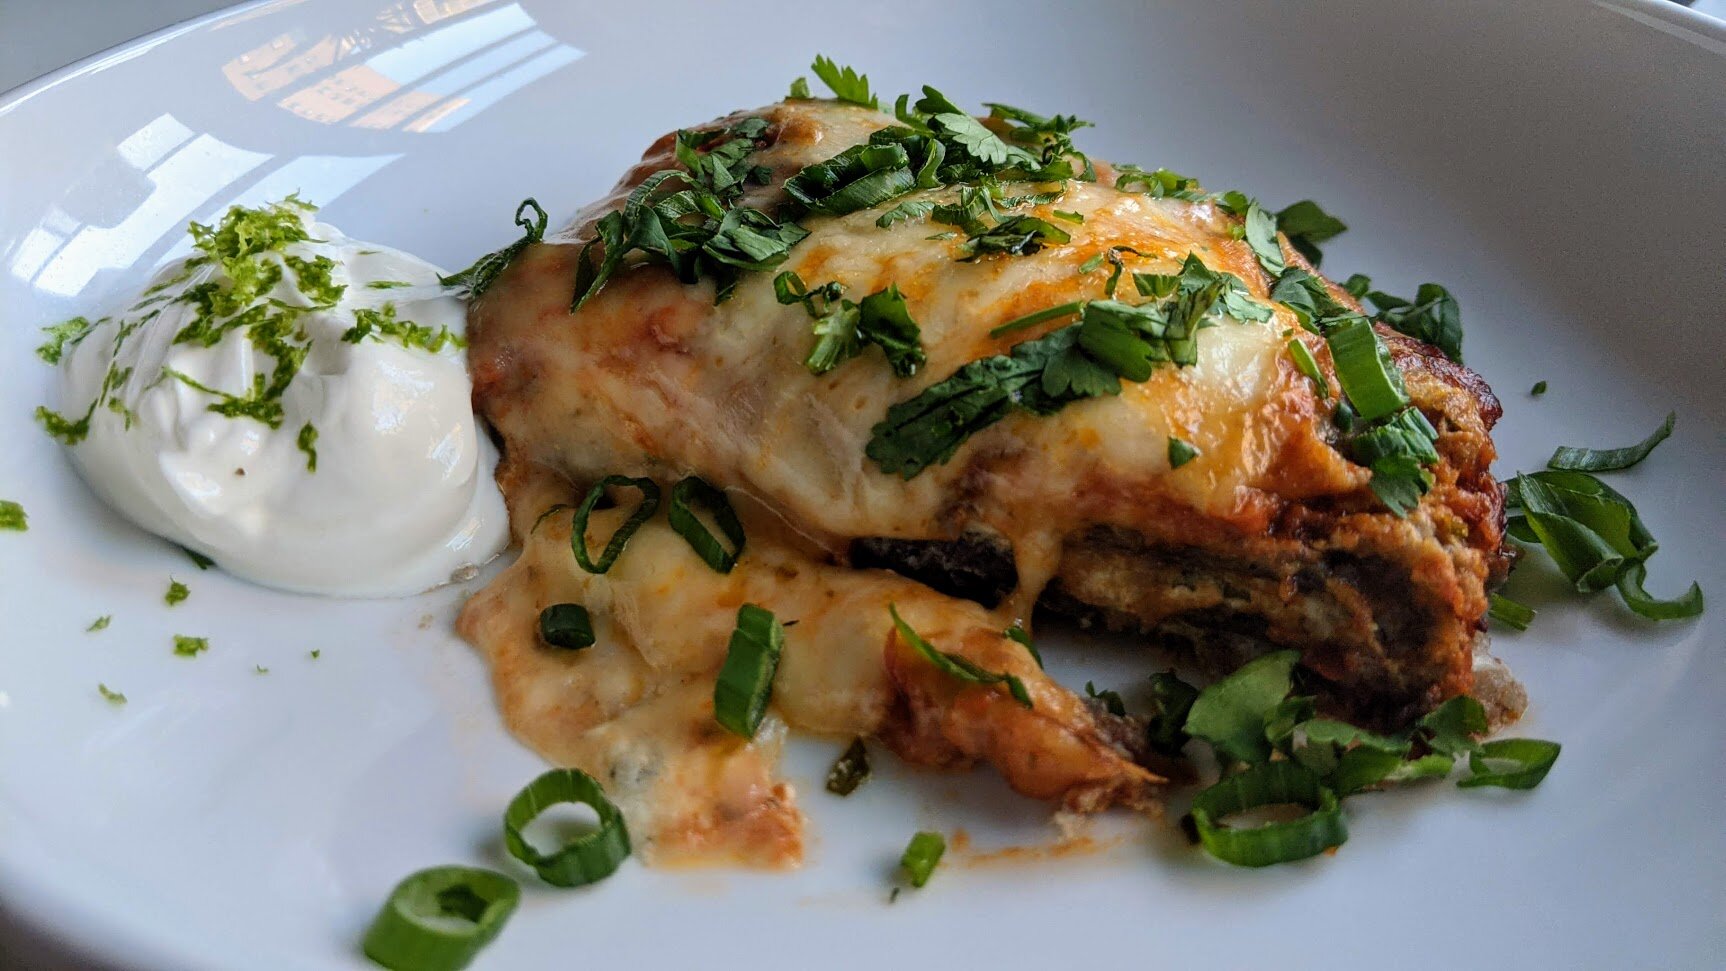
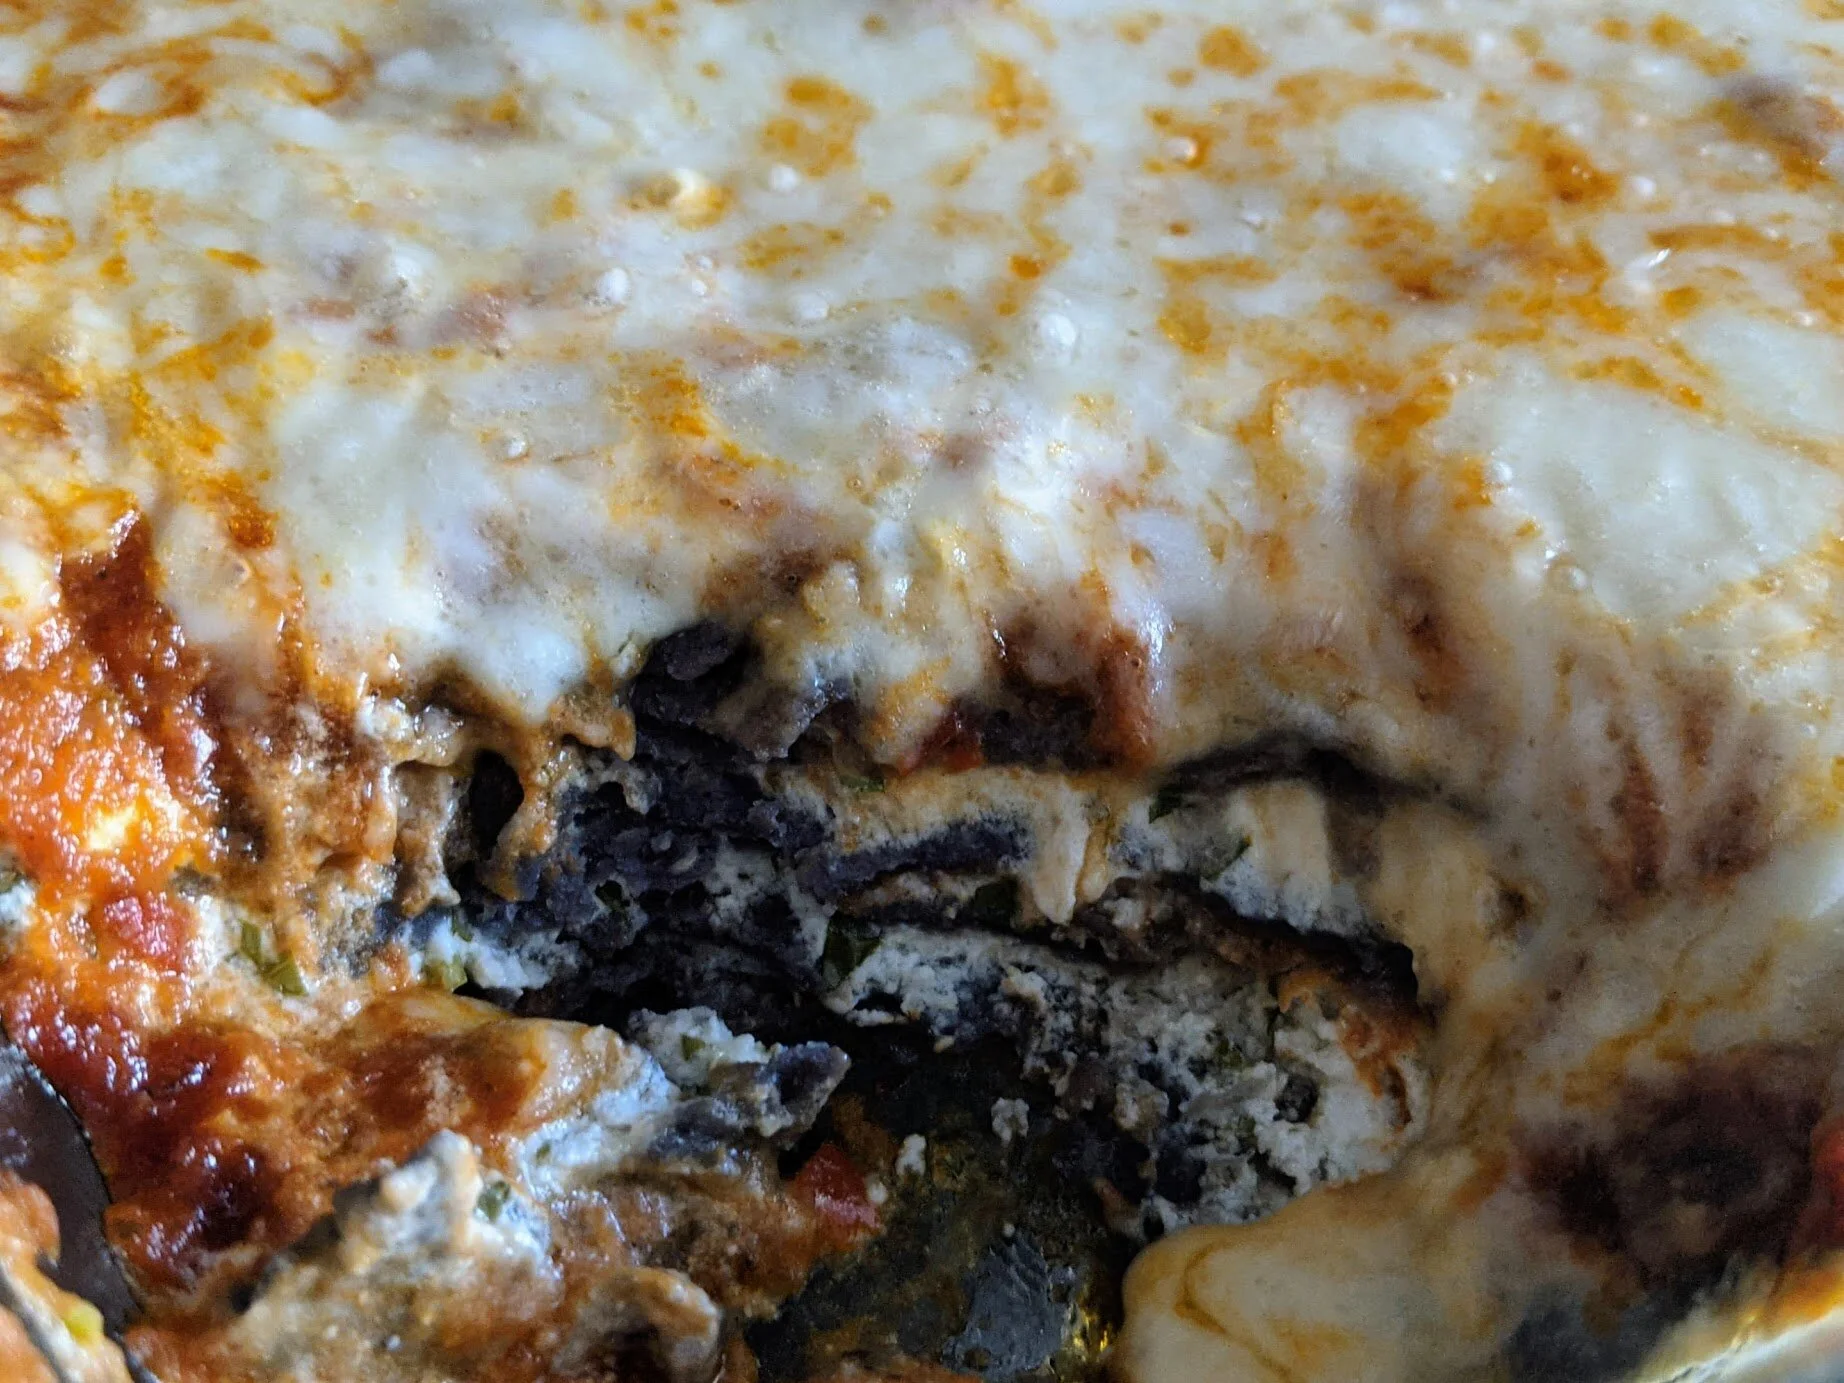
So, for no particular reason, I was looking into Bobby Flay’s recipes and am happy to share this goat cheese-enchiladas-turned-casserole. I know goat cheese enchiladas sound strange, but if you like cheese (I do) and if you’re okay with this being pretty rich (I am), then you’re going to like this recipe. The goat cheese is spiked with lime juice and garlic and blended until light and fluffy, then folded with spices and herbs. That goat cheese delight is stacked with blue corn tortillas in a casserole dish, smothered in a homemade tomato-chile sauce, and tucked into a cozy blanket of Monterey jack cheese. (I did warn you that it’s rich.)


This dish is a bit of an effort - there are two components to make before you assemble the casserole - but it’s worth it for the ooey gooey cheesy outcome. Rice and beans are highly recommended as a side, as is a green salad with a bright dressing to cut the richness.
Goat Cheese Tortilla Casserole
Time: 1.5 hours + 30 mins inactive || Servings: 4-6 || Source: Adapted from Bobby Flay
For the chile sauce:
Ancho chiles - 3
Vegetable oil - 3 tbsp
Red onion - 1 large, finely chopped
Garlic cloves - 3, chopped
Cumin - 1 tbsp
Mexican oregano or regular oregano - 1 tbsp
White wine - 1 cup
Canned tomatoes - 2 cans, 28 oz
Chicken or vegetable stock - 3 cups
Honey - 1-2 tbsp
For the filling:
Soft goat cheese - 1 1/4 lb
Garlic - 3 cloves, coarsely chopped
Cotija cheese - 1/4c, grated
Lime juice - 2 tbsp, more to taste
Cilantro leaves - 1/4c, finely chopped
For assembly:
Blue corn tortillas - 12
Monterey jack - 8 oz, grated
Cilantro - 3 tbsp, chopped
Sour cream, for garnish (mix with lime zest if you’re feeling fancy)
Scallions, sliced thinly, for garnish
Limes, for garnish
Make the chile sauce.
In a small saucepan, bring 2 cups of water to a boil. When boiling, remove from heat and add chiles. Let sit for 30 minutes (longer is okay, if needed). Remove the stems and seeds from the chiles, then place them in a food processor or blender with 1/4 cup of the soaking liquid. Puree until smooth.
In a medium skillet, heat vegetable oil over medium-high. Add onion and cook until soft, 5-7 minutes. Add garlic and cook for another minute, until fragrant. Lower heat if necessary to prevent it from burning. Add cumin and oregano and cook for another minute, until fragrant. Add the ancho puree and cook for another 3 minutes. Add wine, canned tomatoes, and stock to the pan. Raise the heat to bring to a boil and then reduce to a simmer. Allow to simmer for 30 minutes, until slightly thickened. Add salt and pepper, then taste. Add more seasoning as necessary, as well as honey, until you’re satisfied with the flavor.
You can leave the sauce as is if you like it chunky, or puree in a food processor, blender, or with an immersion blender for a smoother texture.
Make the filling.
Place the goat cheese, garlic, cotija cheese, and lime juice in a food processor or blender. Process until smooth and fluffy; this may take a few minutes. Season with salt and pepper, and fold in the chopped cilantro. Taste and adjust seasoning.
Assemble the casserole.
Heat the oven to 375°F.
Spread 1/2 cup or so of the chile sauce on the bottom of a casserole dish. Place three tortillas in the pan, slightly overlapping. You may want to cut the tortillas to get more pan coverage, but this isn’t strictly necessary. Spread 1/2 cup of the sauce over the tortillas, then spread the goat cheese. Top with two more layers, repeating tortillas, sauce, and cheese. Top with a final layer of tortillas, another generous layer of sauce, and the Monterey jack cheese.
Bake for 20 to 30 minutes, until the enchiladas are heated through and the cheese is melted. Remove from the oven. Serve sprinkled with cilantro and scallions, a dollop of sour cream, and a lime wedge.

Water Lily
It finally feels like spring has sprung - so let’s raise a seasonally appropriate glass! This gorgeous cocktail - in hue and in flavor - comes to us via my brother-in-law, Ben. A lawyer by day, Ben regularly moonlights as a bartender extraordinaire, selecting and modifying drinks to inspire and amaze. He’s the kind of person who goes to the liquor store to pick up the exact right gin (“no, no - the juniper in that one is too strong for this drink”) and comes back with an enormous smile and three new varieties of bitters. In other words, we can trust his cocktail recommendations.

It finally feels like spring has sprung - so let’s raise a seasonally appropriate glass! This gorgeous cocktail - in hue and in flavor - comes to us via my brother-in-law, Ben. A lawyer by day, Ben regularly moonlights as a bartender extraordinaire, selecting and modifying drinks to inspire and amaze. He’s the kind of person who goes to the liquor store to pick up the exact right gin (“no, no - the juniper in that one is too strong for this drink”) and comes back with an enormous smile and three new varieties of bitters. In other words, we can trust his cocktail recommendations.


The Water Lily was originally imagined at NYC cocktail bar PDT. It’s a gin-based cocktail spiked with orange liqueur and fresh lemon juice. Its beautiful, spring-forward color comes from crème de violette, which is actually made from wild violets. There are two main brands of crème de violette: Rothman & Winter is the classic from Austria, made from Queen Charlotte and March violets that grow in the Alps. Here, we used Giffard, which is a relative newcomer from Loire, France that has a very intense flavor and color. As you can imagine, crème de violette brings a sweetness and floral essence to this drink that balances well with the herbaceous gin and tart citrus.


Now that the evenings are a little brighter, it feels like there’s loads of time to have an aperitif before dinner. Shake yourself up a Water Lily, kick back, and welcome the warmer weather.
Water Lily
Time: 5 minutes || Servings: 1 || Source: PDT
Cointreau or triple sec - ¾ oz
Crème de violette - ¾ oz
Lemon juice - ¾ oz
Gin - ¾ oz
Twist of lemon or orange, for garnish
Fill a cocktail shaker with ice. Add Cointreau or triple sec, crème de violette, lemon juice, and gin. Shake well, then strain into a coupe glass. Garnish with a strip of lemon or orange zest.

Ottolenghi’s Garlic Tart
There are some weeks that demand comfort food. Also possibly a small kitchen project to distract from endlessly refreshing my news feed. Enter Yotam Ottolenghi’s garlic tart - cloves of garlic simmered in a balsamic syrup with fragrant herbs, layered on top of not one, but two kinds of goat cheese, all bathed in a creamy custard and baked in a crispy puff pastry shell. Sounds like comfort to me.

There are some weeks that demand comfort food. Also possibly a small kitchen project to distract from endlessly refreshing my news feed. Enter Yotam Ottolenghi’s garlic tart - cloves of garlic simmered in a balsamic syrup with fragrant herbs, layered on top of not one, but two kinds of goat cheese, all bathed in a creamy custard and baked in a crispy puff pastry shell. Sounds like comfort to me.


I say this is a project, but really there’s nothing that complicated here. It’s a little time consuming - there are a number of steps - but there are chunks of time between them. You don’t have to be active for the length of the recipe, but you have to be somewhat committed. It requires a fluted tart pan, which feels project-y. And I don’t work with puff pastry that much, and even when I use (perfect good enough) frozen puff pastry, I somehow manage to not be prepared to roll it out and then it gets too warm and chaos ensues. However, I’m happy to report that the puff pastry in this recipe requires minimal manipulation, and its use has the upside that you can use the scraps to make some airy Palmiers to snack on while the custard sets. I’ve included some hard-won tips on how to manage the pastry in the recipe if you, like me, find it a little challenging.


You’ll think you can eat this whole tart when it comes out of the oven looking and smelling gorgeous, and more power to you! But I couldn’t do it - it’s pretty rich. Happily, it keeps well for a couple of days and reheats beautifully - don’t be deterred by the soft pastry, it crisps right up with a little help from the oven.
Ottolenghi’s Garlic Tart
Time: 2 || Servings: 8 || Source: Plenty by Yotam Ottolenghi
Puff pastry - 13 oz (frozen and thawed in the refrigerator)
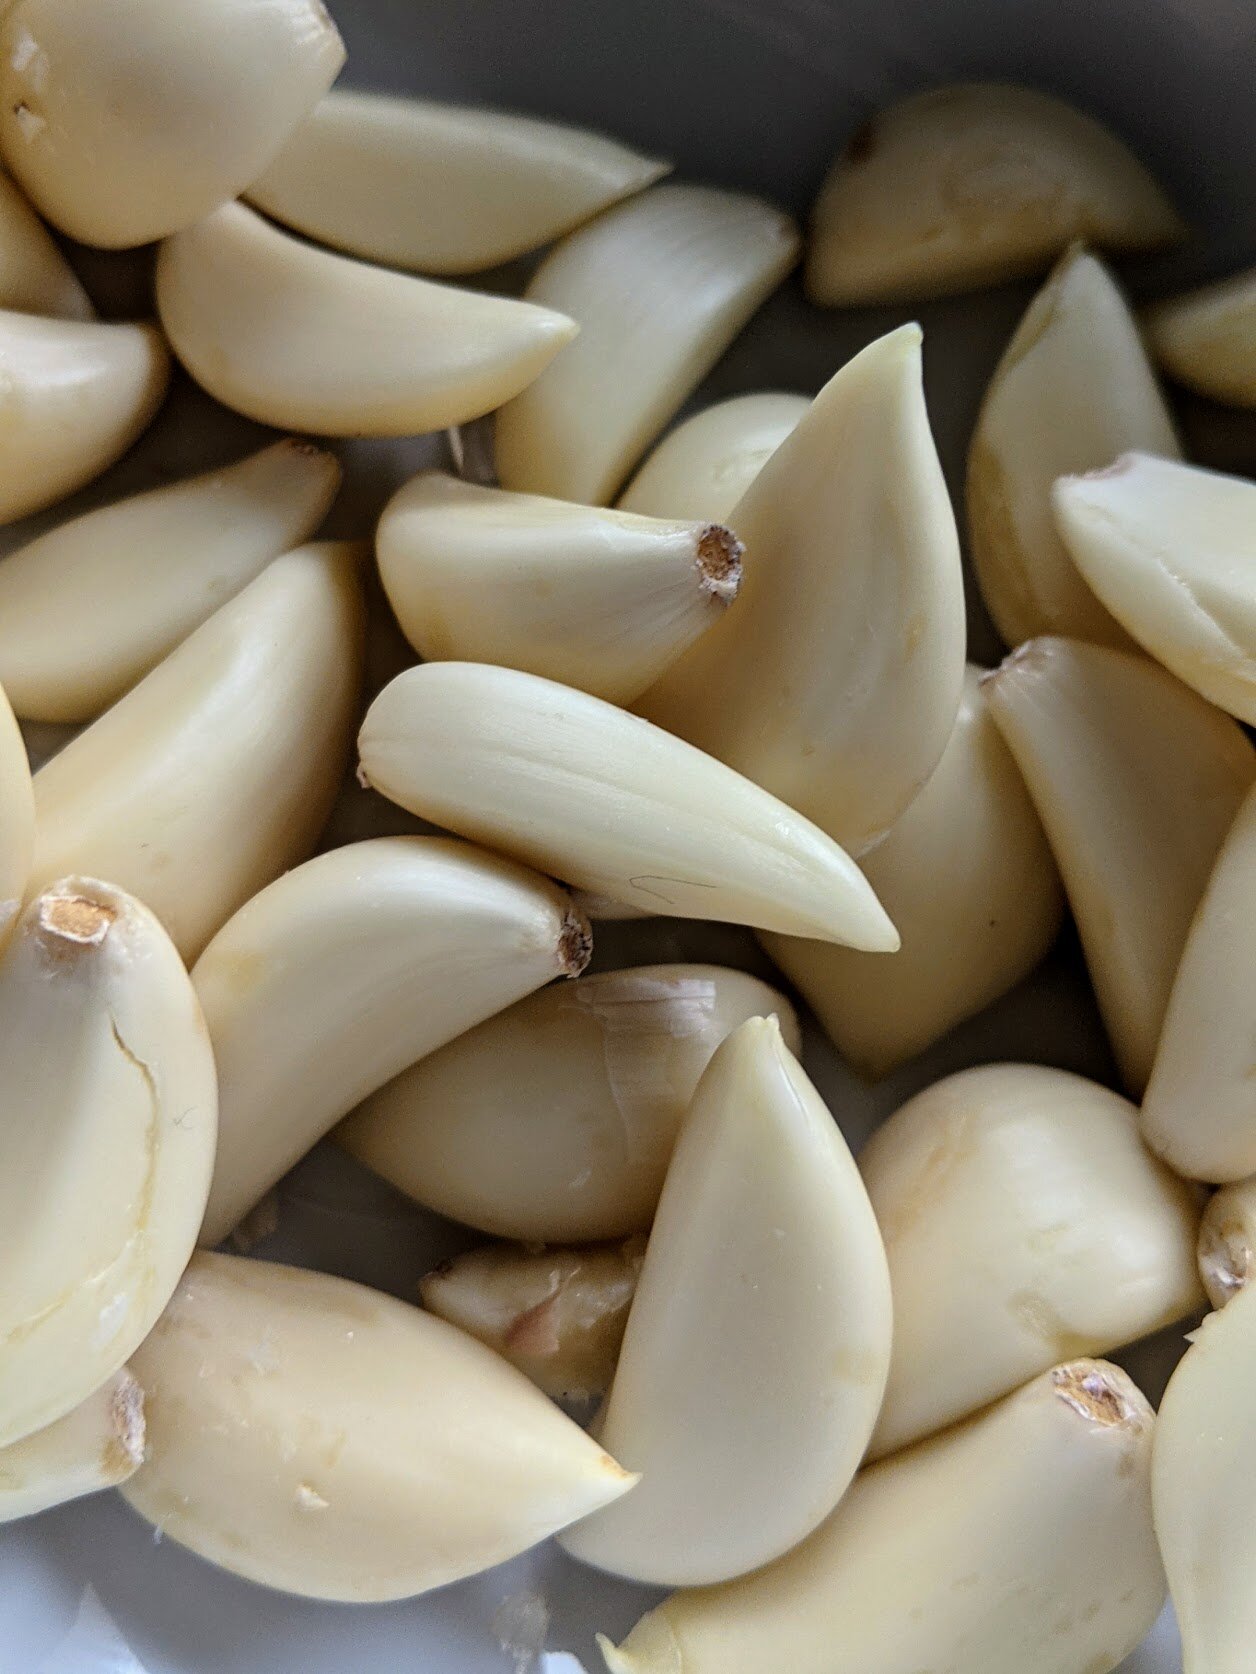
Garlic - 3 heads, cloves separated and peeled
Olive oil - 1 tbsp
Balsamic vinegar - 1 tbsp
Sugar - 3/4 tbsp
Rosemary - 1 tsp, chopped
Thyme - 1 tsp, chopped
Chevre or other soft, creamy goat cheese - 4.5 oz
Goat gouda or other hard, mature goat cheese - 4.5 oz,
Eggs - 2
Heavy cream - 6.5 tbsp
Creme fraiche - 6.5 tbsp
Salt & black pepper
If frozen, thaw your puff pastry in the refrigerator until it’s flexible, about four hours - if it’s too cold, it’ll tear.
Have on hand your 11 inch fluted tart pan, ideally with a loose bottom.
Read this section before you start working with the puff pastry if you’re not experienced: Lightly flour your work surface and rolling pin, then roll out the puff pastry into a circle that can line your tart pan with a little extra hanging over the sides - you can estimate this by placing your tart pan over your pastry and eyeing the size. When you’ve gotten to about the right size, place your rolling pin at the edge of the pastry. Roll the pin towards the center of the pastry without using pressure, bringing the edge of the pastry with the pin so it loops over it. At the end, part of the pastry should be folded over the rolling pin. This should allow you to lift the pastry with little pressure, reducing the risk of tearing. Lift the rolling pin over your tart pan and place the pastry in the pan. Gently press the pastry down into the bottom and sides of the pan. A little overhang is fine, but trim any very excessive pastry hanging out of the pan with some kitchen scissors.
Cover the pastry with parchment paper and fill the bottom with dried beans or pie weights. Let this rest in the refrigerator for 20 minutes, and preheat the oven to 350°F. (This is usually when I start peeling garlic!) After it’s rested, put the pastry in the oven and cook for 20 minutes, then remove the weights and paper and cook for an additional 5-10 minutes, until the pastry has turned golden. Set the pastry aside. Leave the oven on.
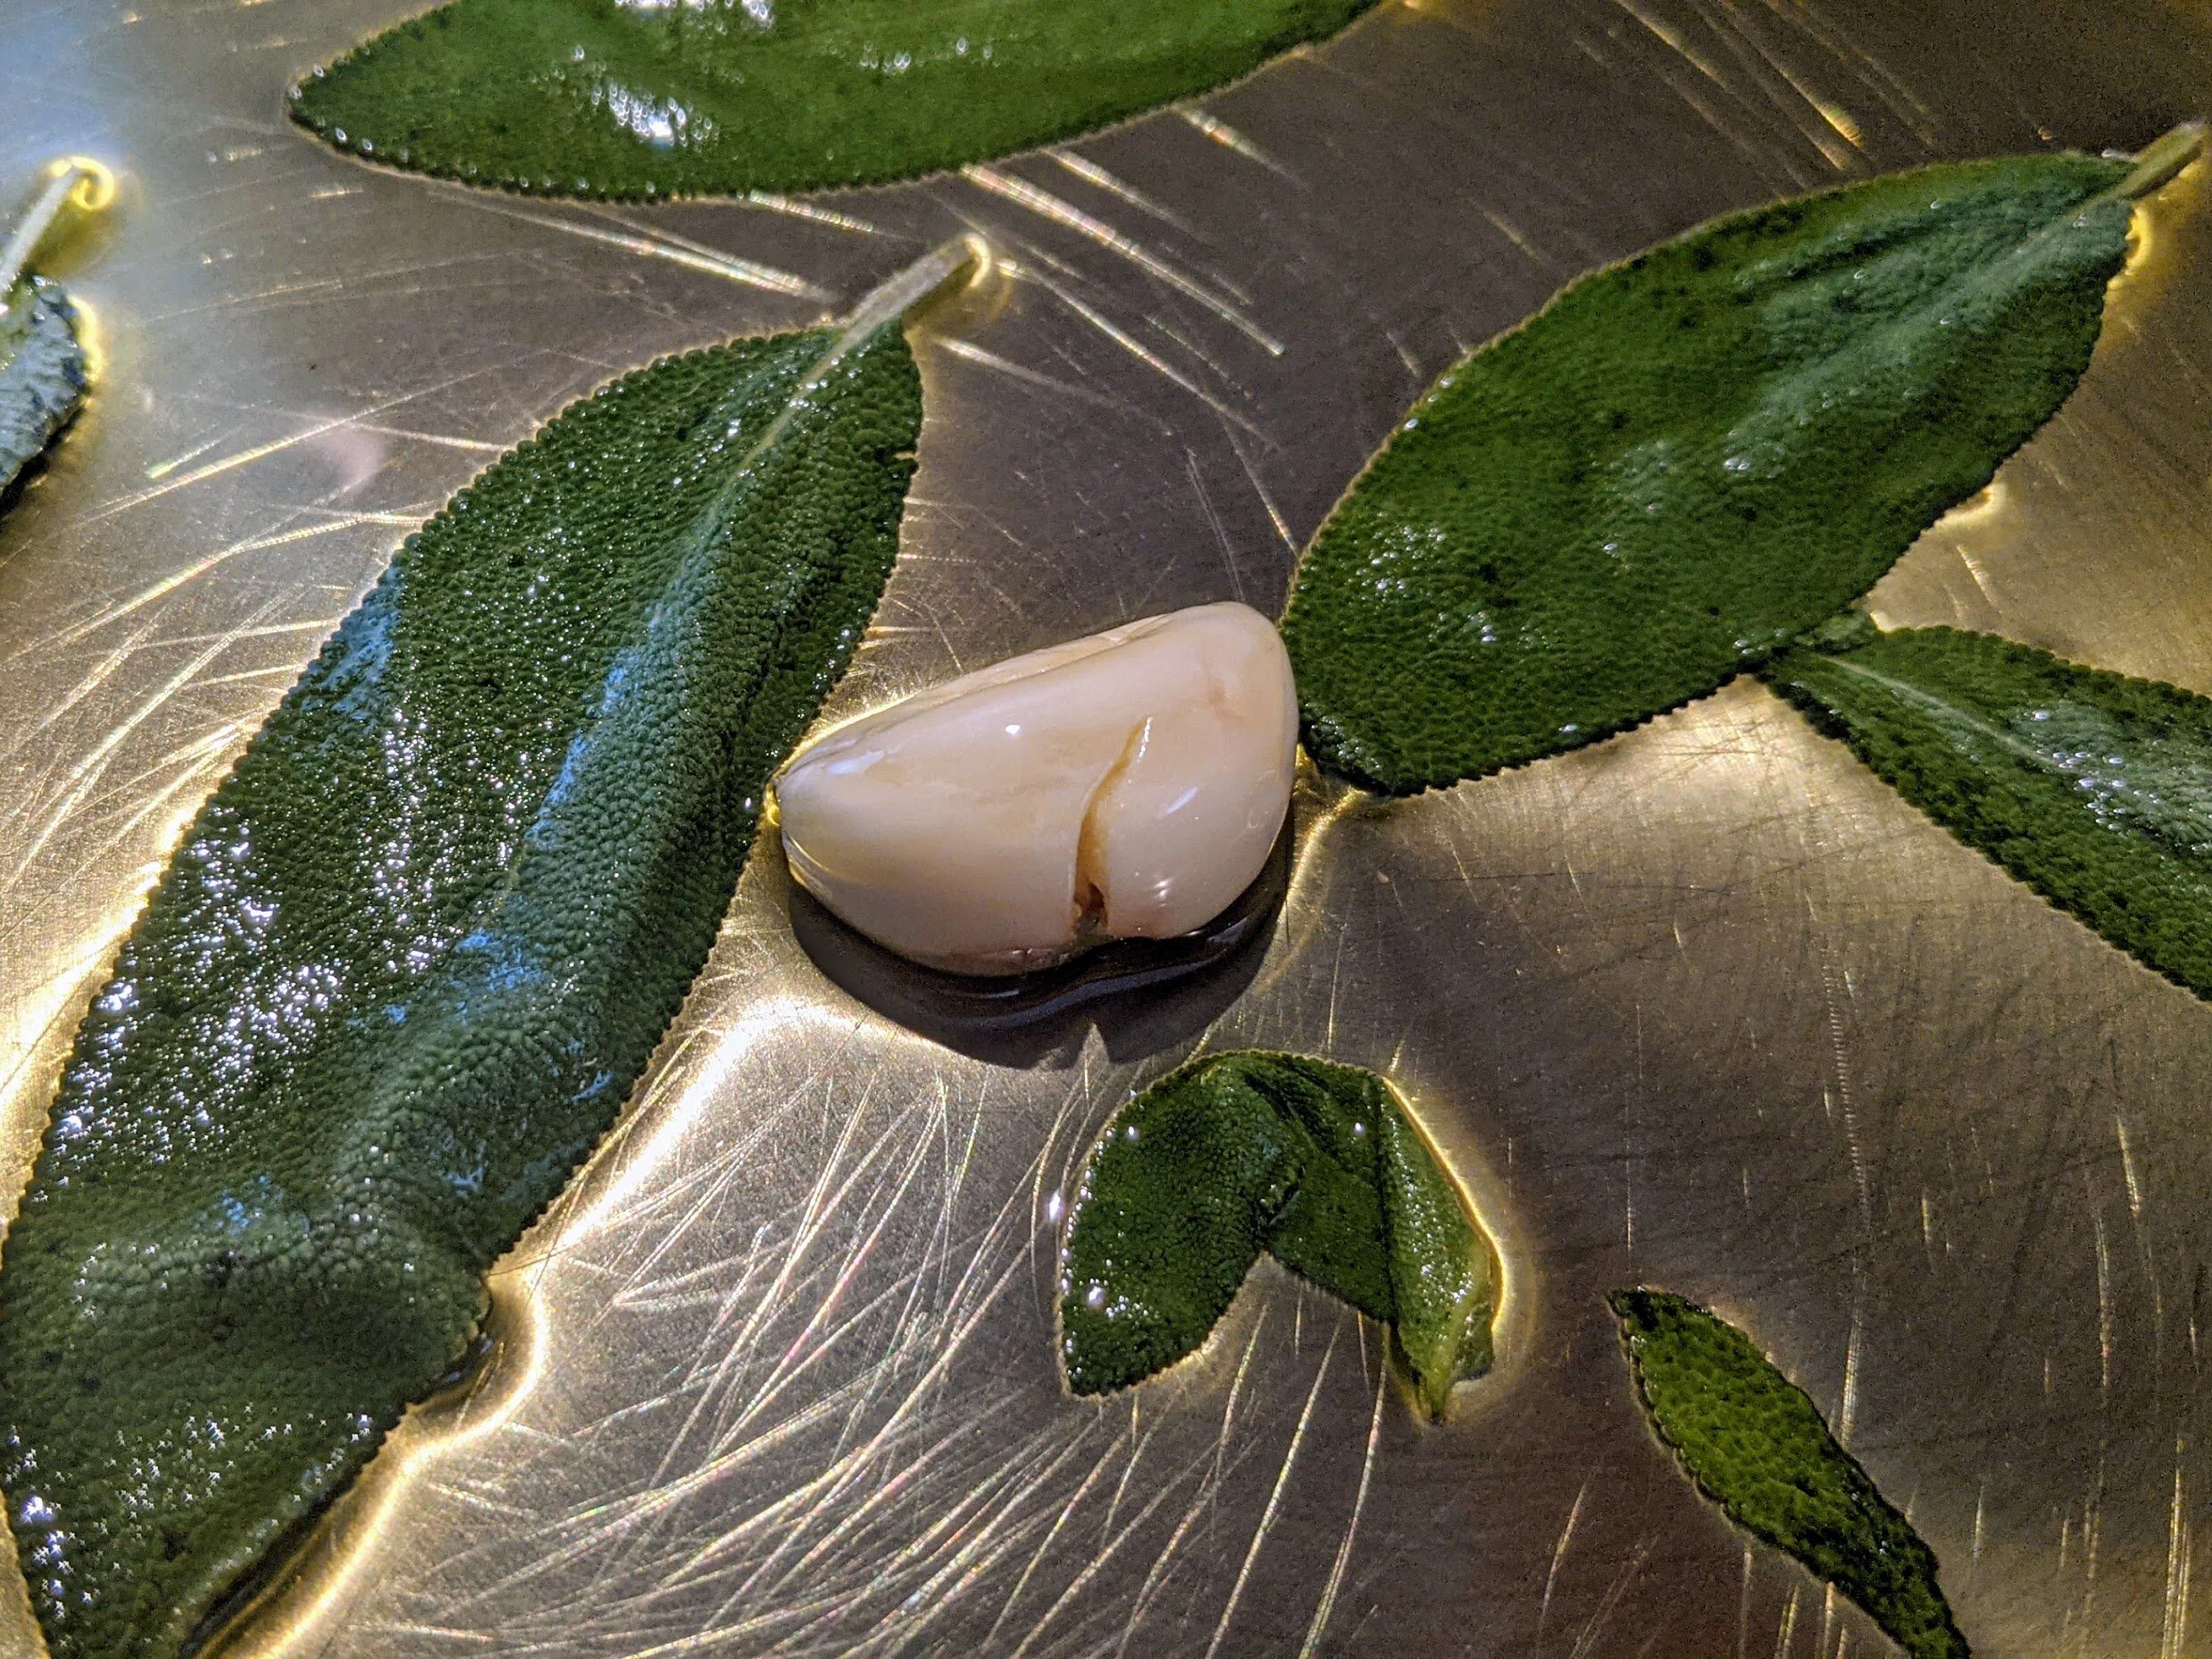
While the pastry is baking, put the garlic cloves in a small pan and cover with water. Bring this to a simmer and blanche the garlic cloves for three minutes, then drain. Dry the pan and put it on high heat. Return the garlic cloves to the pan and add the olive oil, frying for 2 minutes. Add the balsamic vinegar and 1 cup of water and bring to a gentle simmer for 10 minutes. Add sugar, rosemary, thyme, and 1/4 teaspoon of salt. Continue simmering for another 10 minutes. Remove from heat when the garlic cloves are coated in a dark syrup and most of the liquid has evaporated.
Final component: the custard. In a medium bowl whisk together eggs, heavy cream, crème fraiche, 1/2 teaspoon of salt, and some black pepper.
Return to your pastry shell for assembly. Crumble the soft and hard goat cheeses into the tart, distributing evenly around the shell. Pour the garlic and its syrup over the cheese. Pour the custard over the cheese and garlic, although you may not need all of it - you still want to see the garlic and cheese poking through the top.
When you’re ready to put the tart in the oven, reduce oven temperature to 325°F. Place tart in oven and bake for 35-45 minutes. The tart filling should be set and the top should be golden. Garnish with thyme sprigs if you’d like, and serve warm.

Roasted Chicken Legs and Cauliflower with Yogurt
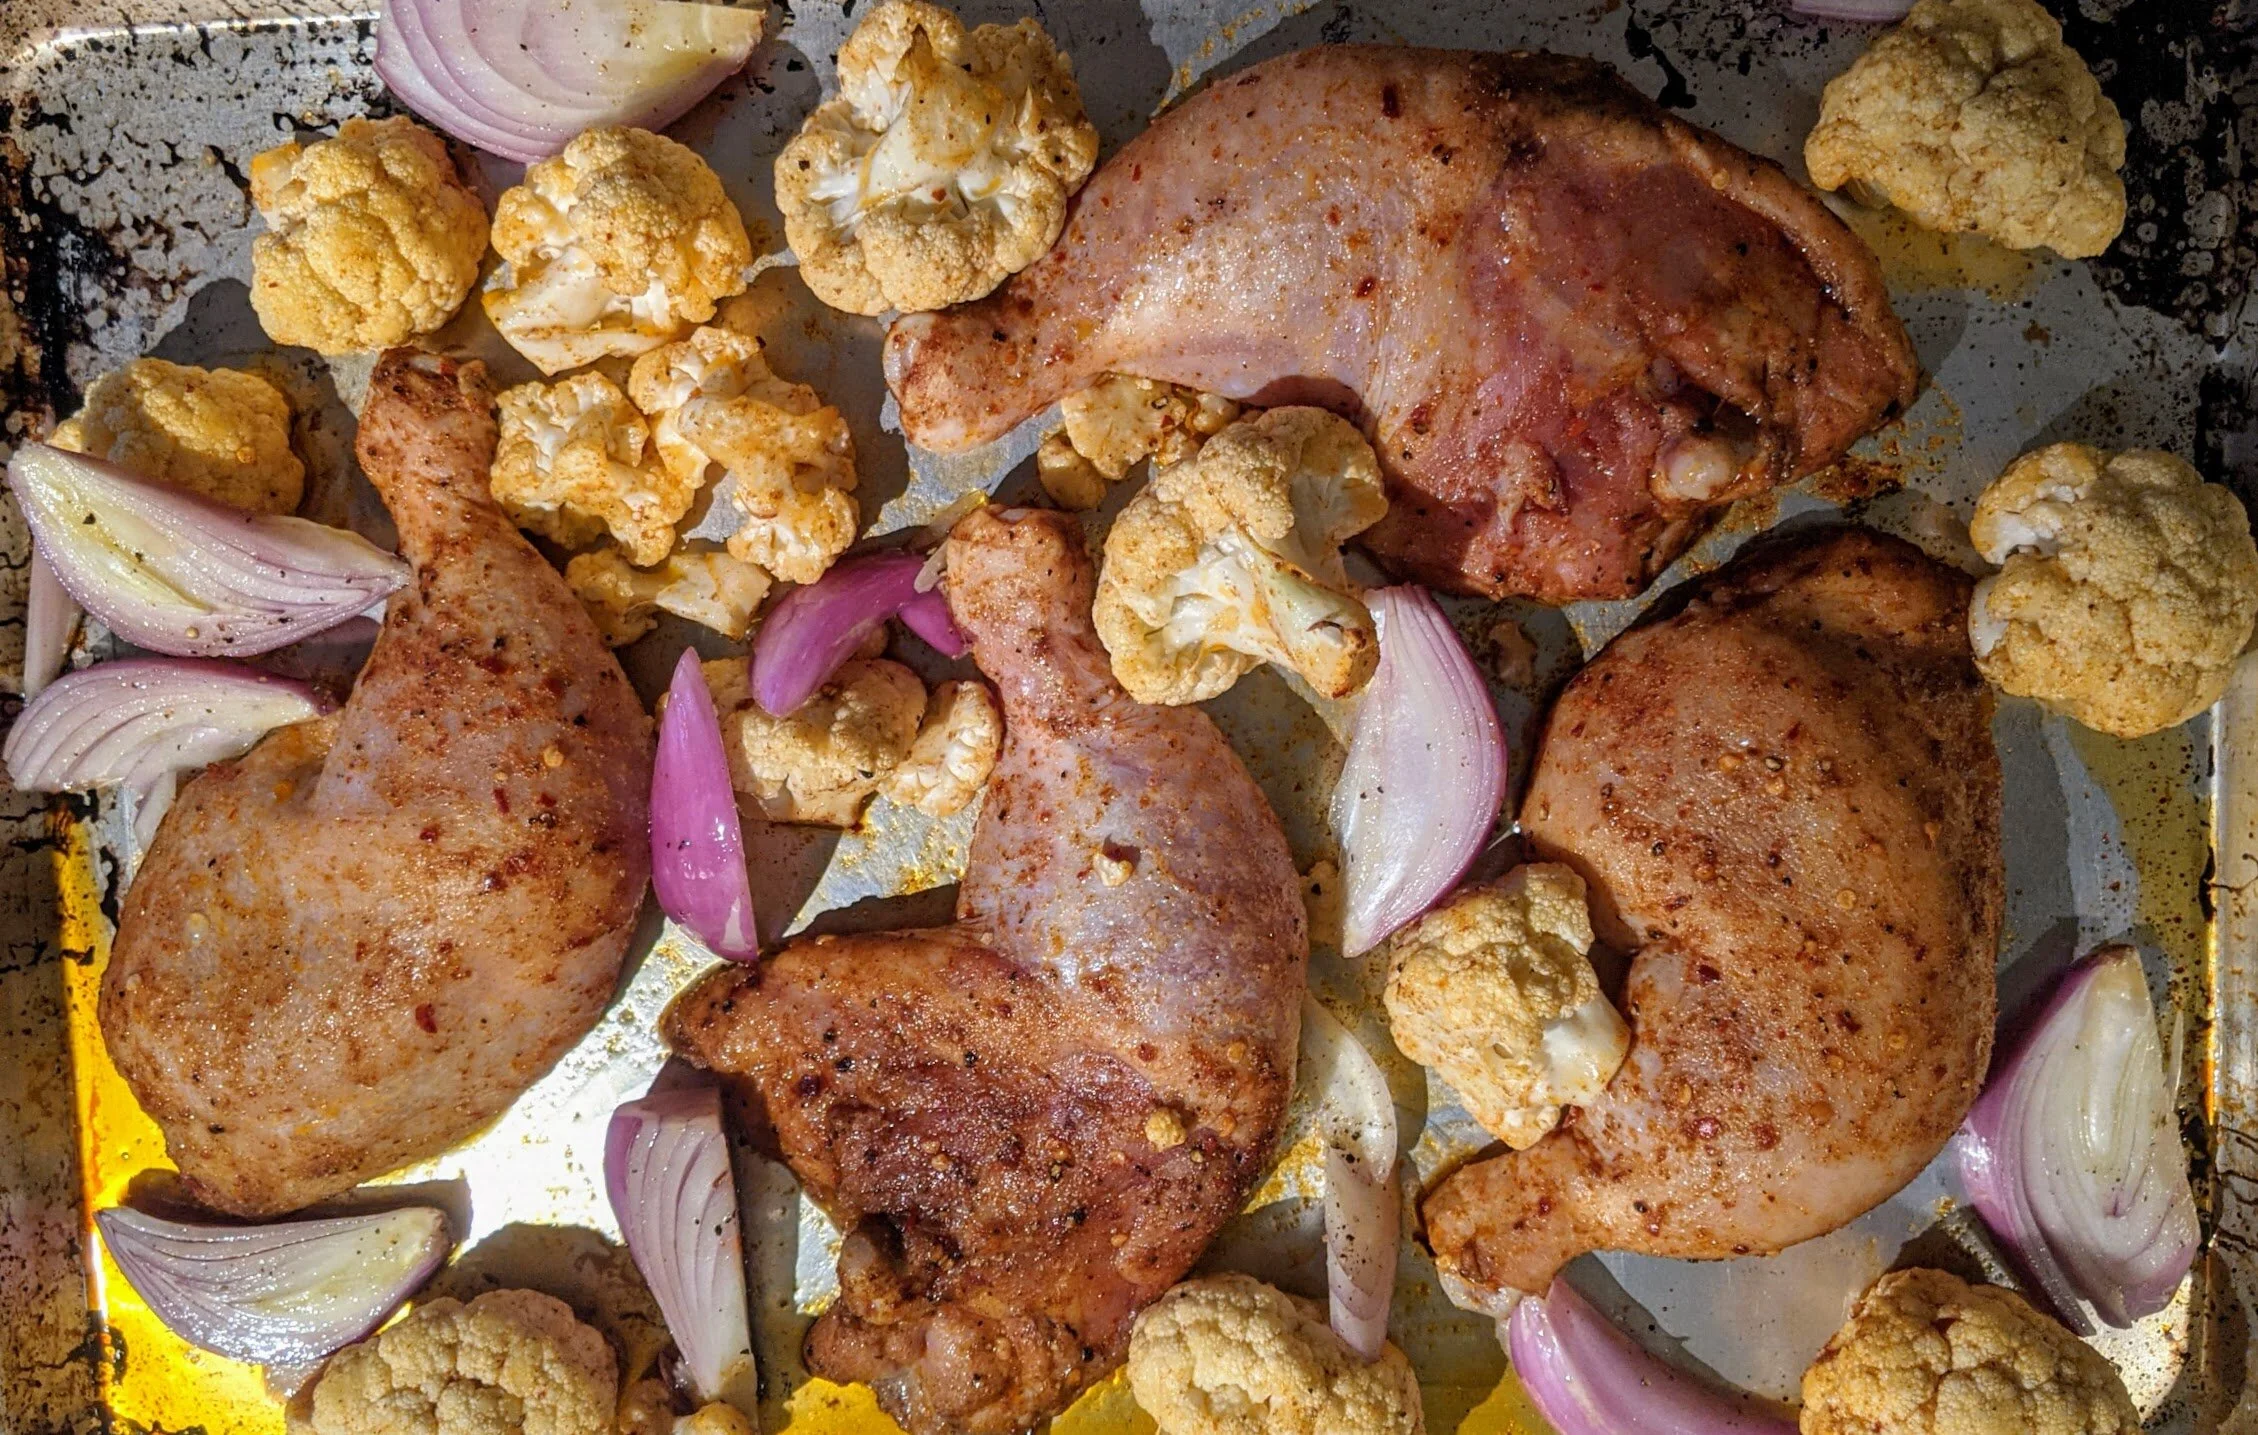
This is a really simple weeknight dinner type of dish - but I wouldn’t have any qualms about serving this for guests. Coat chicken, cauliflower, and some quartered shallots in a warm spice mix and put it in the oven - 40 minutes later, you have dinner! An herby greek yogurt with bright lemon and garlic cuts the heat and adds a tangy contrast.

This is a really simple weeknight dinner type of dish - but I wouldn’t have any qualms about serving this to guests. Coat chicken, cauliflower, and some quartered shallots in a warm spice mix and put it in the oven - 40 minutes later, you have dinner! An herby greek yogurt with bright lemon and garlic cuts the heat and adds a tangy contrast.
The chicken here is marinated in a spicy rub as much as a day ahead, if possible, or even just an hour. If you don’t have the forethought to do it earlier, just rub it on and under the skin for maximum flavor when you’re ready to cook. The dregs of the marinade coat the cauliflower and shallots, continuing our simplicity theme. Cauliflower is a nice vehicle for the spices, but you could substitute broccoli or maybe even zucchini in the summer.


I found this quite filling on its own, but if you want to round it out, feel free to double the marinade and toss some potatoes (fingerlings, chopped yellow potatoes, chopped sweet potato) in with the rest of the vegetables. Rice (maybe mixed with some parsley and lemon zest) would be another great option to bulk this out.
Roasted Chicken Legs and Cauliflower with Yogurt
Time: 1 hour || Servings: 4 || Source: Adapted from Yossy Arefi at NYT
Coriander, ground - 1 tsp
Smoked paprika - 1 tsp
Red pepper flakes - 1/2 tsp
Olive oil - 3 tbsp
Chicken legs, bone-in, skin-on - 4
Cauliflower - 1 small head, about 1 1/2 lb
Shallots - 3
Greek yogurt - 1 cup
Mint - 2 tbsp, chopped
Cilantro - 2 tbsp, chopped
Lemon juice, freshly squeezed - 2 tbsp
Garlic clove - 1
Up to a day before you plan to cook, marinate the chicken. In a container with a cover large enough to hold the chicken (or a gallon bag), combine 1 tbsp of olive oil with the coriander, smoked paprika, and red pepper flakes. Add a generous pinch of salt and several grinds of pepper. Add chicken and coat it well in the marinade. If you’re using a gallon bag, push the air out of the bag and seal, and then vigorously rub the chicken to coat it. Refrigerate chicken until you’re ready to cook.
Note: If you don’t get this done the day before, you can rub the marinade on and under the skin to help the flavors soak in - in any case, it’ll still taste great.
When you’re ready to cook, heat the oven to 425°F. Peel the shallots and cut into quarters. Separate the cauliflower into florets no bigger than 2 inches.
Take the chicken out of the marinade and place on a sheet pan. Add another 2 tbsp of olive oil to the container that held the chicken. Toss the cauliflower and shallots in the olive oil, adding a pinch each of salt and pepper, then distribute onto the sheet pan around the chicken.
Place pan in the oven and roast for 40 minutes. Check about halfway through and give the vegetables a stir. The chicken is done when it’s browned and cooked through (165°F). This might be a little before the time is up - if that’s the case, pull the chicken out and cover to keep warm, and let the vegetables continue to roast until tender.
Make the yogurt sauce - this could be done ahead in the day, or while the chicken’s cooking. Whisk together the yogurt, mint, cilantro, and grated garlic. Add lemon juice, a pinch of salt and pepper, then taste and adjust.
Serve topped with juices from the sheet pan, a squeeze of lemon, a few cilantro leaves, and a large dollop of yogurt sauce.

Butternut Squash Soup with Rosemary Croutons
Okay, I’m ready for warm weather. I can’t wait for sunny park walks with just a light jacket - or, dare we dream, no jacket? - and, on the other side of that, days of abundant fresh produce hand selected from the market. In the meantime, I’m clinging to my winter squashes and citrus, and trying hard to embrace the moment. Because along with the park walks and jacketless freedom come seasonal allergies and sunblock - so there are benefits to the here and now. Like this creamy butternut squash soup.

Okay, I’m ready for warm weather. I can’t wait for sunny park walks with just a light jacket - or, dare we dream, no jacket? - and, on the other side of that, days of abundant fresh produce hand selected from the market. In the meantime, I’m clinging to my winter squashes and citrus, and trying hard to embrace the moment. Because along with the park walks and jacketless freedom come seasonal allergies and sunblock - so there are benefits to the here and now. Like this creamy butternut squash soup.

The most difficult thing you’ll do for this recipe is chop the butternut squash. If knives aren’t your thing, you could purchase prepared chopped squash - no shame in saving your time and/or fingers. If you have a whole squash on hand, start with peeling. It’ll take a little patience, but a simple vegetable peeler (Y-shaped preferred) will do the trick. Once peeled, take a thin slice off the bottom and top to form a stable surface for cutting. Stand the squash upright so it’s tall on its base and, using a sharp knife, carefully cut it vertically, applying firm pressure until you cut through. Scoop out the seeds, then chop. For this recipe, you’re looking for 2-inch chunks.


This is a pretty basic soup as far as soups go: chopped vegetables boiled in water. Sure, we fancy it up a little with some floral notes from the rosemary, some umami from the parmesan, some crunchy breadcrumbs - maybe a little sherry if you have it on hand to add some depth and complexity. But the star of this soup is butternut squash, and it delivers with sweetness, nuttiness, and a velvety texture. Thanks, winter.
Butternut Squash Soup
Time: 1 ½ hours || Servings: 8
Butternut squash - 1 ½ lbs, one large or two small squash
Olive oil - 1 tbsp
Onion - 1 cup, chopped from 1-2 onions
Garlic - 4 cloves, peeled and crushed
Water - 3 cups
Rosemary sprigs - 2
Chicken or vegetable stock - 1 cup
Sherry - ¼ cup
Chunky breadcrumbs - you can buy or make these by pulsing a day-old baguette in a food processor; alternatively, pull some bread into big chunks and toast a bit longer
Parmesan cheese - grated, for serving
Peel the butternut squash and cut a thin slice from the bottom and top to give it an even surface to stand on. Carefully halve the butternut squash vertically. Scoop out the seeds and discard, then roughly chop the squash into 2-inch chunks.
In a large, heavy bottomed pot, heat the olive oil over medium-low heat. Add the onions and cook, stirring occasionally, until golden, about 15 minutes. Don’t let the onions brown. Then add the garlic and cook, stirring, until fragrant, 1-2 minutes. Add the squash, water, and one rosemary sprig, then cover and simmer for about 45 minutes.
While the squash simmers, heat the oven to 350°F. Line a baking sheet with parchment paper and spread the breadcrumbs out on the baking sheet. Chop the leaves from the second sprig of rosemary and sprinkle them over the breadcrumbs. Drizzle breadcrumbs with the oil, then give them a toss to coat them. Toast in the oven for 10 minutes, tossing occasionally to allow the crumbs to brown evenly. Remove when breadcrumbs are crisp, and sprinkle lightly with coarse salt. Set aside to cool.
When the squash is tender and easily pierced with a fork, turn off the heat and discard the rosemary sprig. Puree the mixture using an immersion blender or food mill, or let it cool slightly and use a blender or food processor to puree in as many batches as necessary. Return the puree to the pot over low heat and add the sherry. Slowly add stock until you reach desired consistency. Add a large pinch of salt and a few grinds of pepper, then taste and add sherry and seasoning to your taste. Serve topped with the breadcrumbs and a generous sprinkling of grated parmesan.

Winter Greens Salad
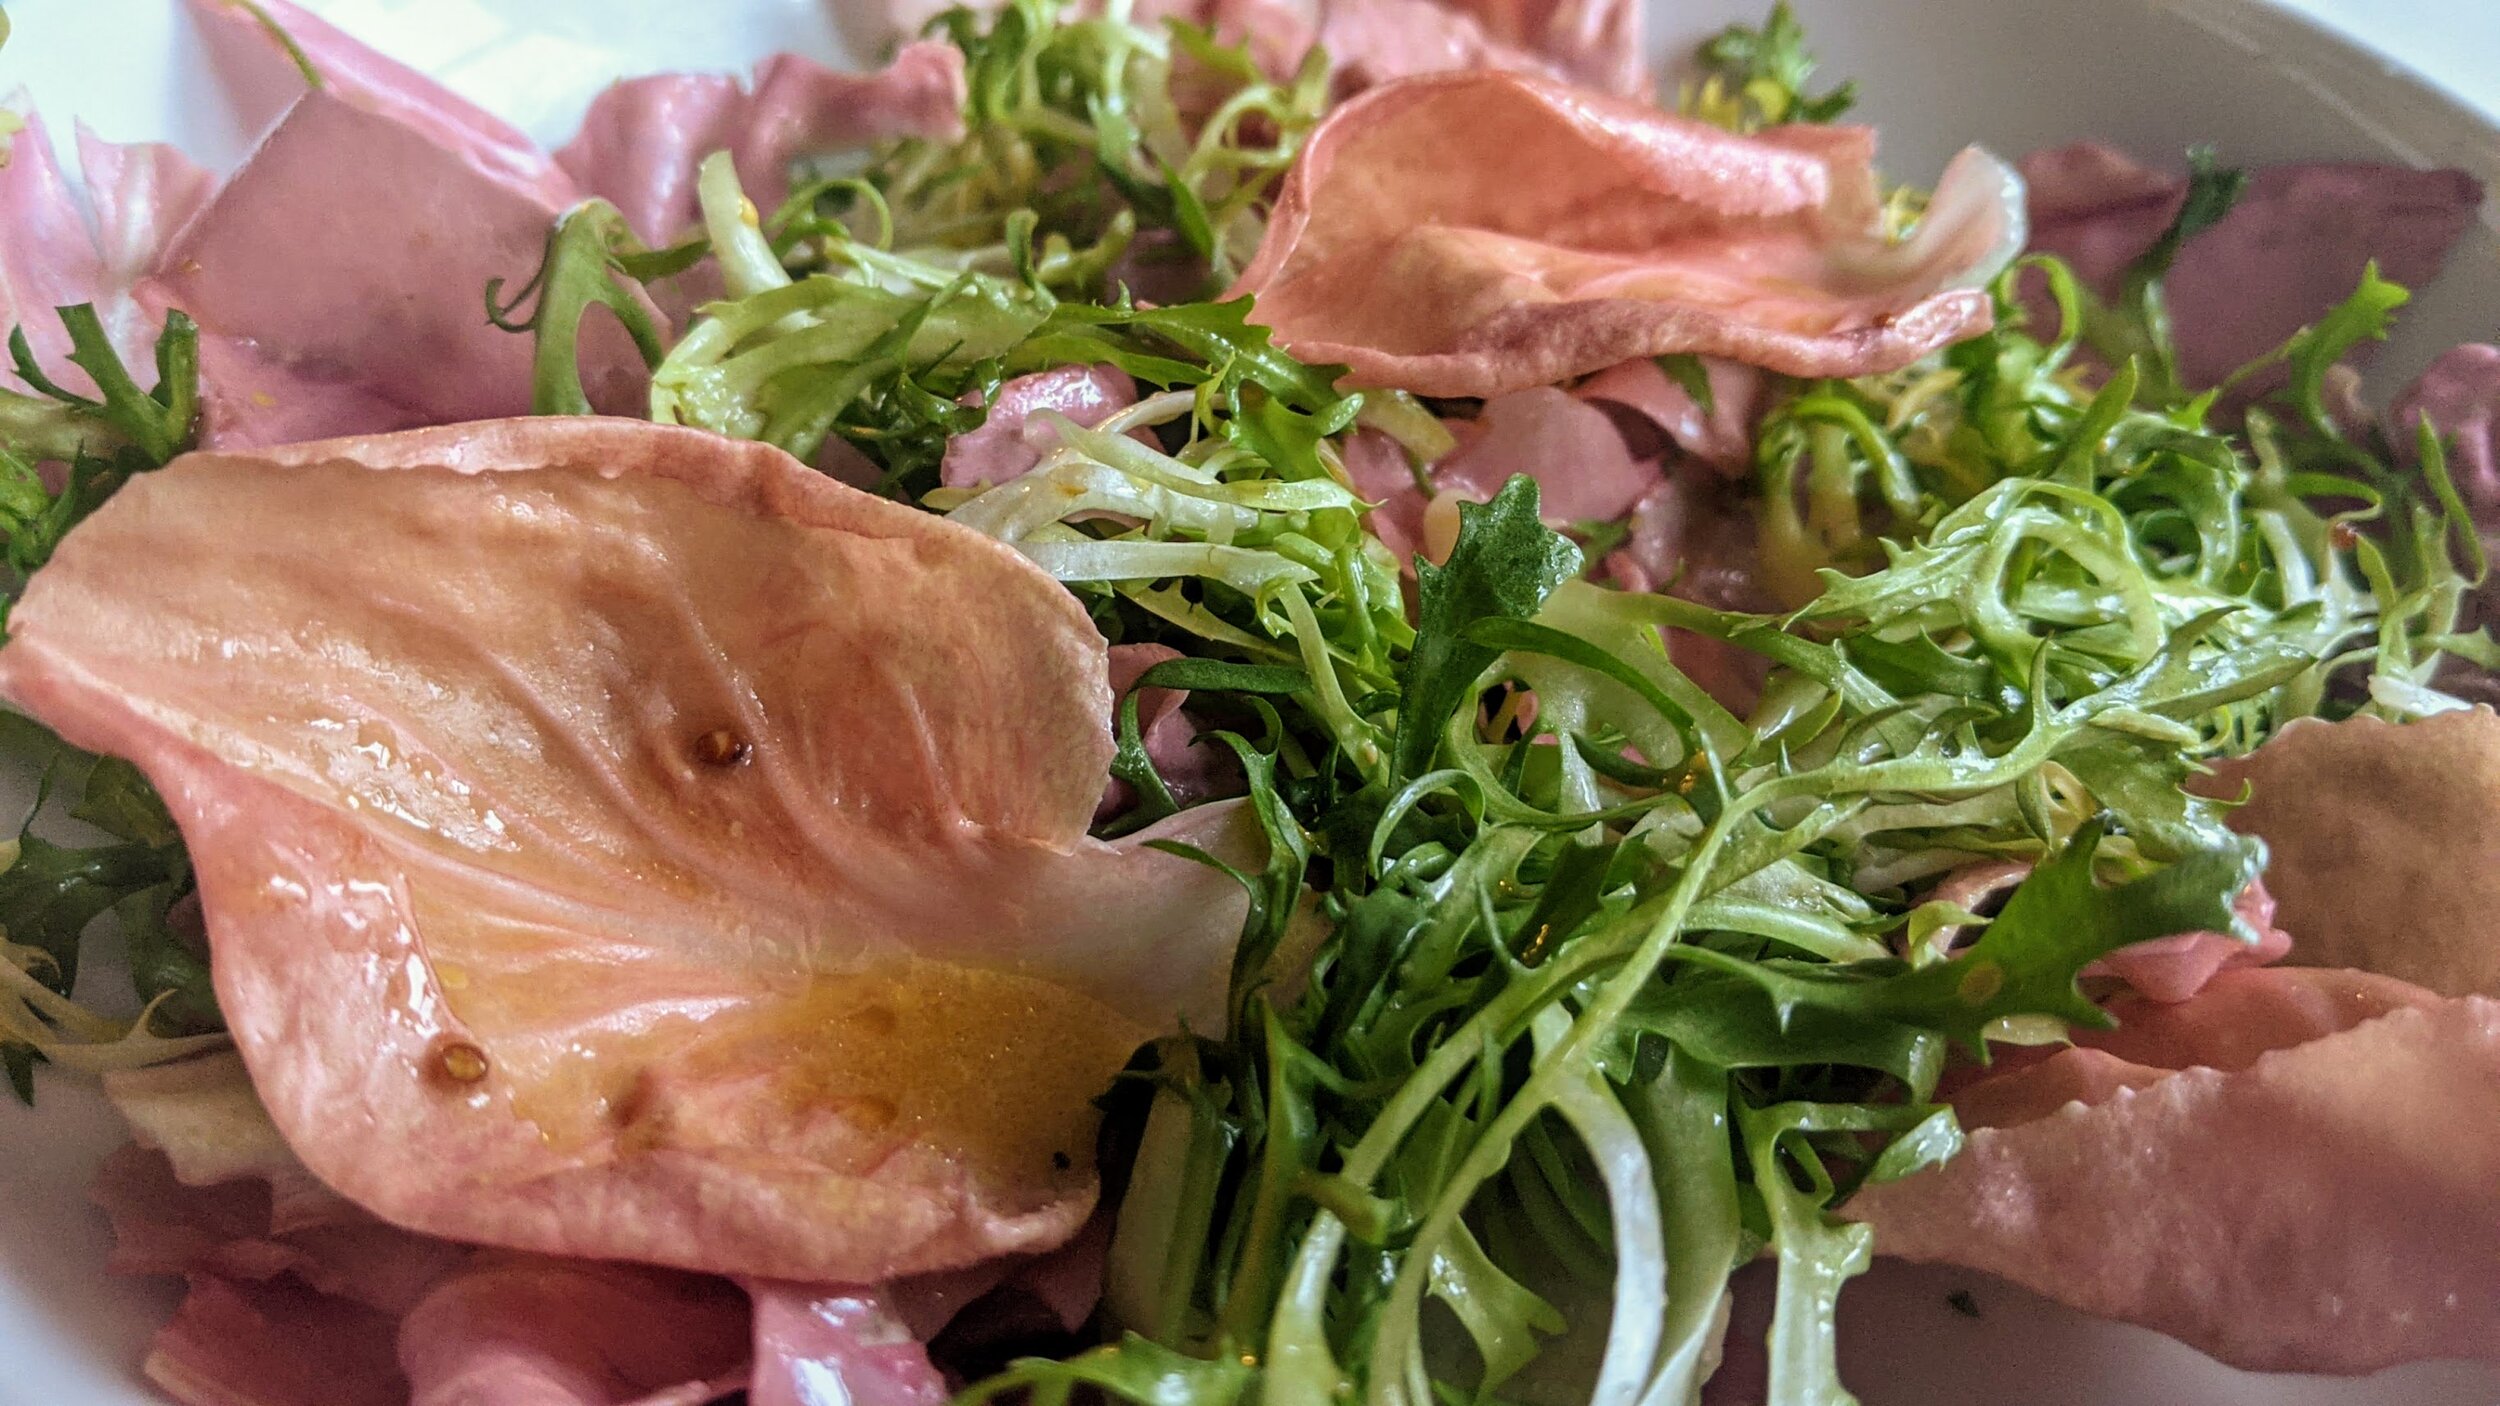
I know, a salad doesn’t seem exciting, and not only is this a salad but it’s one made from winter greens that are maybe a little bit - what shall we say? - oh I guess, yes, they can be bitter, if you’re the type to judge. But don’t stop reading yet. It would be in your best interest to keep reading. Because yes, this salad has bitter greens in it, but the acidic lemony mustardy pop of the dressing transforms them. You will not regret eating this.
I know, a salad doesn’t seem exciting, and not only is this a salad but it’s one made from winter greens that are maybe a little bit - what shall we say? - oh I guess, yes, they can be bitter, if you’re the type to judge. But don’t stop reading yet. It would be in your best interest to keep reading. Because yes, this salad has bitter greens in it, but the acidic lemony mustardy pop of the dressing transforms them. You will not regret eating this.
And let’s face it - it’s been a loooong indoor winter, with sad salads made from greens that long for sun and soil and a shorter commute. These greens might be a little different from your darling bibb and butter lettuces, but they are of the moment. And aren’t we all a little bitter right now? These greens get you.


Did you notice that some of this salad is a little pink? That’s a fancy little chicory called Radicchio La Rosa del Veneto - aka pink radicchio from Venice. I’d never heard of it before, but my local shop had it and who could resist that color? Apparently it’s having a little moment and is being grown in the US with more regularity (some crazy restaurants actually import it from Venice!). It’s absolutely unnecessary to go on a mission to find it, though - red radicchio is equally delicious.

Eat this salad with these awesome garlic & goat cheese toasts, maybe some olives - and a big glass of wine.
Winter Greens Salad
Time: 10 minutes || Servings: 5 || Source: Slightly adapted from Mozza via NYT
Whole grain mustard - 1 ½ tsp
Dijon mustard - 1 ½ tsp
Lemon juice, freshly squeezed - 3 to 6 tbsp
Olive oil - ½ cup
Salt & pepper
Mixed winter greens, such as frisée, radicchio, or dandelion greens - 8 oz or ½ lb
When you’re ready to eat, wash and dry the greens. If there are signs of wilting, soak the greens in cold water - this can also help to reduce the bitterness of radicchio. Dry thoroughly using a salad spinner or kitchen towels. Tear greens into bite sized pieces. I like to keep small leaves whole because they’re pretty. Toss the greens together and place in a large bowl for serving, or individual bowls.
Make the dressing. Note: These amounts will make more dressing than you’ll need for this salad, but it’ll keep in the refrigerator for a week and works well on other greens. In a jar, combine the mustards, 3 tablespoons of lemon juice, and olive oil. Add salt and pepper to taste (I used ½ tsp salt to start). Cover and shake vigorously. When emulsified (the ingredients have come together and look creamy, and the olive oil isn’t separated), dip a small piece of radicchio or frisée into the dressing and taste it. The amount of lemon needed will depend on the acidity of your particular lemon and mustard; I needed 4 tablespoons to get some pop from the lemon. Add additional lemon and salt if needed and taste again - repeat until your palate is happy.
Toss the greens with just enough dressing to coat them. Start with less dressing than you think you need - it’s easy to add more, but an over-dressed salad is irretrievably soggy.
Variation: Although quite good as is, this salad wouldn’t suffer from the addition of toasted walnuts or pine nuts or a little shaved parmesan or roquefort if you feel so inclined.
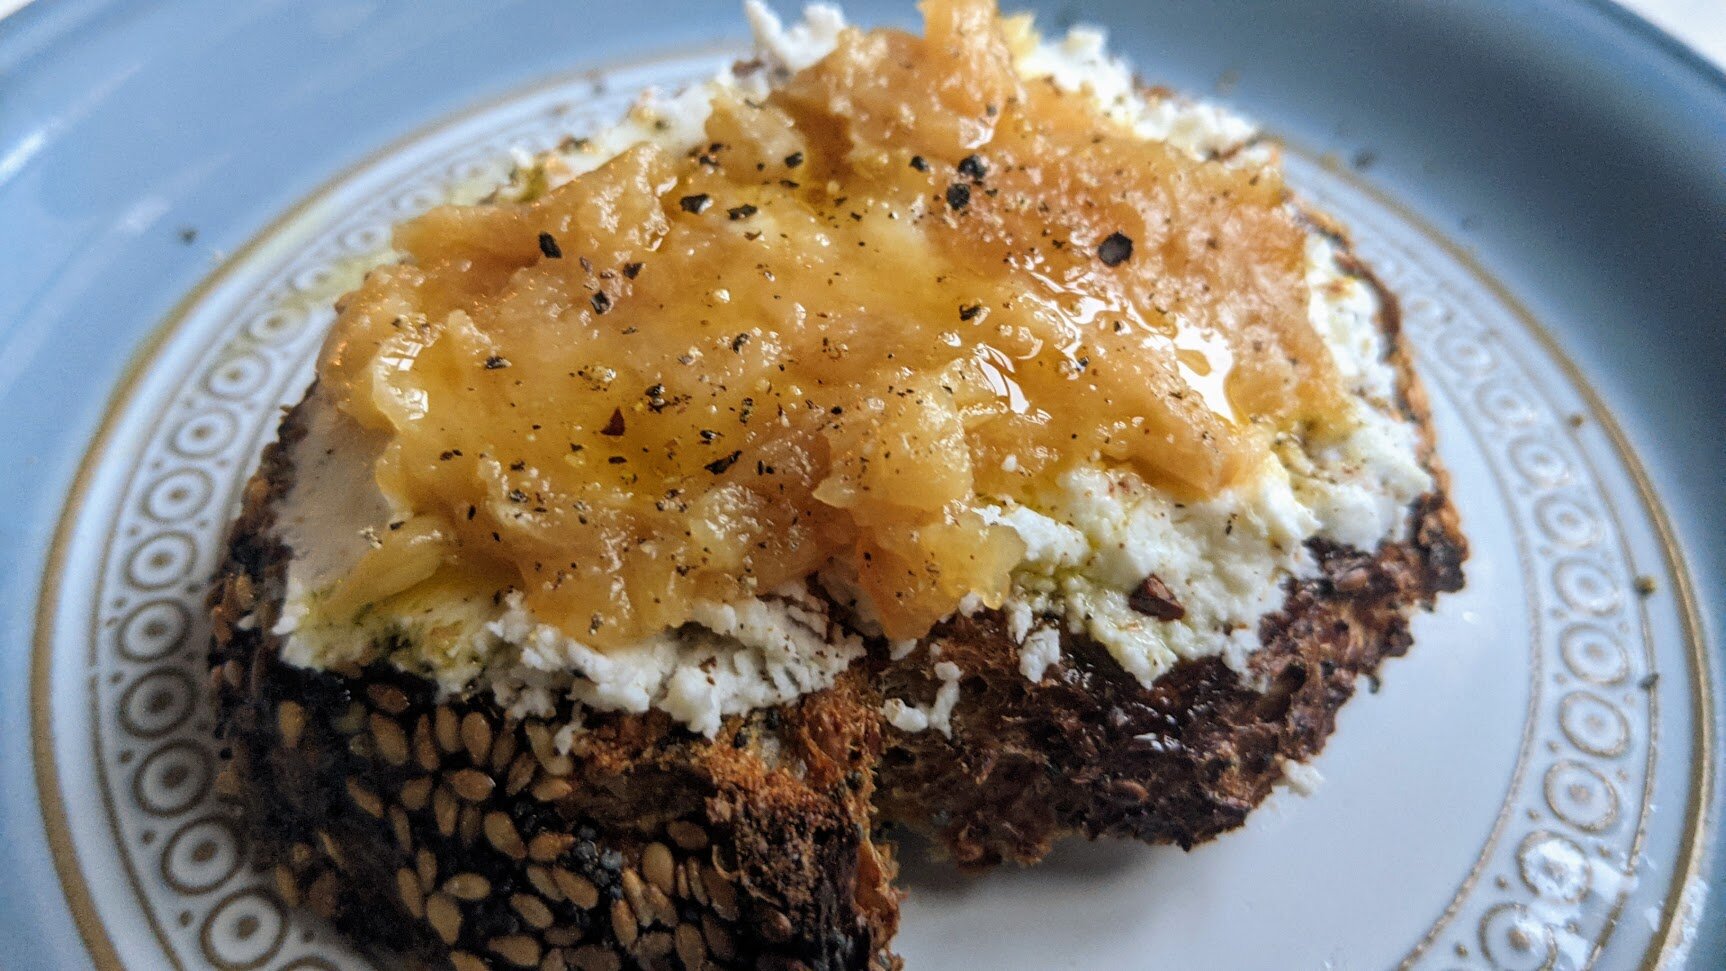
Goat Cheese & Roasted Garlic Toasts
We’ve been enjoying a lot of rich, meaty foods recently (see: bolognese, beef stew), but with warmer weather peeking through - including an incredible 70°F March birthday, thank you thank you - it felt time to go for something a little lighter. We’re not quite at zucchini season, so I turned to winter greens and some pantry staples for support.

We’ve been enjoying a lot of rich, meaty foods recently (see: bolognese, beef stew), but with warmer weather peeking through - including an incredible 70°F March birthday, thank you thank you - it felt time to go for something a little lighter. We’re not quite at zucchini season, so I turned to winter greens and some pantry staples for support.
I love garlic. It has a distinct flavor, as vampires can attest, but it’s so versatile: crush a clove and plop it in a yogurt sauce for subtle flavor, grate it into a dressing for a spicy punch, mince it with onions as a base for tomato sauce. Or, in this case, mellow it out to sweetness with a long roast and eat it directly out of its crinkly skins.


This toast is super simple and easy to prep ahead of time - and actually, you eliminate most of the prep if you just arrange the ingredients for a make-it-yourself experience. The garlic heads can be roasted anytime the day you’re planning to eat, making it easy to snag five minutes to get them in the oven. I used a seeded sourdough for this, but most toasted bread would work - I like having them be sort of crostini sized for easy assembly and consuming.


This is great for lunch with a salad, or bulk it out for dinner with more antipasti items, like raw or roasted vegetables, cured meats, olives, and, of course, wine.
Goat Cheese & Roasted Garlic Toasts
Time: 15 minutes active, 1 hour roasting || Servings: your call
Garlic heads - 1 per person
Olive oil
Goat cheese - 1-2 oz per person
Good bread, such as a baguette
Herbs, such as thyme or rosemary - optional
Salt & pepper
Roast the garlic. This can be done anytime the day you’re planning to eat. Heat the oven to 400°F. Slice about a half inch off the top of the garlic heads - the top of the garlic cloves should be visible. If not, slice a little more. Discard the tops. Place the garlic heads in a baking dish, cut side up. Drizzle the top lightly with olive oil and sprinkle with salt. Fill the baking dish about a quarter inch deep with water and cover tightly with foil. Roast in the oven for 45 minutes to 1 hour. When done, remove from the oven and remove the foil; the garlic should be soft and creamy. The garlic can sit at room temperature in its papery skin until you’re ready to use it.
When you’re closer to eating, put the goat cheese out to come to room temperature - this makes it easier to spread. Finely chop the herbs, if using, and combine with the goat cheese.
Cut the bread into pieces that are easy to pick up - slices for a baguette, or 1.5 inch squares for a boule. Toast the bread lightly.
You can assemble the toasts to serve, but I like putting all of the components out to let people assemble their own. This is how I assemble mine: I spread the goat cheese over the toast, then gently squeeze the bottom of the garlic cloves - they should squish right out. I spread the garlic over the goat cheese, then drizzle it with olive oil and sprinkle with chunky salt and a few grinds of black pepper.
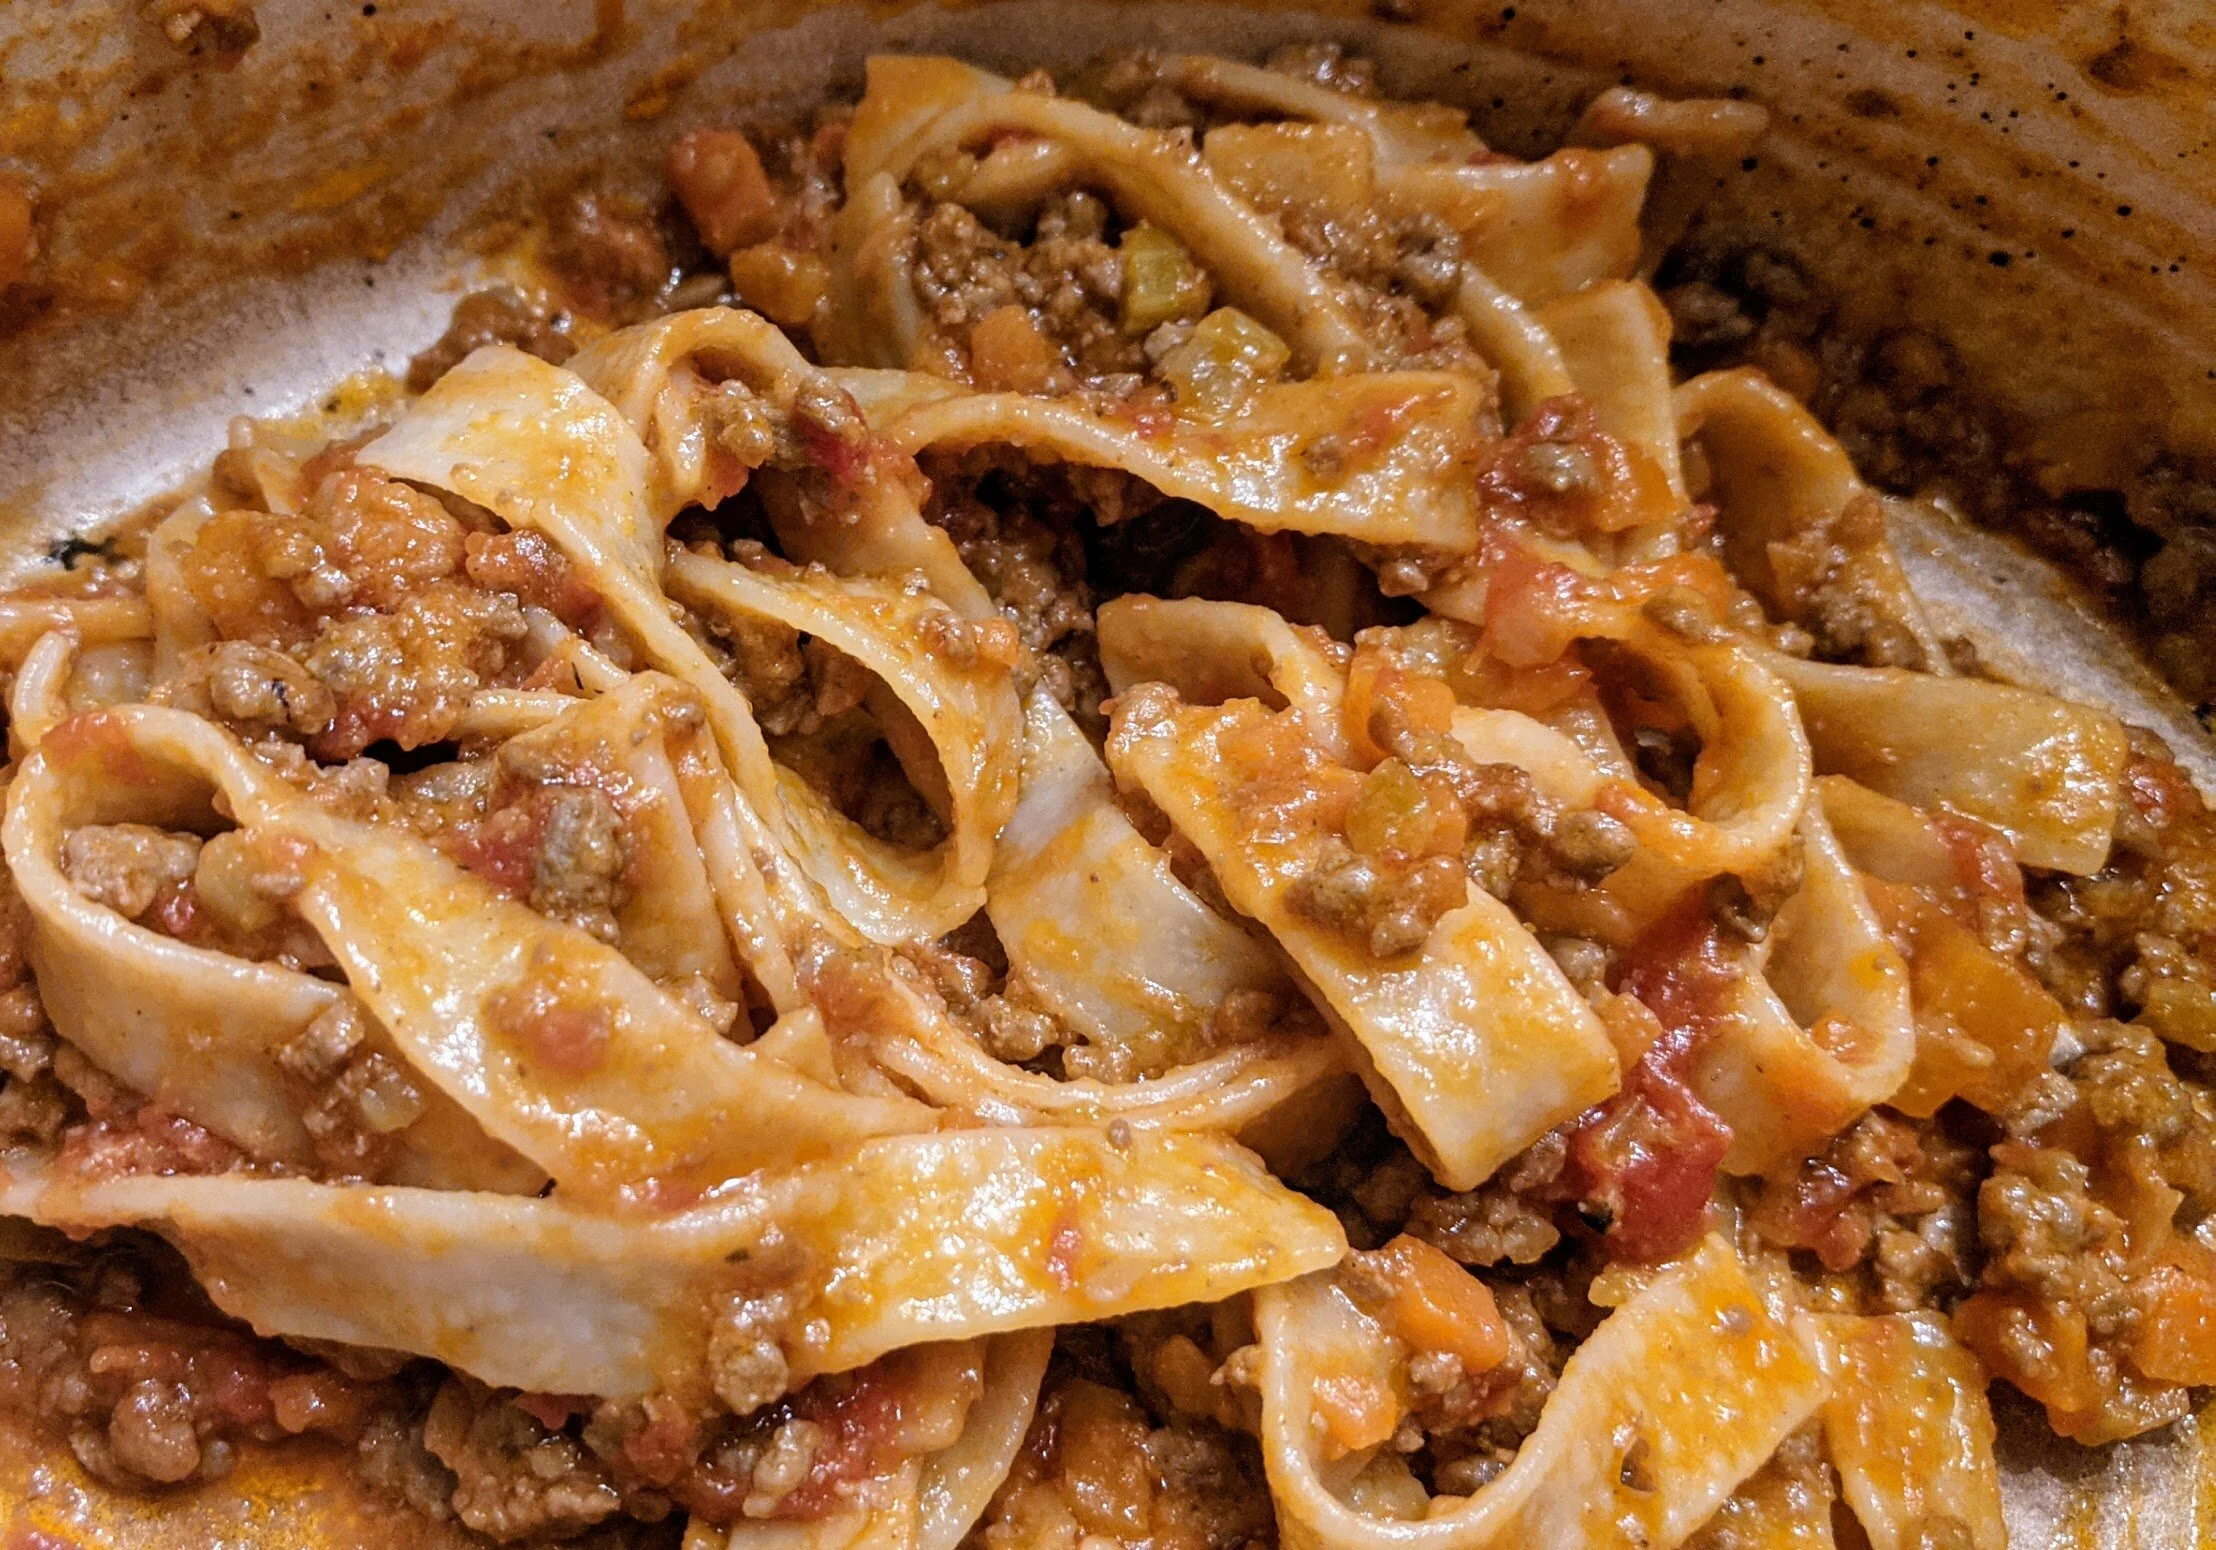
Marcella Hazan’s Bolognese
My one year old will try and mostly eat just about anything so far — she likes pickles, she’s ravenous for beets, she thinks broccoli is great, she devours sourdough like a fiend. But she is picky in terms of quality. She won’t eat bits and pieces of cobbled together leftovers, she knows and handily rejects beans that are stale, she notices if her food is different from the adults’. Purees are out of the question (even mashed potatoes are too suspiciously like baby food for her taste).
Even with all of her food enthusiasm, I have never, ever, seen her eat with as much gusto as she ate Marcella Hazan’s bolognese.

My one year old will try and mostly eat just about anything so far — she likes pickles, she’s ravenous for beets, she thinks broccoli is great, she devours sourdough like a fiend. But she is picky in terms of quality. She won’t eat bits and pieces of cobbled together leftovers, she knows and handily rejects beans that are stale, she notices if her food is different from the adults’. Purees are out of the question (even mashed potatoes are too suspiciously like baby food for her taste).
Even with all of her food enthusiasm, I have never, ever, seen her eat with as much gusto as she ate Marcella Hazan’s bolognese. (Close second: this beef stew.) Between industrious slurps, punctuated by “MMM”s, there was impatient huffing and flailing fists while she waited for her fork to be loaded. She is head over heels for this dish, and with good reason: it’s delish.


This is a pretty straightforward bolognese: a soffritto (carrot, onion, celery sauté) base with ground beef gently simmered in milk and then tomatoes. It requires patience - this isn’t a difficult dish in terms of chopping or technique, but it is absolutely a waiting game. Make sure you let the milk fully evaporate before adding the tomatoes, and then let those tomatoes just barely bubble all afternoon. The wait is so worth it for the outcome: creamy, decadently rich sauce tossed with steaming pasta.

Marcella Hazan’s Bolognese
Time: 1 hour active, several hours simmering || Servings: 6 || Source: Essentials of Classic Italian Cooking by Marcella Hazan
Vegetable oil - 1 tbsp
Butter - 4 tbsp
Onion - 1/2 cup, chopped
Celery - 2/3 cup, chopped
Carrot - 2/3 cup, chopped
Ground beef chuck - 3/4 lb (a higher fat content will make a sweeter sauce)
Whole milk - 1 cup
Whole nutmeg, for grating
White wine - 1 cup
Canned tomatoes - 1 1/2 cup, cut up or crushed with their juices
Pasta - 1 1/2 pounds, typically tagliatelle
Parmesan for garnish
Salt & pepper
In a dutch oven or other heavy bottomed pot, heat the oil and butter over medium. Place the onion in the pot and cook until tender and translucent, about 10 minutes. Add celery and carrot and cook for an additional 2 minutes, stirring.
Add the ground beef, a large pinch of salt (don’t be shy), and several grinds of pepper. The salt will help to release the juices of the beef, dispersing flavor into the sauce. Break up the beef as it cooks, until it’s started to brown - some pinkness is fine.
Add the milk. Simmer, stirring regularly, until the milk has simmered away completely. This will take time - as long as 20 minutes in my experience. If you keep the heat low, you can just stir now and then as you pass through the kitchen, perhaps opening and sipping the wine you’re about to use. When the milk has evaporated, add a few gratings of nutmeg to the pot and stir.
Add the wine and, as with the milk, let it simmer until evaporated.
Add the tomatoes to the pot. Rather than chop them, I usually crush them with my hands as they go into the pot. Stir thoroughly, then bring to a lazy, barely bubbling simmer. Cook, uncovered, for a minimum of 3 hours and longer if you have time - up to 5, 6 hours. (You can shut off the heat and resume cooking again later within the same day if you don’t have several continuous hours to keep an eye on it.) Stir every once in a while, adding 1/2 cup water if the sauce looks dry; typically, I have to do this a few times over the course of cooking. When you’re ready to take the sauce off of the heat, make sure all of the water has evaporated. Toss with cooked, drained pasta (tagliatelle is classic) and one tablespoon of butter. Serve with parmesan cheese on the side.
This sauce works well made a few days ahead and freezes well - if cold, simmer for 15 minutes before using.

Beef Stew
I can’t say enough about this beef stew from Alice Waters. This is a winter staple in my home because it’s simply delicious. A typical beef stew, in my experience, is thick with potatoes and peas. This is not that stew. This has savory tender beef, time-mellowed garlic, sweet onions, carrots, and tomatoes, spiced cloveyness (new word), orange brightness. I’ve been making this stew for years, and I still find myself stealing tastes checking the quality while it simmers all afternoon. And, although this a generously sized stew, I’ve learned not to expect much in the way of leftovers.

I can’t say enough about this beef stew from Alice Waters. This is a winter staple in my home because it’s simply delicious. A typical beef stew, in my experience, is thick with potatoes and peas. This is not that stew. This has savory, tender beef, time-mellowed garlic, sweet onions, carrots, and tomatoes, spiced cloveyness (new word), orange brightness. I’ve been making this stew for years, and I still find myself stealing tastes checking the quality while it simmers all afternoon. And, although this a generously sized stew, I’ve learned not to expect much in the way of leftovers.


I’d recommend using high quality beef stock, homemade if possible… but the honest truth is I’ve used both amazingly good stock and, in a pinch, so-so stock filled out with water and this always turns out amazing. The flavors here are solid, in part because Alice recommends you sear everything before you toss it in the pot. It’s a little extra work, but it makes a difference — instead of muddled flavors, you get depth and nuttiness from the browning. If you use a cast iron, you can deglaze (and sip) with some red wine, then just wipe it out and move on with your life, making this an almost-one-pot recipe.


I’m including the recipe as Alice designed it here, but I find that I skimp at the beginning and end of the recipe. Very rarely do I render the bacon or add raw garlic as a garnish. I’ve tried both, and they’re great - but sometimes I just don’t have bacon on hand and quite often I’m too impatient to chop garlic before digging into my bowl. One thing I am loyal to is the orange peel; it’s small but adds significant brightness to the dish.
Beef Stew
Time: 1 hour active, 2-3 hours simmering || Servings: 4 || Source: The Art of Simple Food by Alice Waters
Beef chuck - 3 pounds, cut into 1.5 inch cubes
Olive oil - 2 tbsp
Bacon - 3 slices, cut into 1/2 inch pieces (optional)
Onions - 2, peeled and quartered
Cloves - 2, stuck into onion quarters
Carrots - 2, cut into 2 inch pieces
Thyme, savory, parsley - 2 sprigs each
Bay leaf - 1
Peppercorns - a few, 5ish
Red wine - 1 3/4 cup
Diced tomatoes - 3, fresh or canned
Garlic - 1 small head, peeled and roughly chopped, plus a couple more finely chopped
Parsley - 1 tbsp, chopped
The day before you plan to cook, salt the beef generously and refrigerate.
Pull out a cast iron or other heavy bottomed pan and place it over medium-high heat. Also pull out a dutch oven or braising dish and place nearby. You’ll be cooking ingredients in the cast iron and then transferring them to the dutch oven to braise into deliciousness.
Put olive oil into the cast iron. When it shimmers but isn’t smoking, add bacon, if using, and cook until the fat has rendered and it’s lightly brown but isn’t crispy. Remove from cast iron and place in dutch oven.
Place beef cubes in the cast iron without crowding. You’ll probably need to cook the beef in multiple batches. Turn beef every few minutes until browned on all sides. The beef will not be fully cooked; it’ll cook through when it’s braising. When browned, transfer beef to the dutch oven.
Turn down the heat. Pour off most of the fat from the cast iron, leaving a thin layer; add more oil if the pan is dry. Add onion, cloves, carrots, herb sprigs, bay leaf, and peppercorns to pan and cook until lightly browned, turning every now and then. This is just for additional flavor - they’ll get plenty of cooking time as they braise. When lightly browned, transfer to dutch oven.
Raise the heat to high. Pour red wine into the cast iron and let it bubble down by two-thirds. While it’s boiling, use a wooden spoon to scrape up all the yummy bits stuck to the bottom of the pan. When reduced, pour into the dutch oven over the beef and vegetables.
Add the tomatoes, roughly chopped garlic, orange zest, and stock to the dutch oven. The liquid should come at least three-quarters of the way up the beef and vegetables. If not, add more - water is fine if you don’t have more stock on hand.
Bring the stew to a simmer and cover. At this point, you can reduce the heat and let it barely simmer on the stovetop, or transfer to a 325° oven. Let stew barely simmer for 2-3 hours, checking occasionally to make sure the heat isn’t too high and to add more liquid if needed.
When the beef is tender and your home smells amazing, remove the stew from the heat. Allow to sit for a few minutes so the fat will settle on top, then skim as well as you can. If you can fish them out, discard the bay leaf, cloves, and peppercorns (I usually just warn eaters and let them gamble with getting a spicy bite). Taste and add salt if needed. Garnish with parsley and finely chopped garlic, and then tuck in.
Variation: You can make this as a pot roast by keeping the meat whole and cooking for an additional hour. In this case, the liquid only needs to come halfway up the beef and vegetables.

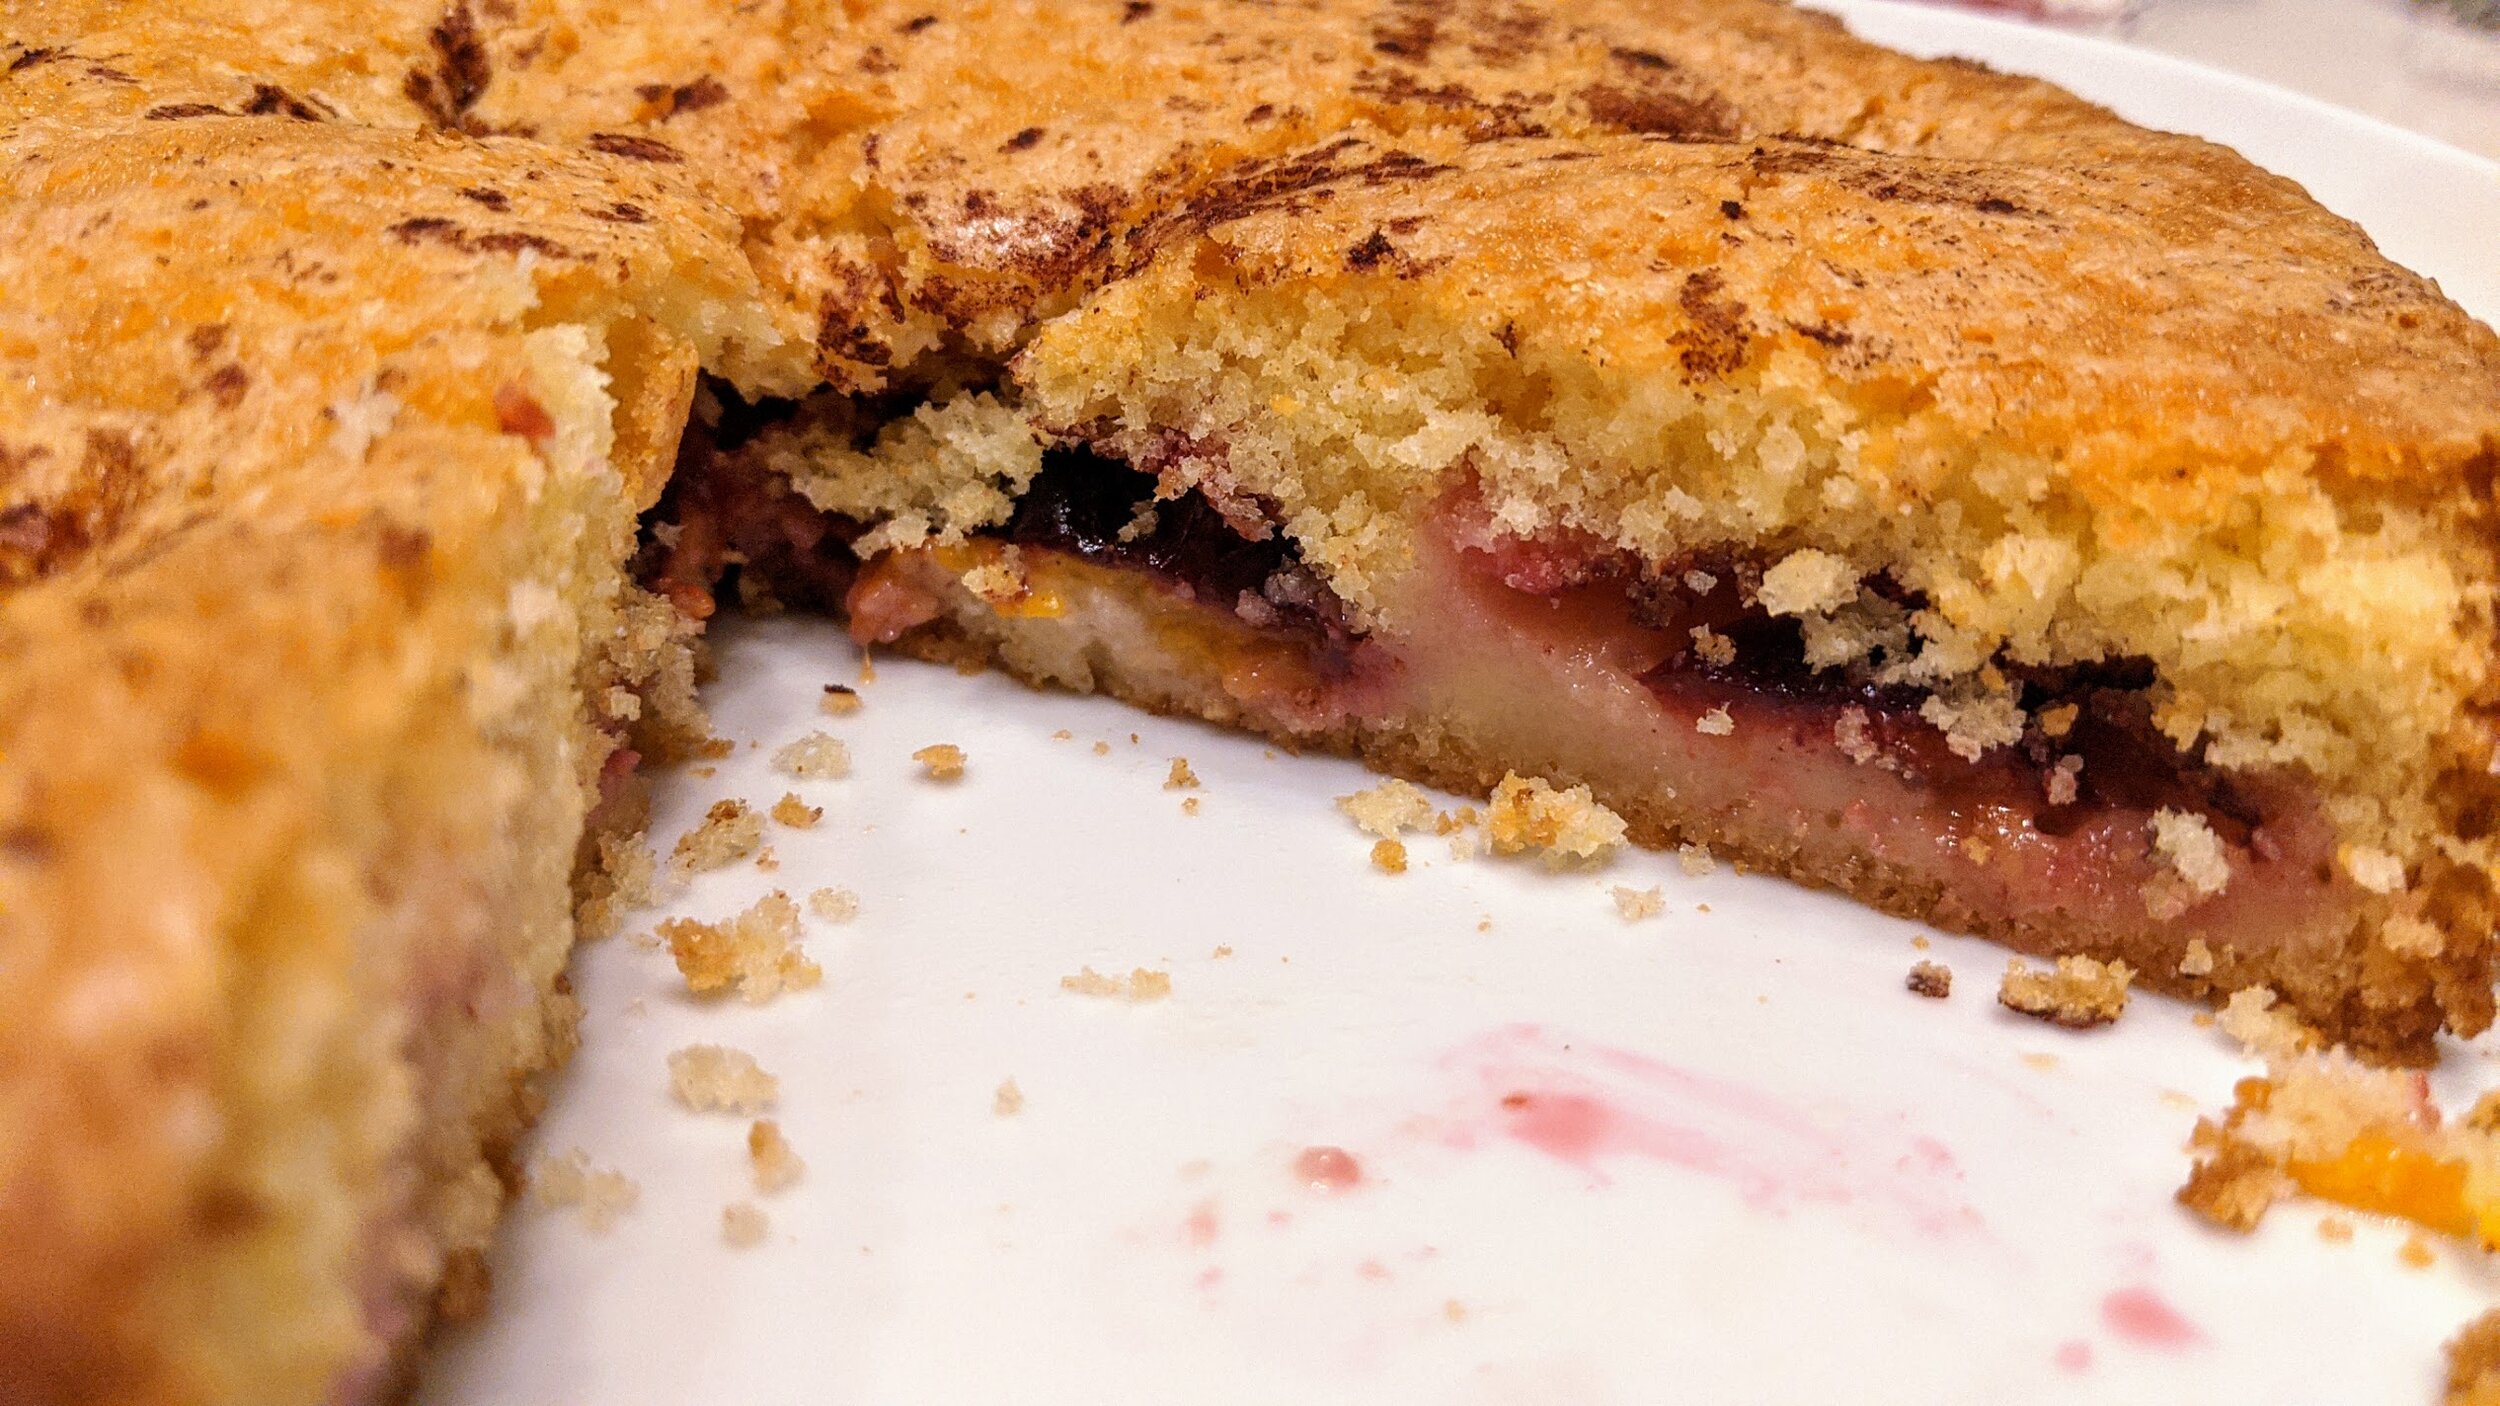
Plum Torte
As a baker, there are two things I absolutely love: 1) a recipe simple enough that I can remember it, not in small part because it makes me feel like a bonafide baker and not a hobbyist, and 2) a gorgeous end product that makes people think it took me all day to make it. Finding both of those things in a single recipe is kind of amazing.

As a baker, there are two things I absolutely love: 1) a recipe simple enough that I can remember it, not in small part because it makes me feel like a bonafide baker and not a hobbyist, and 2) a gorgeous end product that makes people think it took me all day to make it. Finding both of those things in a single recipe is kind of amazing.
It’s no surprise that, meeting both of these criteria, Marian Burros’s recipe for a gorgeous plum torte has been printed in the New York Times annually since 1983. It’s absolutely delicious and forgivingly versatile - any seasonal fruit will work with this beautiful batter, and you can mix up the spices or add herbs to suit your tastes and your pantry. Ms. Burros calls for an 8", 9”, or 10” pan and you don’t even have to grease it!


The most effort you have to put into this recipe is halving the plums. Look for the indent along the side of the plum, and run your knife along that until you’ve gone around the whole plum. Twist the two halves, and the plum will come apart. The pit should be in one half, flat side facing you. Wiggle a knife underneath the pit to remove it - or go crazy and use your fingers to pry it out.
I hope you can take a few minutes to make this incredibly easy classic dessert (…or breakfast?) to welcome the autumn season.
Plum Torte
Time: 15 minutes active, 1 hour baking || Servings: 8 || Source: Marian Burros, New York Times
Sugar - 3/4 cup
Unsalted butter - 1/2 cup (one stick), room temperature
All purpose flour - 1 cup
Baking powder - 1 tsp
Eggs - 2
Purple plums - 24, halved and pitted
Lemon juice, sugar, and cinnamon for topping
Heat oven to 350°F.
In a large bowl, cream together the butter and sugar. Sift in the flour, then add baking soda, eggs, and a pinch of salt. Mix well.
Pour batter into a springform pan between 8 and 10 inches and smooth. No need to grease the pan.
Top batter with plums as densely as possible. With a 10 inch pan, I didn’t use all 24 plums (which was great, I made a second torte!). Sprinkle the top with lemon juice, sugar, and up to a teaspoon of cinnamon. If your plums are very sweet, you may want more lemon juice and less sugar; if they are tart, you may want more sugar and less lemon juice.
Bake torte for 1 hour, checking in the last ten minutes. It’s done when it’s lightly browned and the plums are jammy and sunk into the cake. Cool and remove from pan. Serve warm or at room temperature. This also freezes well; reheat at 300°F for 10-15 minutes.

Simple Kale Salad
One of the reasons I really enjoy having a farm share is that it pushes me to eat foods I would normally avoid because I’m not familiar with how to treat them, or I’ve had a bad experience, or they’re just not on my radar. Kale’s definitely on my radar — it was THE thing to eat before cauliflower and after toasts, I think, right? But I have definitely had some bad experiences with it (steaming and smoothies come to mind) and I haven’t really dug into the right way to prepare it with confidence.

One of the reasons I really enjoy having a farm share is that it pushes me to eat foods I would normally avoid because I’m not familiar with how to treat them, or I’ve had a bad experience, or they’re just not on my radar. Kale’s definitely on my radar — it was THE thing to eat before cauliflower and after toasts, I think, right? But I have definitely had some bad experiences with it (steaming and smoothies come to mind) and I haven’t really dug into the right way to prepare it with confidence.
Cut to four weeks of enormous kale bunches from the farm share and me standing in my kitchen with a question mark over my head. As we enter autumn, I see that kale is going to need to enter my repertoire.
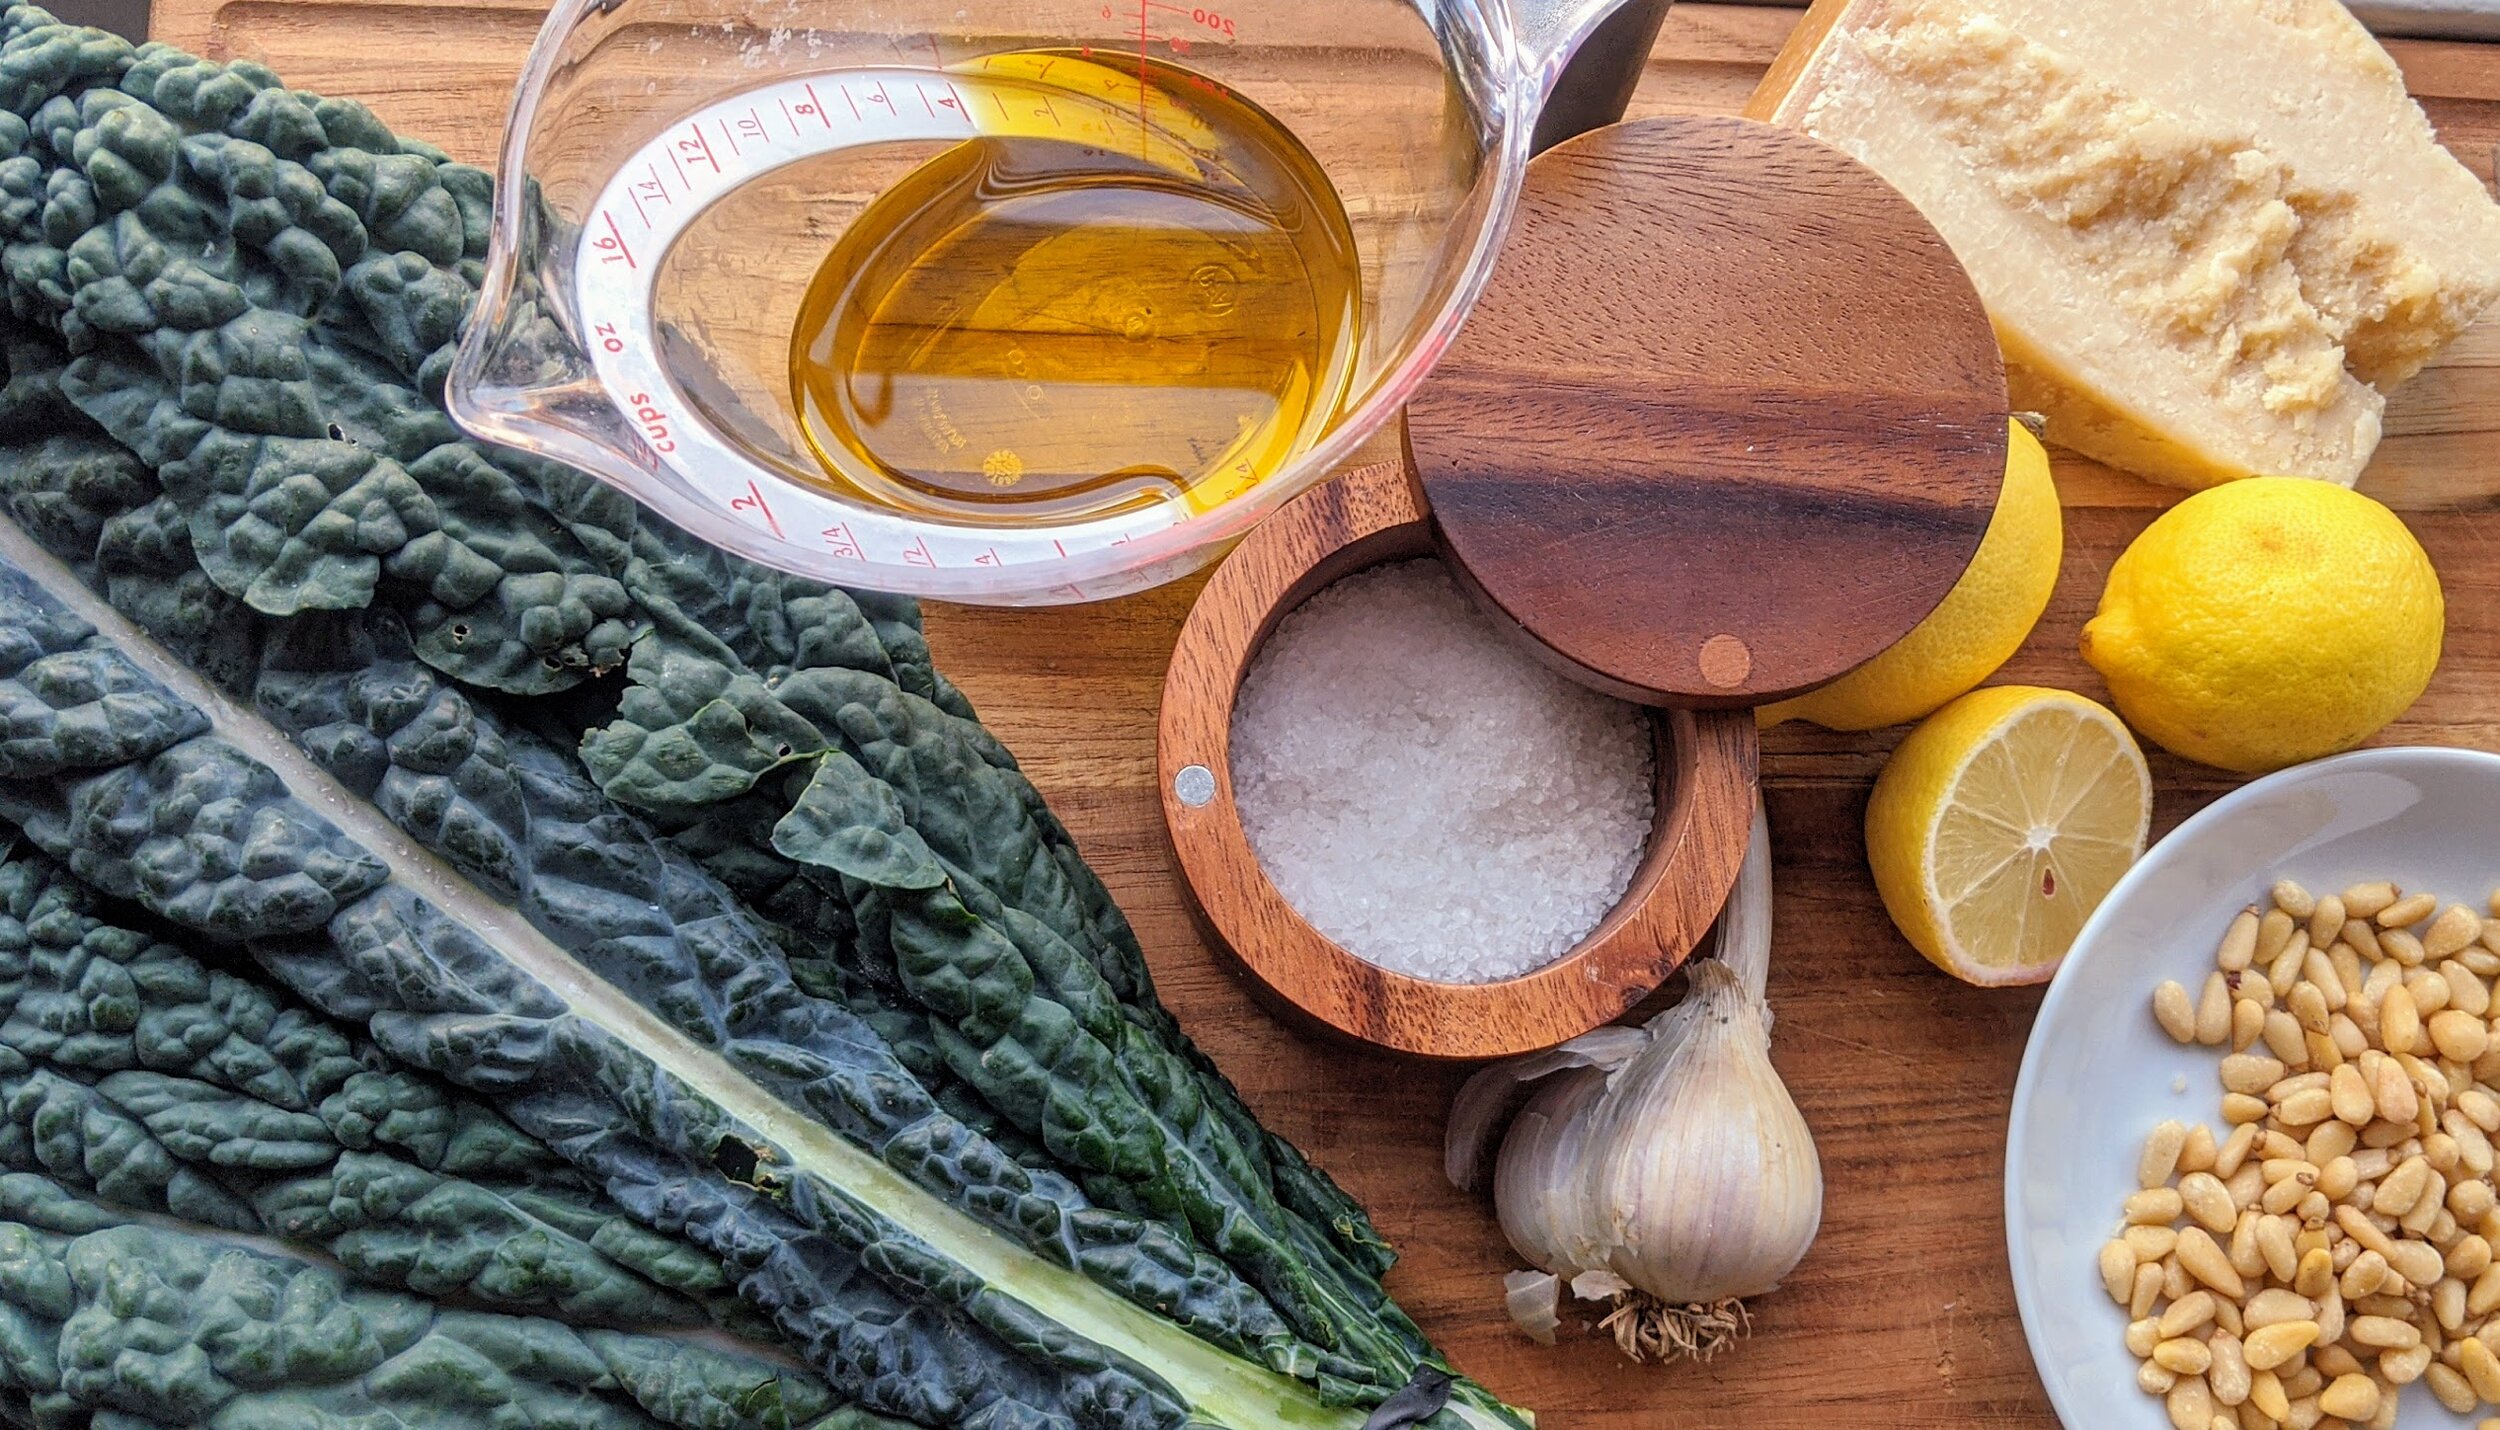
I found an abundance of kale salad recipes that I’ve riffed on and hybridized here to create a very simple and delicious salad. The kale is destemmed and sliced finely into a slaw, which mitigates the fibrousness of the leaf. The dressing leans heavily on acid, which helps the tough leaf break down, and the bright lemon and sharp garlic flavors stand up to the kale. Pine nuts add crunch and, of course, a shower of parmigiano reggiano adds umami deliciousness.


I have found this to be quite filling on its own, but I’ve also been serving it frequently with this gazpacho as a no-cook meal solution.
Simple Kale Salad
Servings: 2 large salads || Time: 15 minutes || Source: many many kale salad recipes
Lemon - 1
Olive oil - 1/2 cup
Garlic - 1
Pine nuts - 2 tbsp
Kale - 1 bunch, washed
Parmesan (Parmigiano-Reggiano)
Over a small bowl, zest the lemon. Slice and squeeze the lemon juice into the same bowl. Add a generous pinch of salt and pepper. Whisk in about 1/3 cup of the olive oil, pouring slowly so that it emulsifies. Taste - the lemon flavor should be sharp, but not pucker-your-lips tart. Whisk in more olive oil as needed to reduce tartness and round out the dressing. Crush and peel the garlic clove and add to dressing (no need to chop; you’ll remove this before serving). Set aside to let the garlic infuse into the dressing.
Toast pine nuts in a small, dry skillet over medium-low heat. Keep a close eye and shake the pan from time to time to toast evenly and avoid burning. You’ll be able to smell them as they release oils and start to toast. Once toasted, remove from heat and set aside to cool.
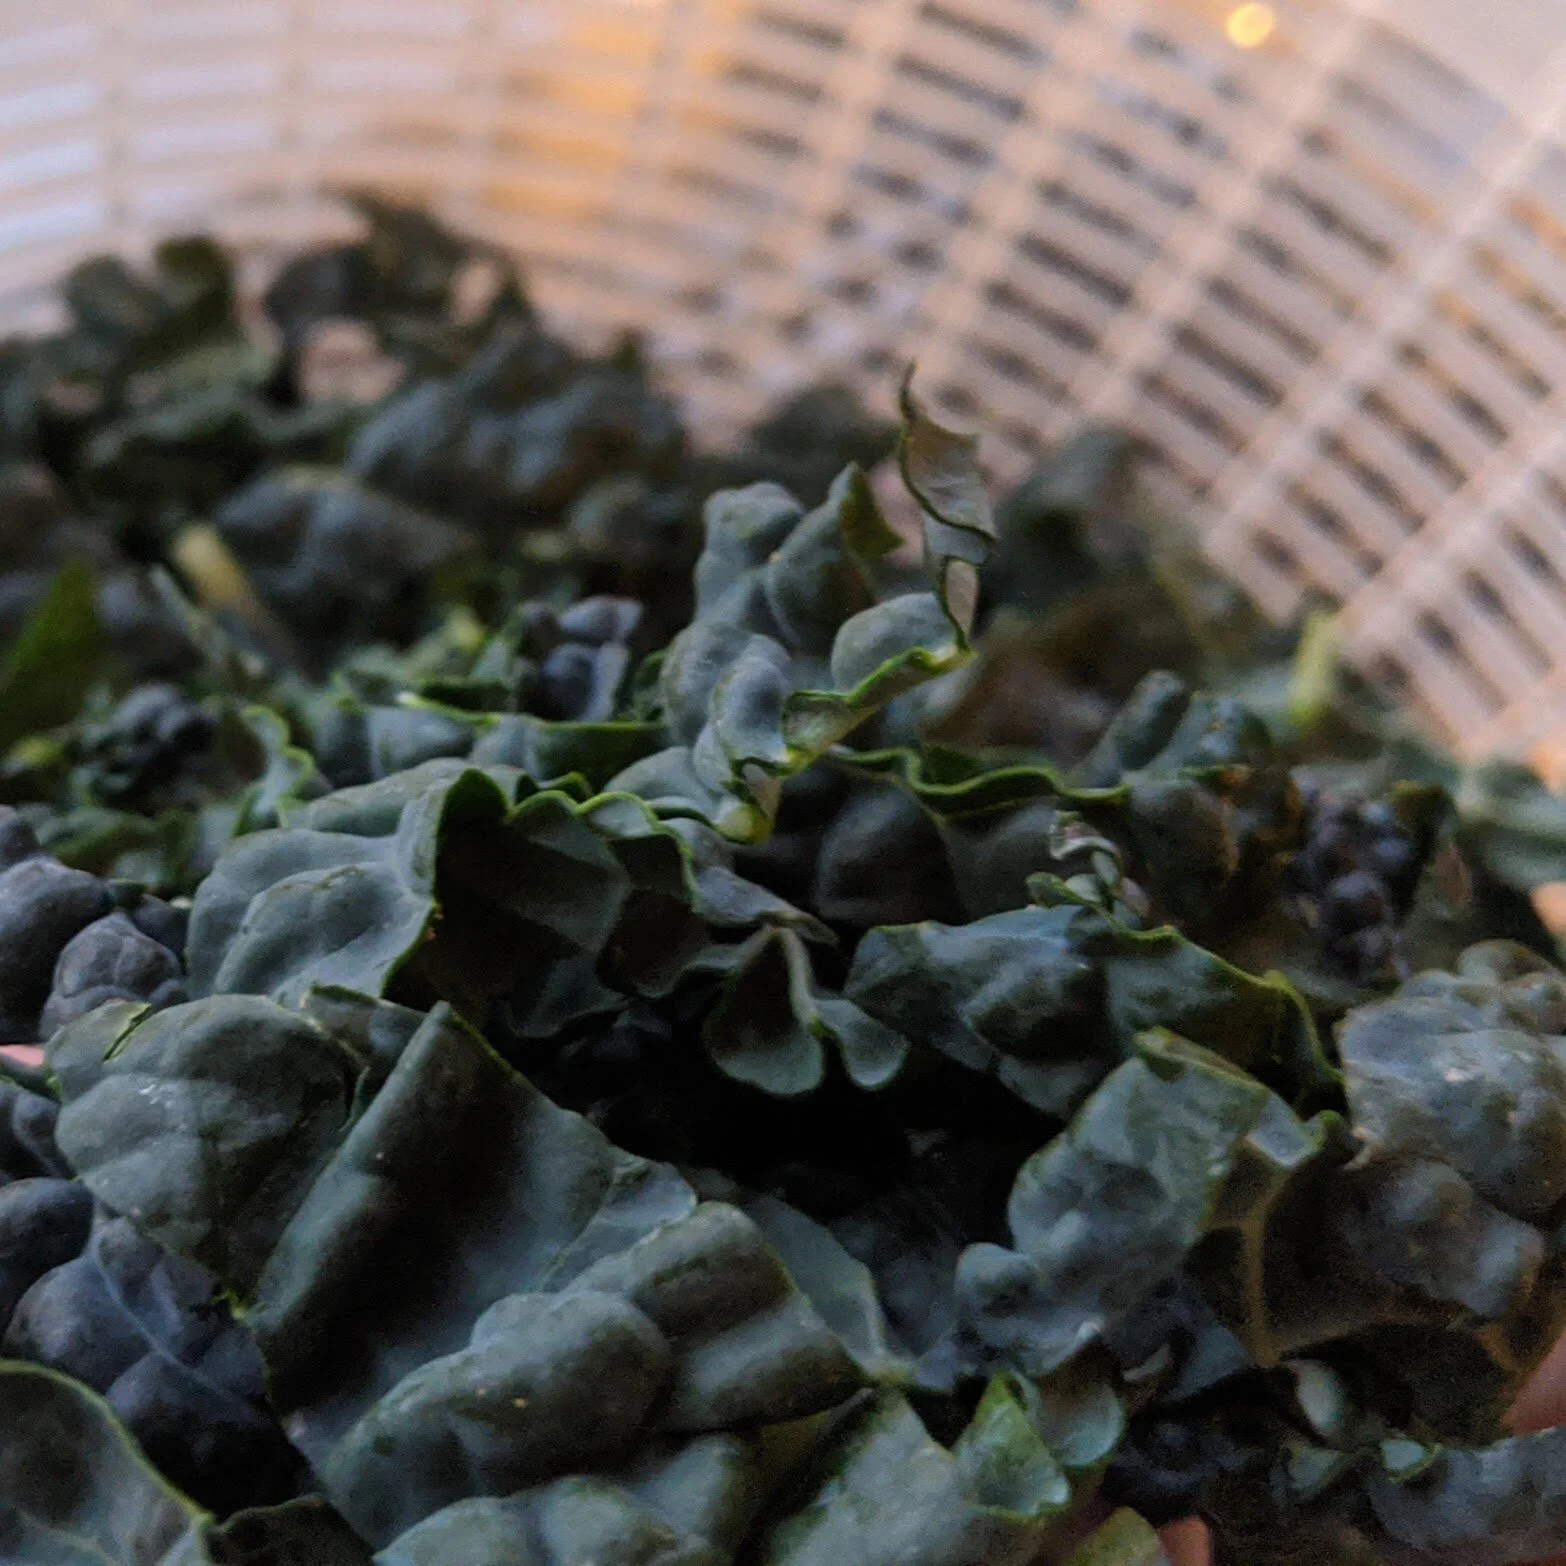
Remove the tough parts of the stems from the kale leaves by slicing along the rib with a sharp knife. There’s no need to remove the smaller, more tender stems at the top of the leaves. Pile kale leaves on top of each other and slice thinly across the leaf to create strips, something like a kale slaw. This doesn’t need to be perfect.
Place kale slaw in a large bowl. Grate up to half a cup of Parmesan over the kale. Scatter pine nuts over the top, then toss ingredients together to mix. Remove garlic cloves from dressing and drizzle over the kale, reserving a couple of tablespoons. Toss the salad together; add more dressing if needed.
Serve, topped with more parmesan if desired.

Gazpacho
We’re having a last sigh of summer this week in NYC and, with my windows open and a warm breeze coming through, I couldn’t help using my late season tomatoes to make gazpacho one last time.

We’re having a last sigh of summer this week in NYC and, with my windows open and a warm breeze coming through, I couldn’t help using my late season tomatoes to make gazpacho one last time.

I’ve made gazpacho before, tried a few different recipes, but it never quite hit for me. There are a lot of gazpacho fanatics, and I just didn’t get it - it’s like cold tomato soup… so what? It wasn’t until this summer that I discovered Julia Moskin’s ‘Best Gazpacho’ recipe and found myself making it on repeat. It’s creamy and smooth, salty and refreshing, filling but oh-so-light. Not to mention it’s packed with good-for-you vegetables, which just feels like having your cake and eating it, too.


I would have been willing to do a lot of work for all that reward, but the absolute best part about this recipe is that it is so ridiculously easy it feels a little boastful to claim it’s cooking at all. The chopping is chunky sloppy, and all you need is a food processor or blender; the stove doesn’t turn on AT ALL.
This recipe calls for a half cup of olive oil, plus more drizzled on top. Use it. All of it. The olive oil gets emulsified in with the vegetables - very much like whisking in olive oil when you’re making a dressing - and it’s the secret to this creamy, decadent, blow your mind soup. Use fresh olive oil (within two years of harvest) if possible, it makes a difference.


Serve the gazpacho in chilled bowls or glasses, as is or topped with something crunchy (I like chopped cucumbers and tomatoes, and definitely toasted bread crumbs). This makes a filling lunch on its own or a heartier meal with some bread and a salad.
Best Gazpacho
Servings: 8-12, ~1 quart. || Time: 20 minutes, plus chilling time || Source: Julia Moskin, New York Times
Tomatoes, ripe - 2lbs
Pepper - 1, ideally cubanelle or Anaheim, but a red or green bell pepper will do in a pinch
Cucumber - 1
Onion - 1 small white or red
Garlic - 1 clove
Sherry vinegar - 2 tsp
Extra virgin olive oil - 1/2 cup, plus more to drizzle
Core the tomatoes and the pepper, making sure to remove all the pepper seeds. Peel the cucumber, onion, and garlic. Cut all of the vegetables into rough chunks and place in a food process or blender. You may need to do this in a couple of batches to avoid overfilling your device; respect the fill line! You can also do this with a hand blender in a deep bowl to avoid splashing.
Pulse the blender a couple of times to bring the volume down a bit, and then blend on high for a couple of minutes until the mixture is very smooth. Scrape down the sides as needed to get everything well blended. With the motor still running, add the salt and sherry vinegar. Slowly drizzle in the olive oil. The olive oil should emuslify and the mixture get lighter in color (pinker or orange); if it seems thin, add a bit more olive oil until you achieve a creamy texture.
Run the soup through a food mill on the finest plate or a fine strainer. If using a strainer, you may need to use a spatula to push the liquid through.
Store soup in a glass container and chill. I find a few hours in the refrigerator is sufficient, but in a shorter time frame (surprise gazpacho night!) I find an hour or so in the freezer to do the trick. Place bowls or glasses you’ll eat from in the refrigerator to chill in the meantime.
When ready to serve, ladle soup into chilled bowls or glasses. Drizzle with olive oil and, if desired, top with lightly salted chopped vegetables or croutons.

Omelettes
Folks, we’ve had a breakthrough. My amazing, darling, spectacular daughter slept through the night last night. After months of groggy, delirious mornings with conversation limited to grunts, it was like the sun peeked through the clouds. There’s an end in sight! In a 2020 that’s been dark in so many ways, this small but critical change was quite possibly the best thing that’s happened to my family in months. Breakfast for us has been recently restricted to whatever is quick, straightforward, and goes with coffee — generally the realm of yogurt, oatmeal, and bagels. But I was in such a good mood this morning that I decided to go big for breakfast: omelettes.

Folks, we’ve had a breakthrough. My amazing, darling, spectacular daughter slept through the night last night. After months of groggy, delirious mornings with conversation limited to grunts, it was like the sun peeked through the clouds. There’s an end in sight! In a 2020 that’s been dark in so many ways, this small but critical change was quite possibly the best thing that’s happened to my family in months. Lately, breakfast for us has been restricted to whatever is quick, straightforward, and goes well washed down with a gallon of coffee — generally the realm of yogurt, oatmeal, and bagels. But I was in such a good mood this morning that I decided to go big for breakfast: omelettes.


There was a time several months ago when I made omelettes almost daily for breakfast or lunch. I was on a mission to perfect my omelette-making technique, which isn’t that difficult but definitely takes some experience to know when the eggs are looking right. I’d greedily store up the odds and ends from dinner - onion ends, the tiny bit of scallion that didn’t get used, pepper scraps - for the omelette filling.
I remember reading somewhere (Julia Child, queen of omelettes, comes to mind as a possible source) that the best way to learn to make an omelette is to have someone show you how. I use maybe a less than perfect technique, especially if you compare it to Julia’s, but it works for me, and there’s never much left on the plate after a meal. That seems like success to me.


I generally use two eggs per omelette, which is typically enough with fillings and some toast. To do this right, you need a decent non-stick pan. Mine is 10 inches, so my omelettes come out a little thinner and more delicate than they would in a more typical 8 or 9 inch pan, but I like them that way. The only other tool you need is a rubber spatula so that you don’t harm your pan and so you can easily slide under the omelette to lift it. And butter.
Once you get the hang of it, omelettes are a pretty quick breakfast, lunch, or dinner. But they feel kind of special compared to cereal, and your fellow diners will definitely be impressed by your kitchen skills.

Despite my full night of sleep (bliss), I went lazy - a.k.a. no-cook - on the filling. Goat cheese and chives is classic, delicious, and easy - but use whatever you have hanging around. Ready?
Omelettes
Servings: 1 || Time: 10 mins || Inspiration: A full night of sleep
Butter - 1 tbsp
Eggs - 2, whisked until just combined
Salt & pepper
Filling of your choice - in this case, 1 tbsp goat cheese and chives
Prepare your filling - in this case, get out your goat cheese and chives. Take a sip of coffee or beverage of choice (no judgement).
Heat butter in 8, 9, or 10 inch non-stick pan over medium heat until it foams.
Get your spatula ready, and pour eggs into the pan. Turn heat to low. Immediately stir eggs in a steady figure-8 pattern until they begin to set, about two minutes. You may need to push the sides down to avoid crispy thin egg edges. Once egg begins to set, stop stirring the eggs - if you keep going, you’ll have delicious scrambled eggs, but not an omelette.
Continue cooking eggs over low until the top is somewhat moist but no longer wet - the eggs shouldn’t run when you tilt the pan. (If they do, lift the edge of the omelette and tilt the pan to allow the wet egg on top to slide under the cooked egg.) Turn off the heat.
Slide a spatula under the omelette to ensure it’s loose from the pan. Season with salt and pepper.
About a third of the way into the egg disc, perpendicular to the pan handle, create a line of filling. Lay down the goat cheese, and then snip chives over the top. With a nonstick spatula, tip the edge of the eggs closest to the handle over the filling. Roll one more time, until you have a little omelette roll with a lip.
Tilt pan over a plate and, using your spatula, roll omelette a final time off the pan and onto the plate. Top lightly with butter (for shine, if you want to get fancy) and season with salt and pepper.

Fresh Tomato Sauce
Summer is dwindling away and I am so excited for all the amazing fall produce that’s coming our way. I got some insanely good Wildfire Gala apples in my farm share (fun fact: these are one of the first apple varieties of the season). A little apple crisp à la Bittman combined with a drop in temperature was just what I needed to get me in the mood for autumn.

Summer is dwindling away and I am so excited for all the amazing fall produce that’s coming our way. I got some insanely good Wildfire Gala apples in my farm share (fun fact: these are one of the first apple varieties of the season). A little apple crisp à la Bittman combined with a drop in temperature was just what I needed to get me in the mood for autumn.
But before we kick summer to the curb, it’s time for a last hurrah with gorgeous late-season tomatoes. Those tomatoes have been so good to us all summer - sliced and salted with some olive oil (or not); chunkily chopped on bread with lettuce and mayo, maybe some bacon, because bacon; diced with garlic and basil for easy peasy bruschetta… I might just shed a tear.


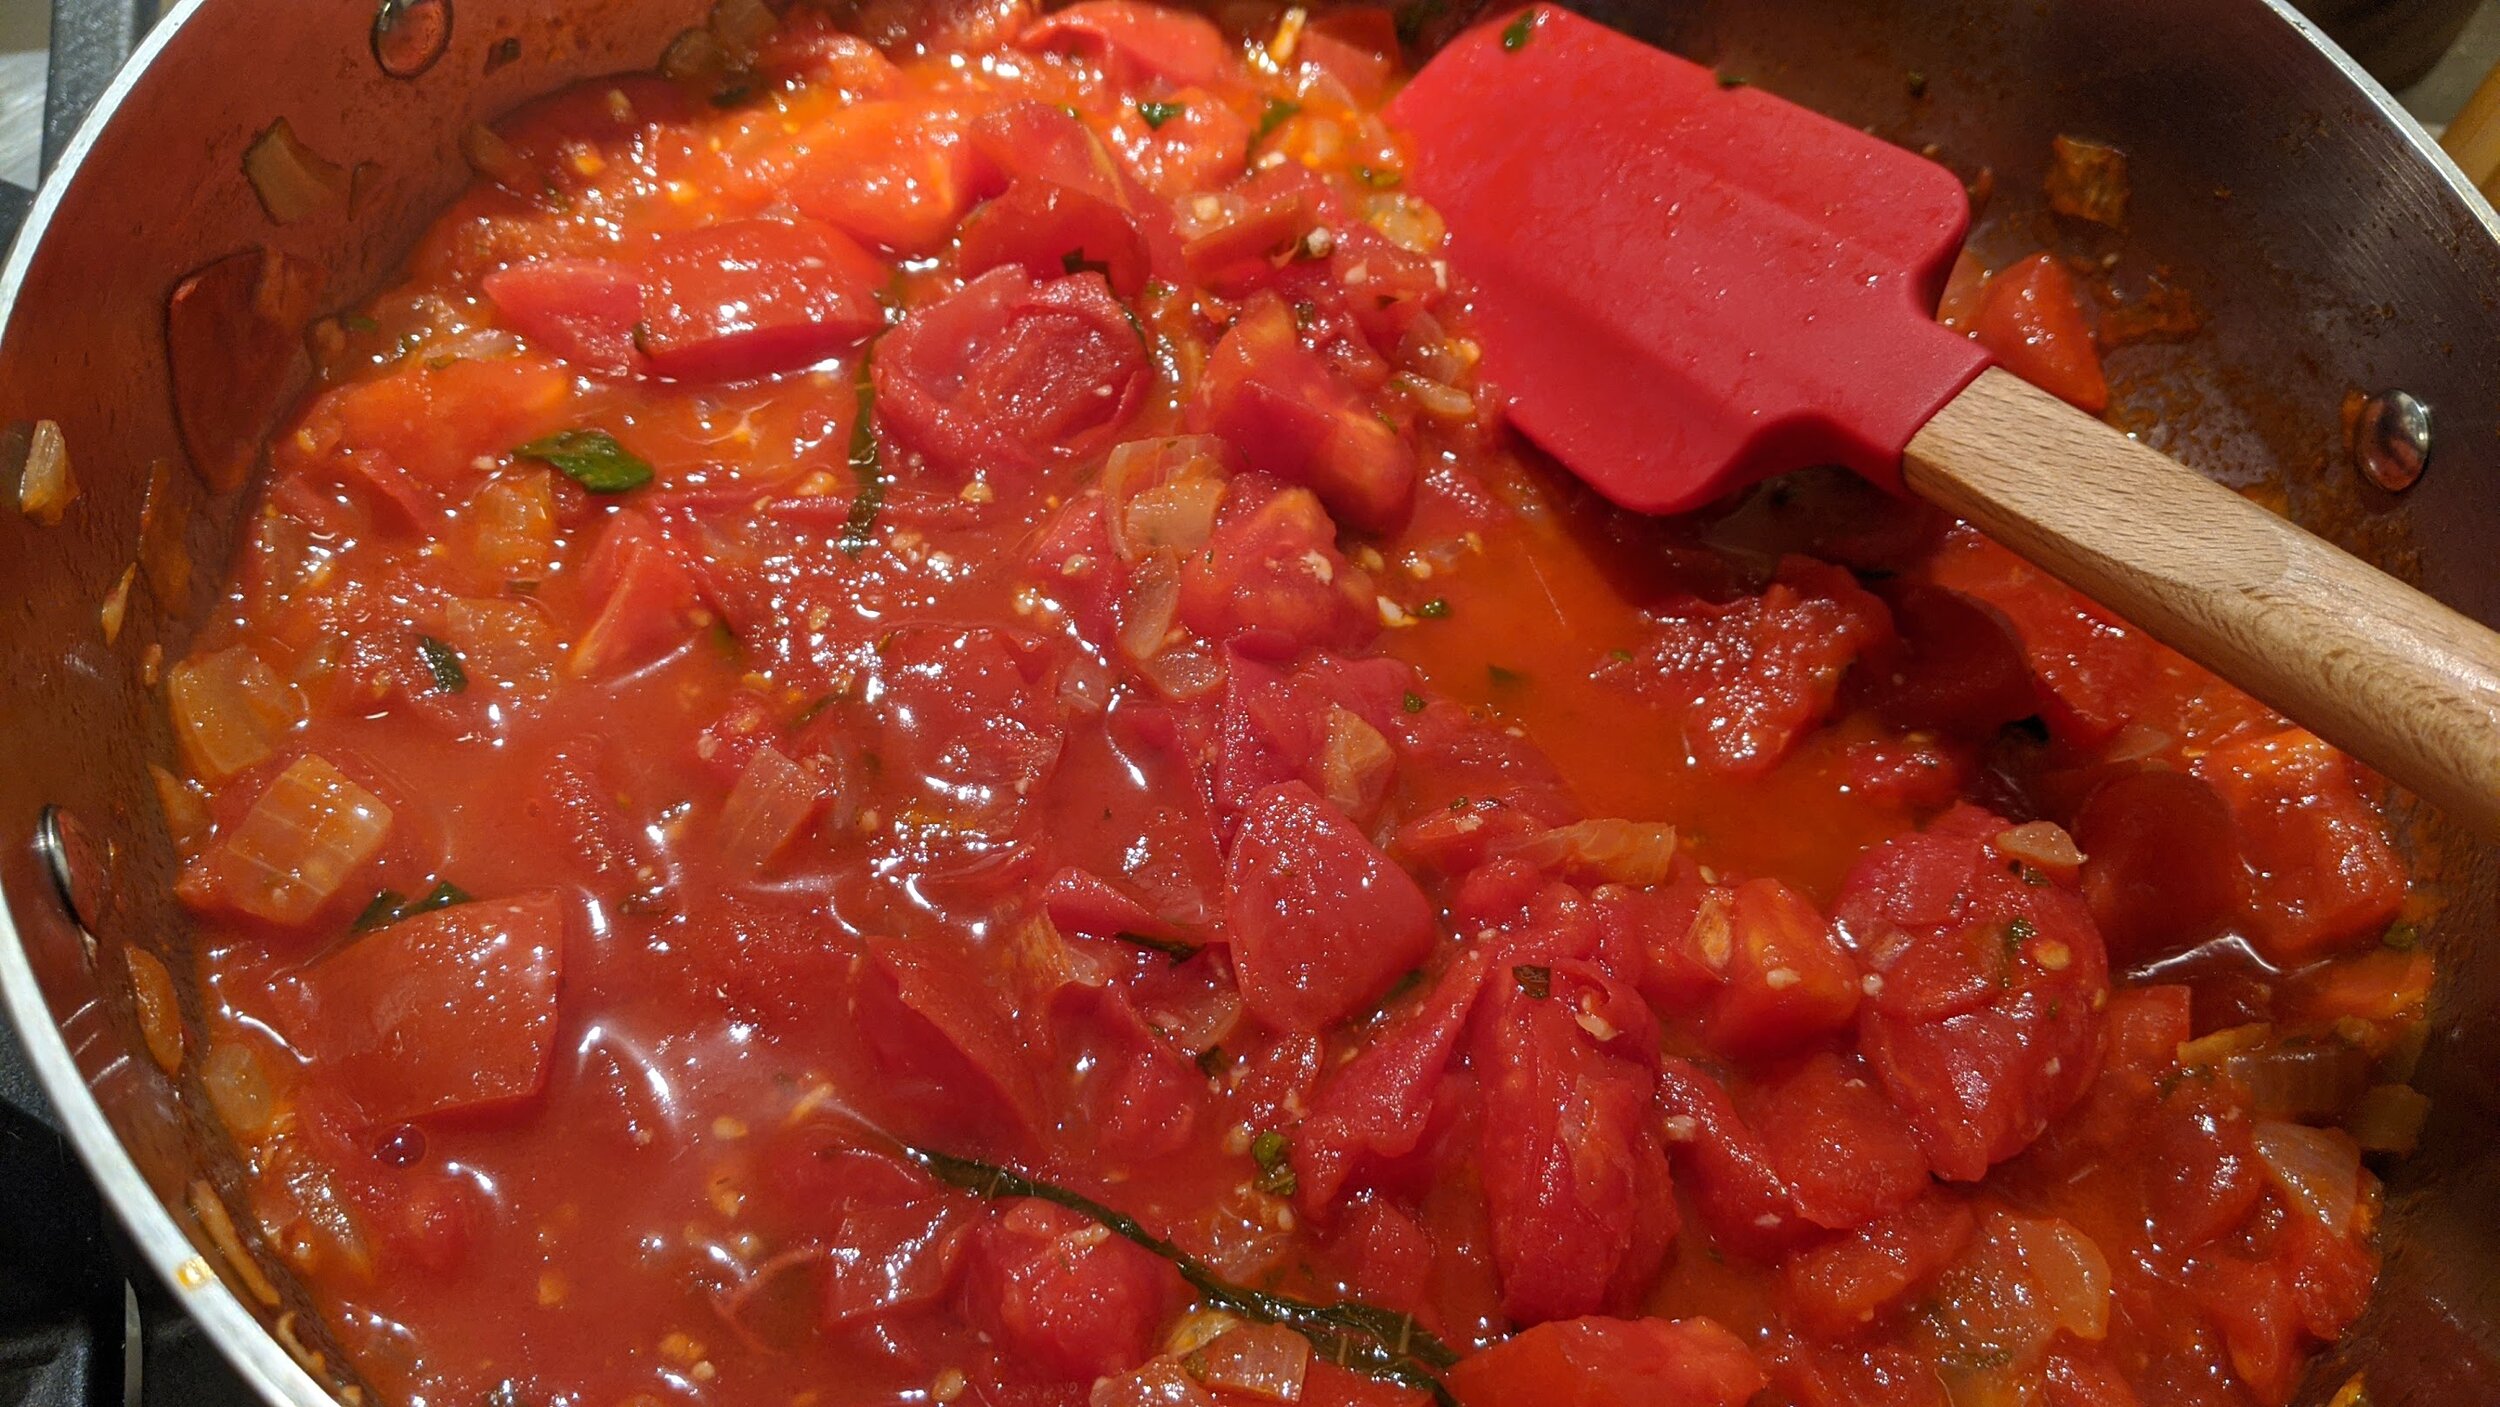


One of the simplest ways to enjoy fresh tomatoes is to make a straightforward tomato sauce. This summer, I’ve been loving a raw tomato sauce: olive oil lazily infused with some smashed garlic cloves and basil all day, then, a couple of hours before eating, mix in tomatoes that have been chopped and salted. Drop in some pasta and maybe some fresh mozzarella and you have a meal. Sometimes, though, I want something a little smoother and, frankly, a little more freezable. (I’ve never canned anything in my life - the idea that I would do it wrong, contaminate my family’s food, and make everyone sick haunts me - but it might just be time to start looking into it because my freezer is full to bursting.)
This tomato sauce is a little more complex, but it doesn’t detract from the tomatoes on bit - and it’s well worth it. It only takes about 15 minutes of hands on time, and then it can simmer away unattended for quite a while if you’d like to really develop the flavor. I don’t mind keeping it short and sweet - I rarely have a lengthy prep time before blood sugar levels drop dangerously in my household - and this sauce doesn’t suffer from having a bit of fresh tomatoeyness about it.


I’m always pretty excited about eating a giant bowl of pasta, and cheese is definitely a factor in that. I maybe have gone a little overboard with two cheeses in the sauce and one on top, but go big or go home. I used both Parmigiano-Reggiano and Pecorino Romano in the sauce as almost a seasoning. These are two delicious, highly regulated Italian cheeses, made from cow and sheep’s milk respectively. From its nubby size, you may detect that I use Parmigiano quite a bit - it’s nutty and it adds umami to whatever it touches. Pecorino is a bit more unique, salty with a tang from the sheep’s milk. Finally, to get creaminess and that cheese pull that will follow you into your dreams, top steaming pasta with fresh mozzarella.
You can use less cheese if you really want. And would this still be very good with a high quality canned tomato? Absolutely, and I don’t doubt I’ll be doing that in a couple of months. Similarly, you could substitute dried oregano and basil for the fresh, keeping in mind that dried herbs have a much more concentrated flavor (roughly substitute 1 tsp dried herb per 1 tbsp fresh herb). Make this your own: add more garlic; change up the herbs; leave your sauce chunky. Personally, I recommend all the cheese.
Fresh Tomato Sauce
Servings: 4-6 || Time: 45 mins || Inspiration: Summer tomatoes
Olive oil - 2 tbsp
Onion - 1 medium, diced
Garlic - 2 cloves, minced or crushed
Fresh tomatoes - 1.5 lbs, roughly chopped
Fresh herbs, such as oregano, thyme, basil - 1 tbsp each, chopped
Parmigiano-reggiano - 2 tbsp, grated
Pecorino-romano - 2 tbsp, grated
Heat olive oil in a medium-large skillet or saucepan over medium heat. Add onion and sauté until it begins to turn translucent. Add garlic. Once garlic has turned golden, but before it browns, add the tomatoes and fresh herbs of your choice. Season with salt and pepper.
Turn heat to medium-high and cook, stirring occasionally, until tomatoes have begun to break down and release their juices.
Bring to a low simmer and cook 15 minutes more, until tomatoes are very broken up and a sauce begins to form. You may continue to cook past this point, for 30 minutes more - if at any point the pan looks dry, add water to prevent burning or sticking. When sauce is cooked to your liking, stir in the cheeses.
For a smoother sauce, pass through a food mill (I used the coarsest grind) or blend in a food processor.
Toss sauce with your favorite pasta and top with chopped or torn mozzarella. Or freeze to lock away a little bit of summer.