
Chinese-Style Rice Noodles
My best friend since childhood, Cat, is Chinese. We had sleepovers weekly, attended our first concert together, went to dance classes together (…when my mom didn’t take us for ice cream instead - the antithesis of Cat’s strict Chinese parents). We grew up in each other’s homes during our formative years.
My best friend since childhood, Cat, is Chinese. We had sleepovers weekly, attended our first concert together, went to dance classes together (…when my mom didn’t take us for ice cream instead - the antithesis of Cat’s strict Chinese parents). We grew up in each other’s homes during our formative years.
My family introduced Cat to American, Middle Eastern, and European cuisines. She had her first hamburger at my house and most of the candy she consumed from elementary school through junior high. In an almost certainly overblown-in-the-retelling near drowning incident at a water park, my mom frantically yelled, “That’s my daughter!!!” at a confused lifeguard. (Interracial adoption was less prevalent in NH in the ‘90s, no doubt.)
On the reverse side, I spent a ton of time at Cat’s house. Hanging out with Cat included watching her practice piano, attending Chinese school as the awkward Caucasian tag-along, and going apple picking with her extended family. Her family still loves telling stories about the first time I used chopsticks (it didn’t go well), my reaction to chicken feet (it didn’t go well), and how I worked the room with all the non-English speaking relatives (it went really well, they loved me).


I had no idea how lucky I was to be exposed to Cat’s mother’s amazing culinary skills over the years. Even now, I remember what their home smelled like, the rice always in the pot, the balls of herbal medicine. All those years, and I have maybe three poorly pronounced words of Chinese and no recipes or instincts for Chinese food. For better or worse, all I have to go on now is Cat.
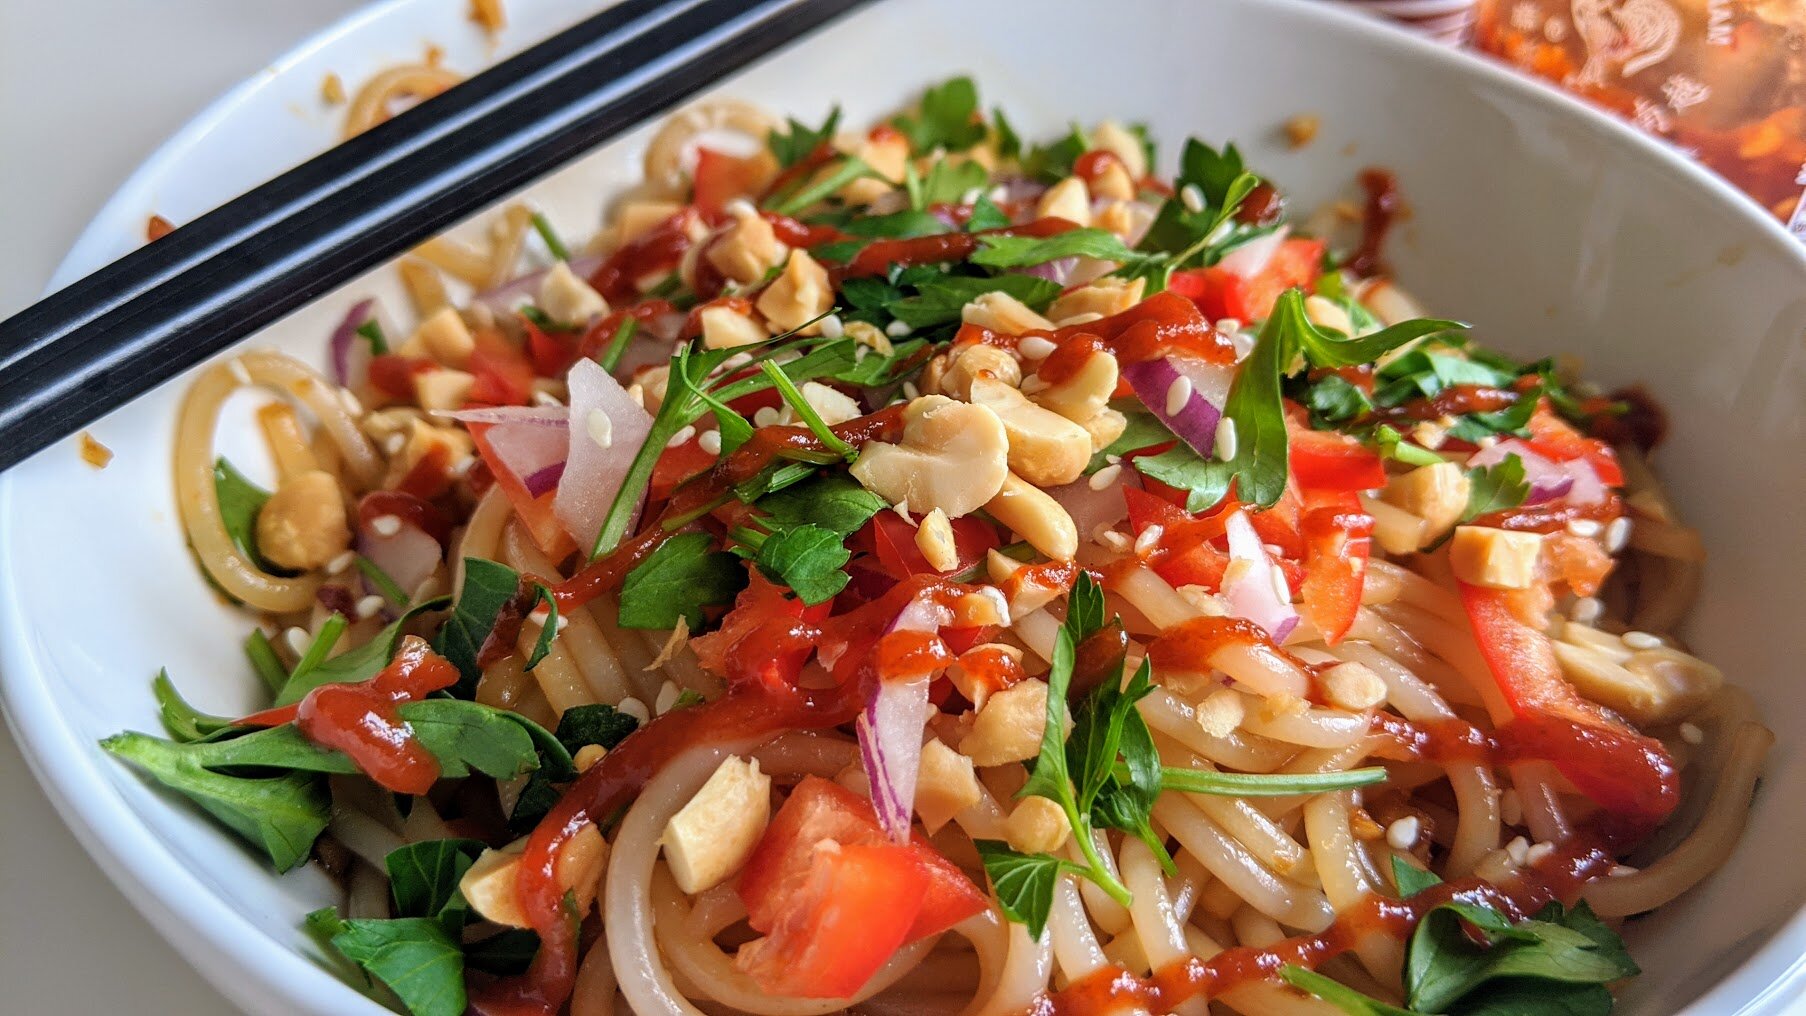
While I can’t really say whether this is authentically Chinese (I was ten, I wasn’t paying attention!), this noodle dish is based off of Cat’s “recipe” when she made it for me a couple of years ago. Measurements weren’t really involved, and she thought it was silly that I was even asking - “just taste it, does it taste good?” - so let’s just say this is a rough reimagining of what she did.


This has been a go-to recipe in my household for a quick and easy, mostly healthy, warm lunch. This is a very basic version of it, but it’s easily adapted to include vegetables (wilted greens, raw radishes, hot peppers) and meat or seafood. In what’s developing as a bit of a theme on this blog, I find this to be yet another good recipe for using up odds and ends in the kitchen.
Chinese-Style Rice Noodles
Yield: 2 servings || Time: 20 minutes || Source: Cat
Rice noodles - 4 oz
Ginger - 2 inches, grated or minced
Garlic - 1 clove, grated or minced
Soy sauce - 1/3 cup
Rice wine vinegar - 1 tbsp
Sesame oil - 1 tbsp
Chili garlic sauce - 1 tbsp or to taste (if you don’t have this, add some red pepper flakes to taste)
Red onion - 1/4 cup, chopped
Red pepper - 1/3 cup, chopped
Cilantro - 2 tbsp, chopped
Peanuts - 2 tbsp, chopped
Sesame seeds, for garnish
Sriracha or other hot sauce, for serving
Set a large pot of water to boil. When it’s boiling, cook noodles according to package directions. This usually takes 30 seconds if they’re fresh noodles and maybe 3 minutes if they’re dry.
In a small bowl, combine ginger, garlic, soy sauce, rice wine vinegar, sesame oil, and chili garlic sauce or red pepper flakes. Taste - it should be salty from the soy sauce and a little vinegary. Adjust to taste, but remember it’ll be absorbed by starchy noodles so it won’t taste as strongly when everything is combined.
When noodles are ready, drain and pour them into bowls. Divide sauce among bowls and toss the noodles. Top with chopped onion, red pepper, cilantro, and peanuts. Garnish with sesame seeds and serve with Sriracha.

Halibut “Puttanesca”
As you may have noticed, we’re eating a tad more than average amount fish (or at least more than average for us). One of the main reasons is that I signed up for a fish subscription, which has been slightly less overwhelming and a lot more fun that I expected. We’re getting a lot of variety and, with some minor bumps along the way, I’m learning all the different ways to prepare and dress up fish.

As you may have noticed, we’re eating a tad more than average amount fish (or at least more than average for us). One of the main reasons is that I signed up for a fish subscription, which has been slightly less overwhelming and a lot more fun that I expected. We’re getting a lot of variety and, with some minor bumps along the way, I’m learning all the different ways to prepare and dress up fish.
One thing I haven’t quite figured out is how to manage leftover fish well. We get four portions of each fish, and there are two adults and the baby - and although she eats a LOT (mostly blueberries), she’s not quite up to adult portion size yet. So we end up having a couple of portions left, and reheating in the oven or in the microwave doesn’t seem to do it justice. (Any thoughts on this would be well appreciated in the comments!)

This week’s delivery was halibut. I was pretty excited because this is a fish I have a bit of experience with, which I couldn’t say for the porgy or skate or catfish we’ve received in other weeks. Halibut is a pretty firm white fish that doesn’t get incredibly delicate and fall apart when cooked, although it is fork-tender. It’s pretty mild and sweet as far as fish goes, and it stands up well to strong flavors.


I’ve been playing a lot with Mediterranean flavors, so I decided to throw a classic set of strong Mediterranean flavors at it and I ended up pretty pleased with the result. I pan seared the halibut to get some color, and then made a quick pan sauce with green olives, garlic, anchovies, capers, and white wine. It smelled amazing - stop and put your face over the pan and breathe amazing. I turned the fish in the sauce, garnished with a little lemon and parsley, and there we had it - dinner.
I’ve been kind of thinking of this as a halibut puttanesca… it’s got all the flavors, minus the tomato. Tomato actually wouldn’t be out of place here, but I found this delightfully briny and satisfying as is.
This recipe is easily modified to suit your tastes - just include a little more of this or a little less of that. I used a green olive, Castelvetrano, but this could be good with black olives, too. If you’re opposed to anchovies, this would still be pretty tasty without them - but they do add a depth of flavor, so give them a try if you’re up for it.
Halibut “Puttanesca”
Servings: 4 | Time: 30 minutes | Inspiration: The Mediterranean Diet Cookbook
Halibut fillets - 1.5 lbs
Olive oil - 3 tbsp
Anchovy - 3 fillets, more or less to taste
Garlic - 2 cloves, minced (about a tablespoon)
Capers - 1 tablespoon, drained
Green olives, like Castelvetrano - 3, pitted
White wine, dry - ½ cup
Lemon juice - 1-2 tsp, to taste
Lemon zest, parsley or chives, for garnish
Season halibut with salt and pepper on both sides.
Heat a medium-large nonstick skillet over medium-high heat. Add two tablespoons of olive oil. When oil shimmers, add halibut to the pan, working in batches if needed to give the halibut space. Sear both sides of the halibut, 2-3 minutes per side. Remove halibut to a plate and cover to keep warm.
Reduce the heat to medium. In the same pan, add the anchovies and cook for a couple of minutes, stirring, until they start to break up. Add the garlic, olives, and capers and cook briefly, long enough to smell the garlic. Add white wine, turn heat to high, and cook until half the wine is evaporated. Add fish back to pan and spoon sauce over to coat in all that deliciousness. Cook a minute or so more, until fish is opaque (you can open the fillet a bit to see that it’s opaque all the way through).
Transfer fish to a plate. Add lemon to sauce, if using, and spoon over the fish. Garnish with chopped parsley or chives and grated lemon zest, if using.

Use-Up-Your-Vegetables Pasta
Sometimes you make something that is just so so good you can’t possibly imagine what else you could be making for dinner because why in the world would you eat something else when you could be eating THIS?
Since this is our third time making this dish this week, I would say we’re pretty solidly in the realm of obsession.

I’ve mentioned previously that we’ve been having a glut of corn, and now the tomatoes have piled up as well. Not that I’m complaining about too much deliciousness cluttering my counter - I know I’ll mock this “problem” of late summer bounty when we’re in the deep dark depths of winter. And yes, yes, I know I can absolutely make a simple tomato sauce that will freeze beautifully and - once rediscovered, thawed, and tossed with pasta one frosty December day - will make my eyes tear up with memories of beach days and tank tops. But that doesn’t so much solve the problem of dinner tonight. And, so was born Use-Up-Your-Vegetables pasta.


Is this really a recipe? I don’t know. Is it an ode to all the flavors of summer, a true honor to corn, eggplant, and tomatoes? YES.
At its core, this “recipe” is no more than sautéing a few gorgeous vegetables - corn, eggplant, onion, garlic, tomato - in olive oil, smothering them with cheese, and tossing them with pasta. Incredibly easy and incredibly satisfying.
“But I don’t have corn,” you say, smugly surveying your gleaming, cornsilk-free countertops. No problem! in the spirit of using up your vegetables, use what you have on hand. Skip the corn, add the green beans. Got zucchini? Wonderful, toss it in! You can’t really go wrong with bright, fresh summer vegetables. I kind of think you’ll be obsessed with this, too.
Use-Up-Your-Vegetables Pasta
Servings: 4-6 || Time: 30 minutes || Inspiration: Late summer vegetable bounty
Olive oil - 2-4 tbsp
Onion, white or yellow - 1 small, diced
Corn kernels - about 1 cup, cut from 2 ears of corn (frozen could work)
Eggplant - 1 medium, diced
Garlic - 2 cloves, minced
Tomatoes - 3 medium, diced
Farfalle pasta or other forkable shape - 1 lb
Parmesan - grated, to taste
Herbs, like basil, parsley, cilantro, or tarragon for garnish
Set a large pot of salted water over high heat to come to a boil.
Meanwhile, set a large skillet over medium heat. Add olive oil and heat until shimmering. Add onion and sauté until it begins to turn translucent. Add corn kernels, season with salt and pepper, and sauté until they start to brown. Add eggplant and season once more. The eggplant will absorb a lot of the oil, so add a bit more if needed to prevent burning. Cook, stirring occasionally, until eggplant is browned. Add garlic, sauté until fragrant, then add tomatoes. Continue to cook, stirring here and there, for 10-15 minutes more while the pasta cooks. Turn down heat as necessary to maintain a low simmer.
Once water is boiling, add pasta and cook until al dente. Drain pasta, reserving 1/2 cup of pasta water, and add to sauce. Toss the sauce and the pasta together. Transfer to a bowl.
Top pasta with Parmesan. Your sauce may need a little help to get saucy and marry with the pasta, especially if you use a less juicy type of tomato, like plum tomatoes. Add pasta water to the bowl, using a 1/4 cup at a time, and toss with pasta until you get a satisfying squelchy sound and the pasta looks well coated with sauce. Top with perhaps a little more cheese (why not?) and the chopped herbs of your choice.

Fried Catfish
I got some catfish from my fish share this week, and I have to admit I know next to nothing about it. I think it has whiskers? According to my mother, catfish is “very Louisiana” and “definitely a bottom feeder” and also absolutely delicious. I found this fried catfish recipe from Chef Todd Richards, author of Soul - and he got it from his mother. So that speaks pretty highly for it, no?
Last night was a rough night for my exhausting devil child beautiful young daughter. I’ve read that 75% of babies her age can sleep through the night (defined as what I can only imagine is a glorious 8-12 hour stretch). But we are members of the bleary 25% who are still waking up at least twice - or in the case of last night, five times - each night for feedings.
So dragging myself into the kitchen this morning - large cup of coffee in hand - to tackle the marinade for my dinner plan was less than appealing. But I did it, and, oh, was it worth it.

I got some catfish from my fish share this week, and I have to admit I know next to nothing about it. I think it has whiskers? According to my mother, catfish is “very Louisiana” and “definitely a bottom feeder” and also absolutely delicious. I found this fried catfish recipe from Chef Todd Richards, author of Soul - and he got it from his mother. So that speaks pretty highly for it, no?
This catfish is incredibly easy and incredibly delicious. My morning task was to immerse the catfish in a buttermilk marinade with Worcestershire, powdered onion, powdered garlic, hot sauce, salt and pepper. After that, you can basically ignore it except to give it a turn at midday.

But... I have to admit I was a little intimidated by this recipe. Frying isn’t a common technique in my household, not out of any opposition to frying but because I’ve always assumed it’s something that requires a high level of skill. Also, I’m extraordinarily lazy when it comes to cleaning up and I was under the impression that frying was extremely messy. Turns out, I was delightfully wrong on all fronts.
After doing some research, I identified two key tricks for frying. First, measure the temperature of the oil. I didn’t have a thermometer to leave in the oil, so I used an instant read thermometer to get to a pretty confident 350°F reading. Second, like any time you dredge, remove any excess liquid (in this case, buttermilk marinade) and excess grain (in this case, cornmeal). (As a newbie, I’m very interested in hearing other people’s expertise on this topic!)
Despite all my fears, this catfish was incredibly easy and a total hit at home. The crust was flavorful and crispy, the meat was moist and tender. And I didn’t destroy my stove with an oil storm, which has now opened my mind and heart to frying at home.

I highly recommend serving this up with something to cut the richness — something fresh like a tomato, or acidic like pickles, or bitter like lightly sautéed Swiss chard. These corn jalapeño muffins are amazing, too. At the end of the day, you will not regret dragging yourself into the kitchen to get this going.
Fried Catfish
Servings: 4 || Time: 45 minutes || Source: Chef Todd Richards
Catfish fillets - 1.5lbs
Vegetable or canola oil - 4 cups
For the marinade
Buttermilk - 2 cups
Worcestershire - 2 tbsp
Hot sauce - 1 tbsp
Garlic powder - ¼ tsp
Onion powder - ¼ tsp
Salt - 1 tsp
Black pepper - 1 tsp
For dredging
Cornmeal - ½ cup
Cayenne - ½ tsp
Salt - 3 tsp
Black pepper - ½ tsp
Up to eight hours before cooking, combine the ingredients for the marinade in a gallon bag or shallow baking pan and add the catfish. Refrigerate.
When you’re ready to cook, combine the dredging ingredients on a large plate or shallow bowl.
Heat vegetable oil in a large pan (cast iron or stainless steel) over medium heat until it reaches 350°F.
Working with as many pieces of catfish as you can fit in the pan at one time, remove the catfish from the buttermilk and dredge in the cornmeal mixture, shaking to remove excess. Let stand for five minutes as the oil heats.
Add the catfish to the oil and fry until golden brown, around 4 minutes per side. Use tongs to check for browning and turn when it’s turned golden brown. Remove catfish to a plate lined with paper towels to drain.
Serve with tartar sauce, hot sauce, lemon, and your choice of sides.

Corn Jalapeño Muffins
Buying a farm share has so many benefits: we support local food, a local business, local people, plus we eat healthfully and deliciously ourselves. But the downside is that you get a LOT of whatever’s in season and growing well at the farm. Which, in this case, means lots and lots of corn.

I’m going to blow your mind in a couple days with a killer catfish recipe. But first I have to talk about corn.
I have so much corn.
Buying a farm share has so many benefits: we support local food, a local business, local people, plus we eat healthfully and deliciously ourselves. But the downside is that you get a LOT of whatever’s in season and growing well at the farm. Which, in this case, means lots and lots of corn.
I’m getting into the farm share rhythm and slowly but steadily learning how to put away those summer flavors for the darker and sparser wintertimes. (Yes, winter is coming.) I made some delicious, bright plum tomato sauce that will just scream summer when I rediscover it in my freezer in January. And instead of wondering what to do with another amazing, fragrant bunch of basil, I made a quick and dirty pesto that has been my go to snack with bread all week.
I have to admit, though, that I am having an absolute drought of creativity when it comes to corn. I know I can cut the kernels off the cob and freeze them straight, but that seems a little pathetic, and what will I do with it this winter anyway?
So I turned to my local newspaper and I found a recipe for corn jalapeno muffins and I can’t lie, I was pretty excited. I like spicy food, but my partner LOVES spicy food. And anything that will mercifully take two whole cobs of corn off my hands is very much in my wheelhouse right now.


I made a few modifications to this recipe to turn it into the corn-using muffins of my dreams. I reduced the butter by a couple of tablespoons, which allowed me to add butter directly to the cooked muffin with limited guilt. (I also melted it in the same pan as the corn jalapeño mixture, because… why?) I doubled the jalapeño because - as mentioned - the partner loves spice. I made a full muffin style version of these, rather than the mini-muffins the recipe suggests. And, of course, I added a little more corn that was strictly necessary.
The batter ended up so light and airy that I felt like I should fold the corn, jalapeño, and cheese into it rather than mix - but this sort of delicacy is unnecessary. Give it a try -- you too will end up with muffins that are moist and spicy with pops of texture from the sweet corn kernels.
Corn Jalapeno Muffins
Yield: 18 muffins || Time: 45 minutes || Adapted from: The New York Times
Butter - 4 tbsp
Corn kernels - raw from a fresh corn cob, or chopped frozen corn
Jalapeño - 2
Flour - 1 cup
Cornmeal - 1 cup
Baking powder - 1.5 tsp
Baking soda - 1.5 tsp
Eggs - 2, beaten
Buttermilk - 1.5 cups
Sharp cheddar or gruyere cheese - 3 ounces or 85 grams
Heat the oven to 400°F and butter a muffin tin.
In a small skillet, heat butter over medium low heat. Add corn and jalapeño, season lightly with salt and pepper, and sauté for a couple of minutes to soften.
In a medium bowl, whisk together flour, cornmeal, baking powder, and baking soda. Add eggs and buttermilk and mix. Add corn jalapeño mixture, followed by the cheese.
Fill muffin tin with batter until about 3/4 full. Bake for 15-20 minutes or until a tester comes out clean.

White Bean Bruschetta
I am excited to start with a simple dish that we love from a sadly defunct but formerly lovely West Village restaurant, Pó. Pó was one of Mario Batali’s first restaurants and it was (in typical NYC style) a tiny, cozy spot that put out delicious Italian food. Amazingly, one of the best things they served was actually free.

Hello -- my name’s Marisa, I live in NYC with my partner and our new-ish baby girl (born in December!). I’m starting this blog to document our adventures in cooking and eating, two of my very favorite activities.

It’s been challenging to get back into cooking following the birth of our little one, but I’ve always found cooking to be a rewarding (read: delicious) and mostly relaxing activity. I also really believe in being close to your food - knowing where it comes from and the people who grow it, if you can. That’s easier to do when it’s not winter, of course.


I’m excited to start with a simple dish that we love from a sadly defunct but formerly lovely West Village restaurant, Pó. Pó was one of Mario Batali’s first restaurants — despite his other proclivities, he does know how to cook. In typical NYC style, it was a tiny, cozy spot that put out delicious Italian food. Delightfully, one of the best things they served was actually free.
This white bean bruschetta, studded with zingy sliced garlic and red pepper flakes, came to the table gratis. It was a mouth-watering way to start a meal and, as it turns out, not too difficult to make at home. I really like that it’s versatile -- simple enough for an any-night appetizer using mostly pantry items, impressive enough for guests, and easily scaled for a big group. This will be tasty no matter what, but I like to splurge on fresh, good quality olive oil and aged balsamic to make this extra.

White Bean Bruschetta from Pó (RIP)
Yield: 12 pieces || Time: 20 minutes || Source: Pó
Cannellini beans (white kidney beans) - 1 can, drained & well rinsed
Extra virgin olive oil - 3 tablespoons
Balsamic vinegar - 2 tablespoons
Red pepper flakes - 1/2 teaspoon or to taste
Basil leaves - 2 tablespoons, chopped*
Garlic - 2 cloves, thinly sliced or finely chopped
Salt and pepper
Baguette, sliced ½” thick
In a medium bowl, put the rinsed beans, olive oil, balsamic vinegar, red pepper flakes, basil, and garlic. Gently combine - I like to use my hands. Season with salt and pepper to taste. Let it sit in the refrigerator for a few hours to marinate and let the flavors come together.
Slice the baguette. Serve the bread with the bowl of the bean mixture, or spoon the bean mixture on ahead of time if you want to get fancy. If you do put the beans on the bread to serve, consider toasting the bread so it doesn’t get soggy (in an oven at 325°F for 5-10 minutes).
—————————-
*Although it makes no difference to how it tastes, basil is beautiful when it’s thinly sliced, aka chiffonade. To do it, pile a number of basil leaves on top of each other, then tightly roll the pile so you have a long thin roll. Slice thinly along the bundle of basil and you’ll get elegant ribbons!