
Butterscotch White Chocolate Pudding
Delicious and simple, this is butterscotch pudding with a caramelized white chocolate twist. Say what? Yep, caramelized white chocolate is a thing, and you’re going to want to try it.

Delicious and simple, this is butterscotch pudding with a caramelized white chocolate twist. Say what? Yep, caramelized white chocolate is a thing, and you’re going to want to try it.


I made this recipe at the request of my sister, Ashley, who has an inexplicable love of white chocolate. I generally object to white chocolate, which, for me, is too one-note sweet and weirdly soft and generally a liar. For those of you who still live under the illusion that white chocolate is chocolate: it’s cocoa butter, with no actual cocoa bean aka chocolate in it, masquerading as chocolate. But I’m definitely pro butterscotch pudding and I hold a strong belief that caramelization redeems just about anything. Plus, I love having a dessert ready made in my refrigerator that I can pull out and seem like an effortless boss.
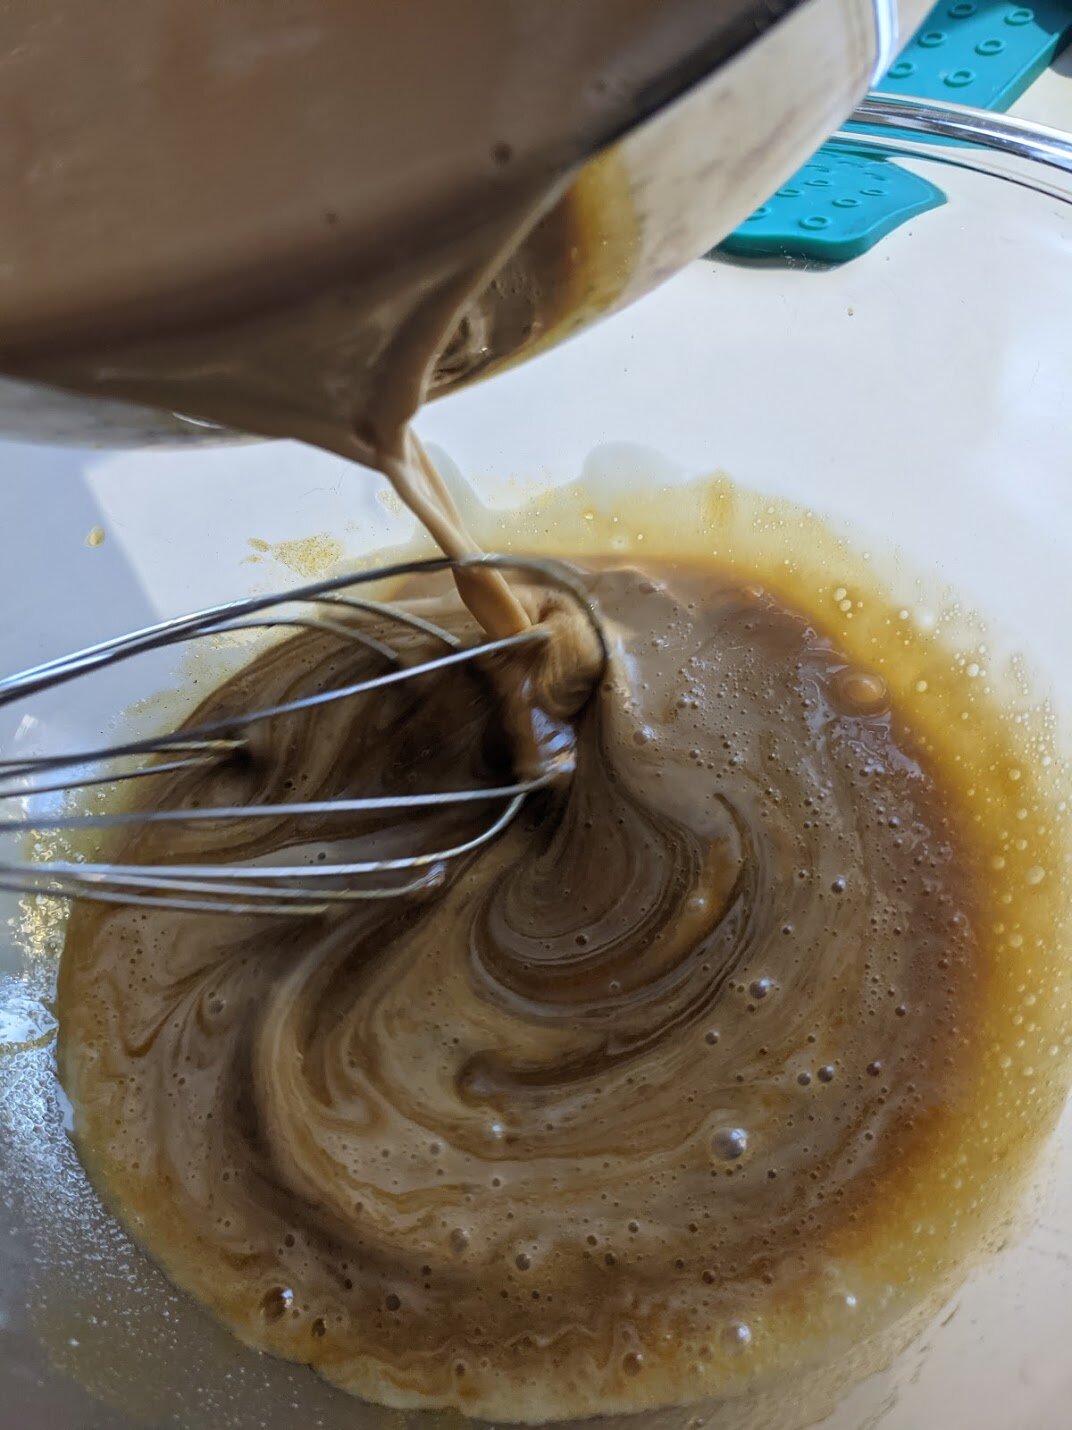

Overall, this was pretty simple to put together. Combine brown sugar, egg yolks, alcohol, and toasty cardamom. Melt the caramelized white chocolate in some milk, enjoy the amazing smell, then combine everything and strain. Pour it into ramekins, cover and put them in a pressure cooker to steam for all of 9 minutes. The hardest part might be waiting for these to chill to eating temperature!
Although the original recipe calls for rum, we are solidly a whiskey household and rarely have rum on hand. I’m happy to report that the whiskey was a delicious substitution and I personally did not miss the added sweetness from the rum at all. I tend to be into less sweet desserts in general, so if you’re into rum, you do you.


This recipe does call for some special tools - first off, you need a pressure cooker or Instant Pot. Although it’s an extra tool, it helps you avoid the need to stand over a hot stove stirring vigorously while the mixture thickens up. Next, you need to have a ramekins, espresso cups, or other heatproof bowls. This also could work with a larger heatproof bowl or soufflé dish as a family style dessert (see note below).
Butterscotch White Chocolate Pudding
Time: 1 hour + 3 hours chilling || Servings: 6 || Source: Dinner in an Instant by Melissa Clark
Heavy cream - 1 1/2 cups
Whole milk - 1/2 cup
Dulcey blond chocolate or butterscotch chips - 6 oz
Large egg yolks - 5
Dark brown sugar - 1/3 cup, packed
Whiskey or rum - 2 tsp or to taste
Cardamom or nutmeg - 1/2 tsp
Kosher salt - 1/8 tsp
Crème fraîche or whipped cream, for serving
Chocolate shavings, for serving
In a heavy bottomed pan, heat the cream and milk until steaming and just starting to simmer. Be careful not to overheat and scald the milk. Turn off the heat, then whisk in the blond chocolate or butterscotch chips until melted and well incorporated.
In a large bowl, whisk together the egg yolks, brown sugar, whiskey or rum, cardamom or nutmeg, and salt. Pour in the chocolate cream while whisking constantly so that you don’t cook the yolks. Continue whisking until the mixture is creamy and smooth, then pour through a very fine sieve into a bowl or measuring cup with a spout.
Choose your cooking vessel. If you want individual portions, select ramekins, espresso cups, or other heatproof cups that can hold 4 to 6 ounces. Fill the vessels of your choice with custard, then cover tightly with aluminum foil. Put a steamer rack into your pressure cooker or instant pot and fill with 1 ½ cups of water.
Arrange puddings on the steamer rack; if you have six, I recommend doing them in two batches so that they’ll cook more evenly and you reduce the chances of accidents — although you could stack them in a staggered fashion if you’re more coordinated than I am.
For the first batch, cover and seal the pressure cooker and cook on low pressure for 4 minutes. Allow the pressure to release naturally for 5 minutes, then release the remaining pressure manually. For the second batch, cook on low pressure for 5 minutes. Allow the pressure to release naturally for 5 minutes, then release the remaining pressure manually.
Once puddings are ready, remove them from the pressure cooker using oven mitts or tongs. Carefully remove the foil (be careful, there may be steam), and let the puddings come to room temperature. When cooled, cover with plastic wrap and chill them in the refrigerator for a minimum of three hours. Garnish with whipped cream or crème fraîche and chocolate shavings.
Notes:
If you prefer to caramelize your own white chocolate, heat the oven to 250°F. Cut white chocolate bars into cubes and spread out on a rimmed baking sheet. Bake, stirring every 10 minutes, for 30-60 minutes. When it’s caramelized, the chocolate will be the color of peanut butter. This has the upside of making your kitchen smell delicious.
If you’d prefer to have a single shareable pudding, or you don’t have enough small heat-proof cups on hand, you can use a 1-quart soufflé dish or other heatproof dish that will fit into your pressure cooker. In this case, cook on low pressure for 18 minutes. Allow the pressure to release naturally for 5 minutes, then release the remaining pressure naturally. Chill and garnish as indicated.
If you would like to make this ahead, the custard will keep in the refrigerator for two days before cooking. The cooked custards will keep for up three days after cooking.

Roasted Chicken Legs and Cauliflower with Yogurt
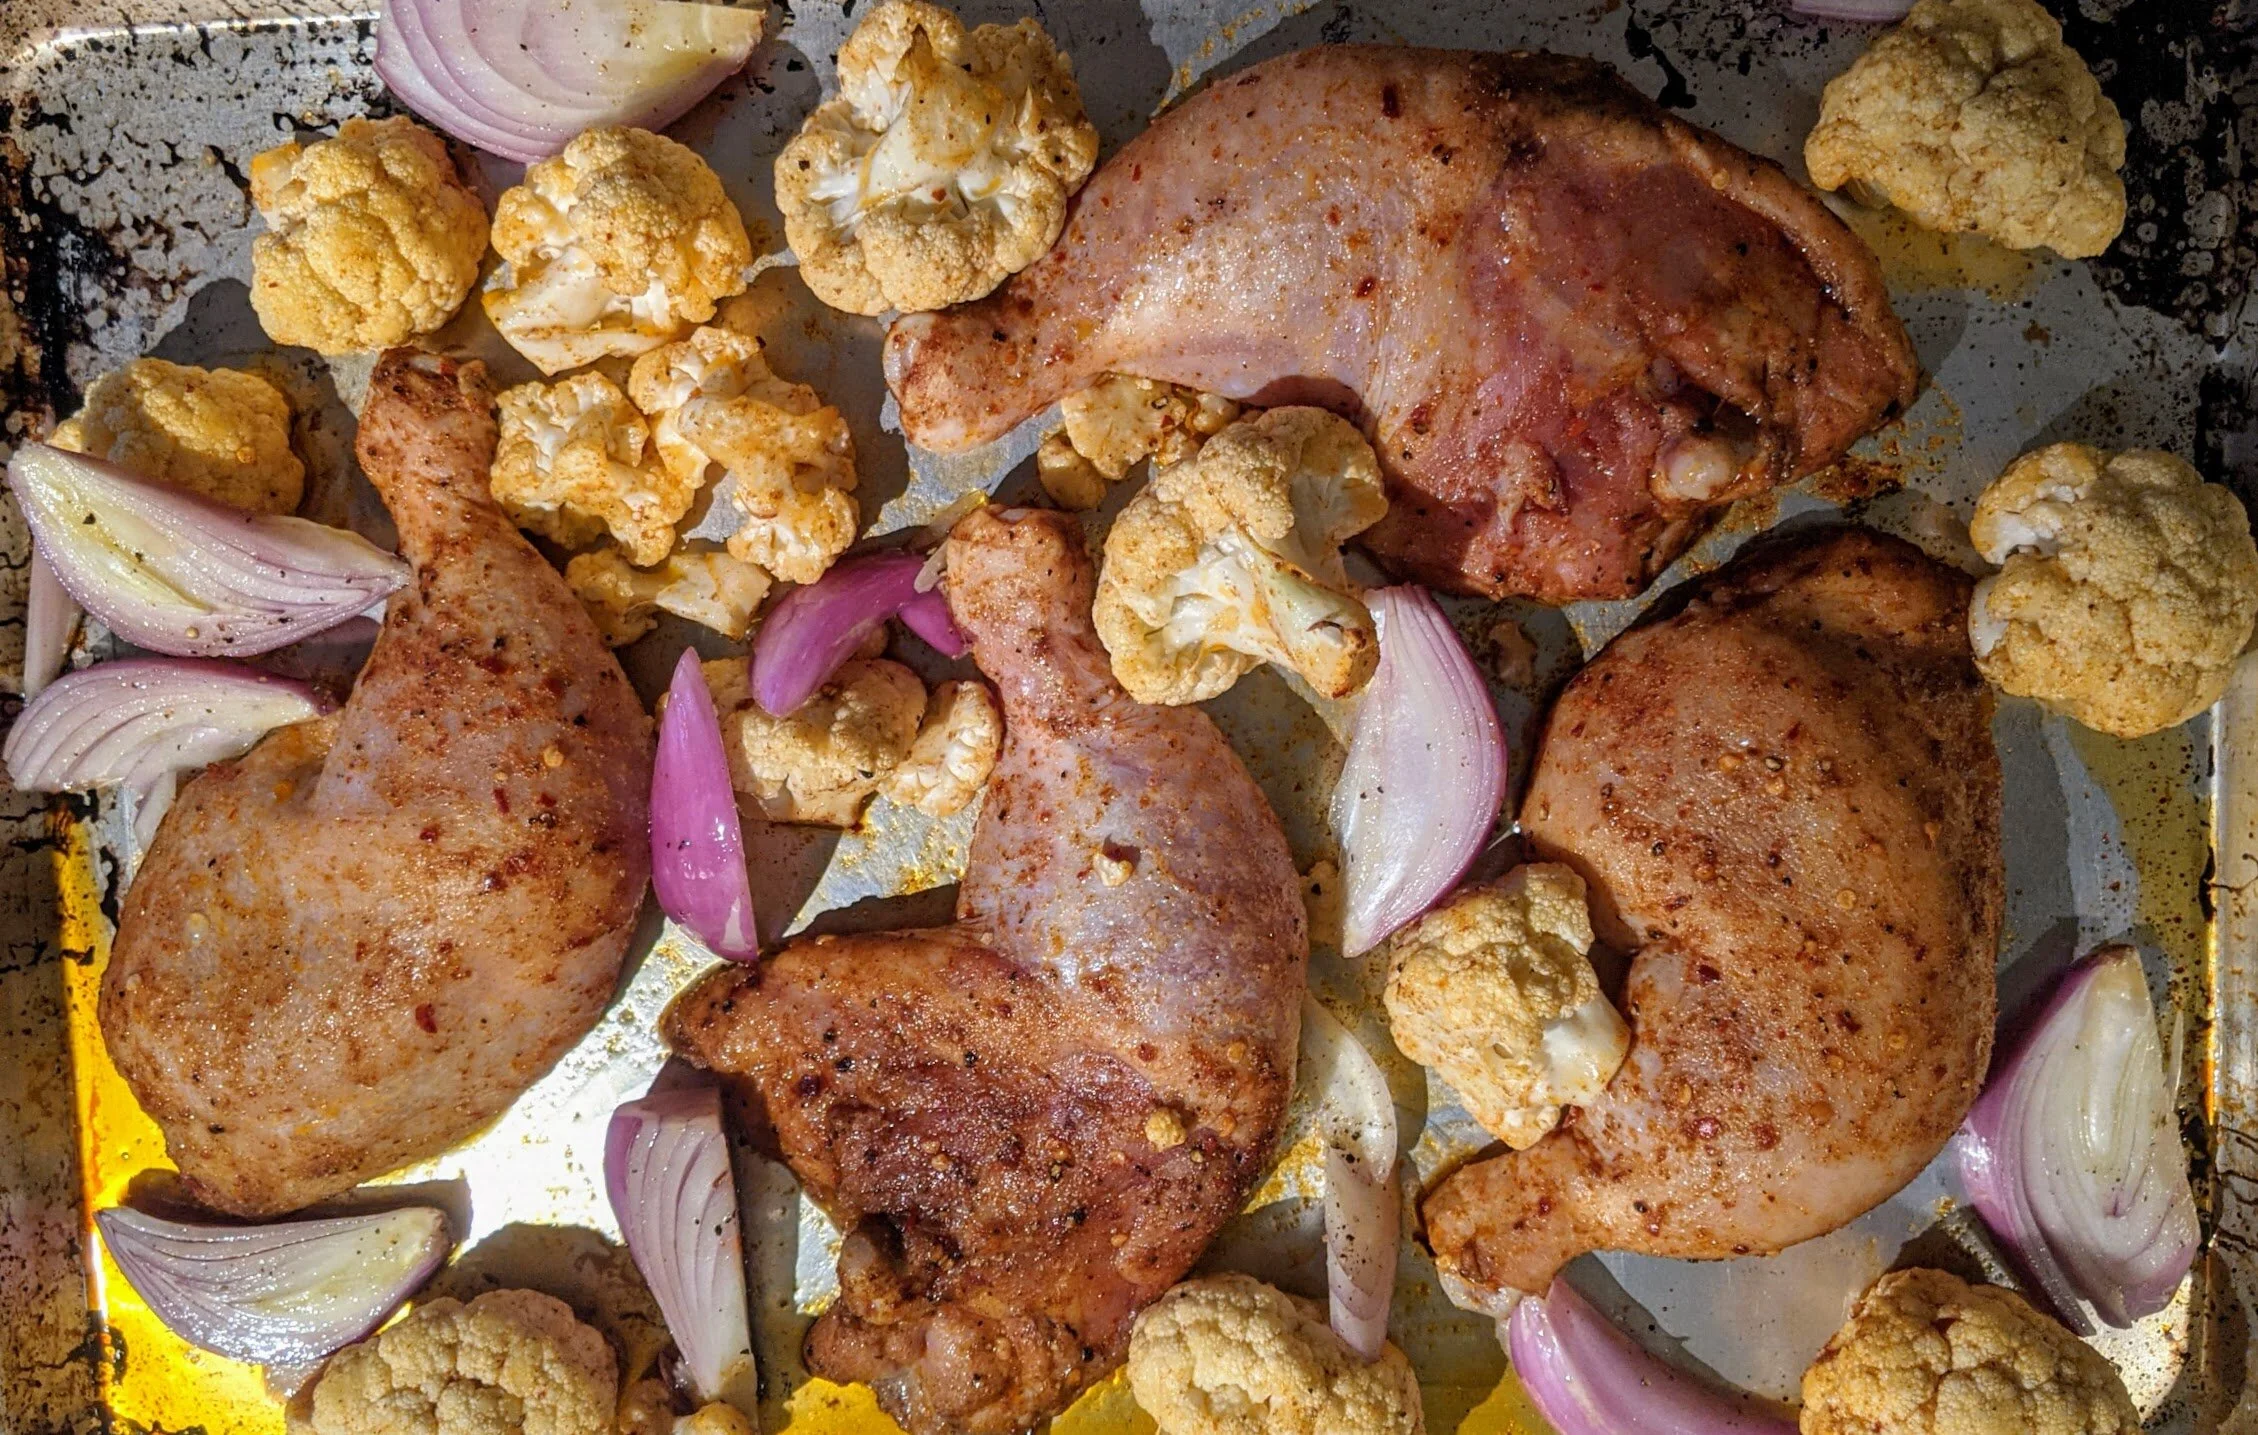
This is a really simple weeknight dinner type of dish - but I wouldn’t have any qualms about serving this for guests. Coat chicken, cauliflower, and some quartered shallots in a warm spice mix and put it in the oven - 40 minutes later, you have dinner! An herby greek yogurt with bright lemon and garlic cuts the heat and adds a tangy contrast.

This is a really simple weeknight dinner type of dish - but I wouldn’t have any qualms about serving this to guests. Coat chicken, cauliflower, and some quartered shallots in a warm spice mix and put it in the oven - 40 minutes later, you have dinner! An herby greek yogurt with bright lemon and garlic cuts the heat and adds a tangy contrast.
The chicken here is marinated in a spicy rub as much as a day ahead, if possible, or even just an hour. If you don’t have the forethought to do it earlier, just rub it on and under the skin for maximum flavor when you’re ready to cook. The dregs of the marinade coat the cauliflower and shallots, continuing our simplicity theme. Cauliflower is a nice vehicle for the spices, but you could substitute broccoli or maybe even zucchini in the summer.


I found this quite filling on its own, but if you want to round it out, feel free to double the marinade and toss some potatoes (fingerlings, chopped yellow potatoes, chopped sweet potato) in with the rest of the vegetables. Rice (maybe mixed with some parsley and lemon zest) would be another great option to bulk this out.
Roasted Chicken Legs and Cauliflower with Yogurt
Time: 1 hour || Servings: 4 || Source: Adapted from Yossy Arefi at NYT
Coriander, ground - 1 tsp
Smoked paprika - 1 tsp
Red pepper flakes - 1/2 tsp
Olive oil - 3 tbsp
Chicken legs, bone-in, skin-on - 4
Cauliflower - 1 small head, about 1 1/2 lb
Shallots - 3
Greek yogurt - 1 cup
Mint - 2 tbsp, chopped
Cilantro - 2 tbsp, chopped
Lemon juice, freshly squeezed - 2 tbsp
Garlic clove - 1
Up to a day before you plan to cook, marinate the chicken. In a container with a cover large enough to hold the chicken (or a gallon bag), combine 1 tbsp of olive oil with the coriander, smoked paprika, and red pepper flakes. Add a generous pinch of salt and several grinds of pepper. Add chicken and coat it well in the marinade. If you’re using a gallon bag, push the air out of the bag and seal, and then vigorously rub the chicken to coat it. Refrigerate chicken until you’re ready to cook.
Note: If you don’t get this done the day before, you can rub the marinade on and under the skin to help the flavors soak in - in any case, it’ll still taste great.
When you’re ready to cook, heat the oven to 425°F. Peel the shallots and cut into quarters. Separate the cauliflower into florets no bigger than 2 inches.
Take the chicken out of the marinade and place on a sheet pan. Add another 2 tbsp of olive oil to the container that held the chicken. Toss the cauliflower and shallots in the olive oil, adding a pinch each of salt and pepper, then distribute onto the sheet pan around the chicken.
Place pan in the oven and roast for 40 minutes. Check about halfway through and give the vegetables a stir. The chicken is done when it’s browned and cooked through (165°F). This might be a little before the time is up - if that’s the case, pull the chicken out and cover to keep warm, and let the vegetables continue to roast until tender.
Make the yogurt sauce - this could be done ahead in the day, or while the chicken’s cooking. Whisk together the yogurt, mint, cilantro, and grated garlic. Add lemon juice, a pinch of salt and pepper, then taste and adjust.
Serve topped with juices from the sheet pan, a squeeze of lemon, a few cilantro leaves, and a large dollop of yogurt sauce.

Butternut Squash Soup with Rosemary Croutons
Okay, I’m ready for warm weather. I can’t wait for sunny park walks with just a light jacket - or, dare we dream, no jacket? - and, on the other side of that, days of abundant fresh produce hand selected from the market. In the meantime, I’m clinging to my winter squashes and citrus, and trying hard to embrace the moment. Because along with the park walks and jacketless freedom come seasonal allergies and sunblock - so there are benefits to the here and now. Like this creamy butternut squash soup.

Okay, I’m ready for warm weather. I can’t wait for sunny park walks with just a light jacket - or, dare we dream, no jacket? - and, on the other side of that, days of abundant fresh produce hand selected from the market. In the meantime, I’m clinging to my winter squashes and citrus, and trying hard to embrace the moment. Because along with the park walks and jacketless freedom come seasonal allergies and sunblock - so there are benefits to the here and now. Like this creamy butternut squash soup.

The most difficult thing you’ll do for this recipe is chop the butternut squash. If knives aren’t your thing, you could purchase prepared chopped squash - no shame in saving your time and/or fingers. If you have a whole squash on hand, start with peeling. It’ll take a little patience, but a simple vegetable peeler (Y-shaped preferred) will do the trick. Once peeled, take a thin slice off the bottom and top to form a stable surface for cutting. Stand the squash upright so it’s tall on its base and, using a sharp knife, carefully cut it vertically, applying firm pressure until you cut through. Scoop out the seeds, then chop. For this recipe, you’re looking for 2-inch chunks.


This is a pretty basic soup as far as soups go: chopped vegetables boiled in water. Sure, we fancy it up a little with some floral notes from the rosemary, some umami from the parmesan, some crunchy breadcrumbs - maybe a little sherry if you have it on hand to add some depth and complexity. But the star of this soup is butternut squash, and it delivers with sweetness, nuttiness, and a velvety texture. Thanks, winter.
Butternut Squash Soup
Time: 1 ½ hours || Servings: 8
Butternut squash - 1 ½ lbs, one large or two small squash
Olive oil - 1 tbsp
Onion - 1 cup, chopped from 1-2 onions
Garlic - 4 cloves, peeled and crushed
Water - 3 cups
Rosemary sprigs - 2
Chicken or vegetable stock - 1 cup
Sherry - ¼ cup
Chunky breadcrumbs - you can buy or make these by pulsing a day-old baguette in a food processor; alternatively, pull some bread into big chunks and toast a bit longer
Parmesan cheese - grated, for serving
Peel the butternut squash and cut a thin slice from the bottom and top to give it an even surface to stand on. Carefully halve the butternut squash vertically. Scoop out the seeds and discard, then roughly chop the squash into 2-inch chunks.
In a large, heavy bottomed pot, heat the olive oil over medium-low heat. Add the onions and cook, stirring occasionally, until golden, about 15 minutes. Don’t let the onions brown. Then add the garlic and cook, stirring, until fragrant, 1-2 minutes. Add the squash, water, and one rosemary sprig, then cover and simmer for about 45 minutes.
While the squash simmers, heat the oven to 350°F. Line a baking sheet with parchment paper and spread the breadcrumbs out on the baking sheet. Chop the leaves from the second sprig of rosemary and sprinkle them over the breadcrumbs. Drizzle breadcrumbs with the oil, then give them a toss to coat them. Toast in the oven for 10 minutes, tossing occasionally to allow the crumbs to brown evenly. Remove when breadcrumbs are crisp, and sprinkle lightly with coarse salt. Set aside to cool.
When the squash is tender and easily pierced with a fork, turn off the heat and discard the rosemary sprig. Puree the mixture using an immersion blender or food mill, or let it cool slightly and use a blender or food processor to puree in as many batches as necessary. Return the puree to the pot over low heat and add the sherry. Slowly add stock until you reach desired consistency. Add a large pinch of salt and a few grinds of pepper, then taste and add sherry and seasoning to your taste. Serve topped with the breadcrumbs and a generous sprinkling of grated parmesan.

Winter Greens Salad
I know, a salad doesn’t seem exciting, and not only is this a salad but it’s one made from winter greens that are maybe a little bit - what shall we say? - oh I guess, yes, they can be bitter, if you’re the type to judge. But don’t stop reading yet. It would be in your best interest to keep reading. Because yes, this salad has bitter greens in it, but the acidic lemony mustardy pop of the dressing transforms them. You will not regret eating this.
I know, a salad doesn’t seem exciting, and not only is this a salad but it’s one made from winter greens that are maybe a little bit - what shall we say? - oh I guess, yes, they can be bitter, if you’re the type to judge. But don’t stop reading yet. It would be in your best interest to keep reading. Because yes, this salad has bitter greens in it, but the acidic lemony mustardy pop of the dressing transforms them. You will not regret eating this.
And let’s face it - it’s been a loooong indoor winter, with sad salads made from greens that long for sun and soil and a shorter commute. These greens might be a little different from your darling bibb and butter lettuces, but they are of the moment. And aren’t we all a little bitter right now? These greens get you.


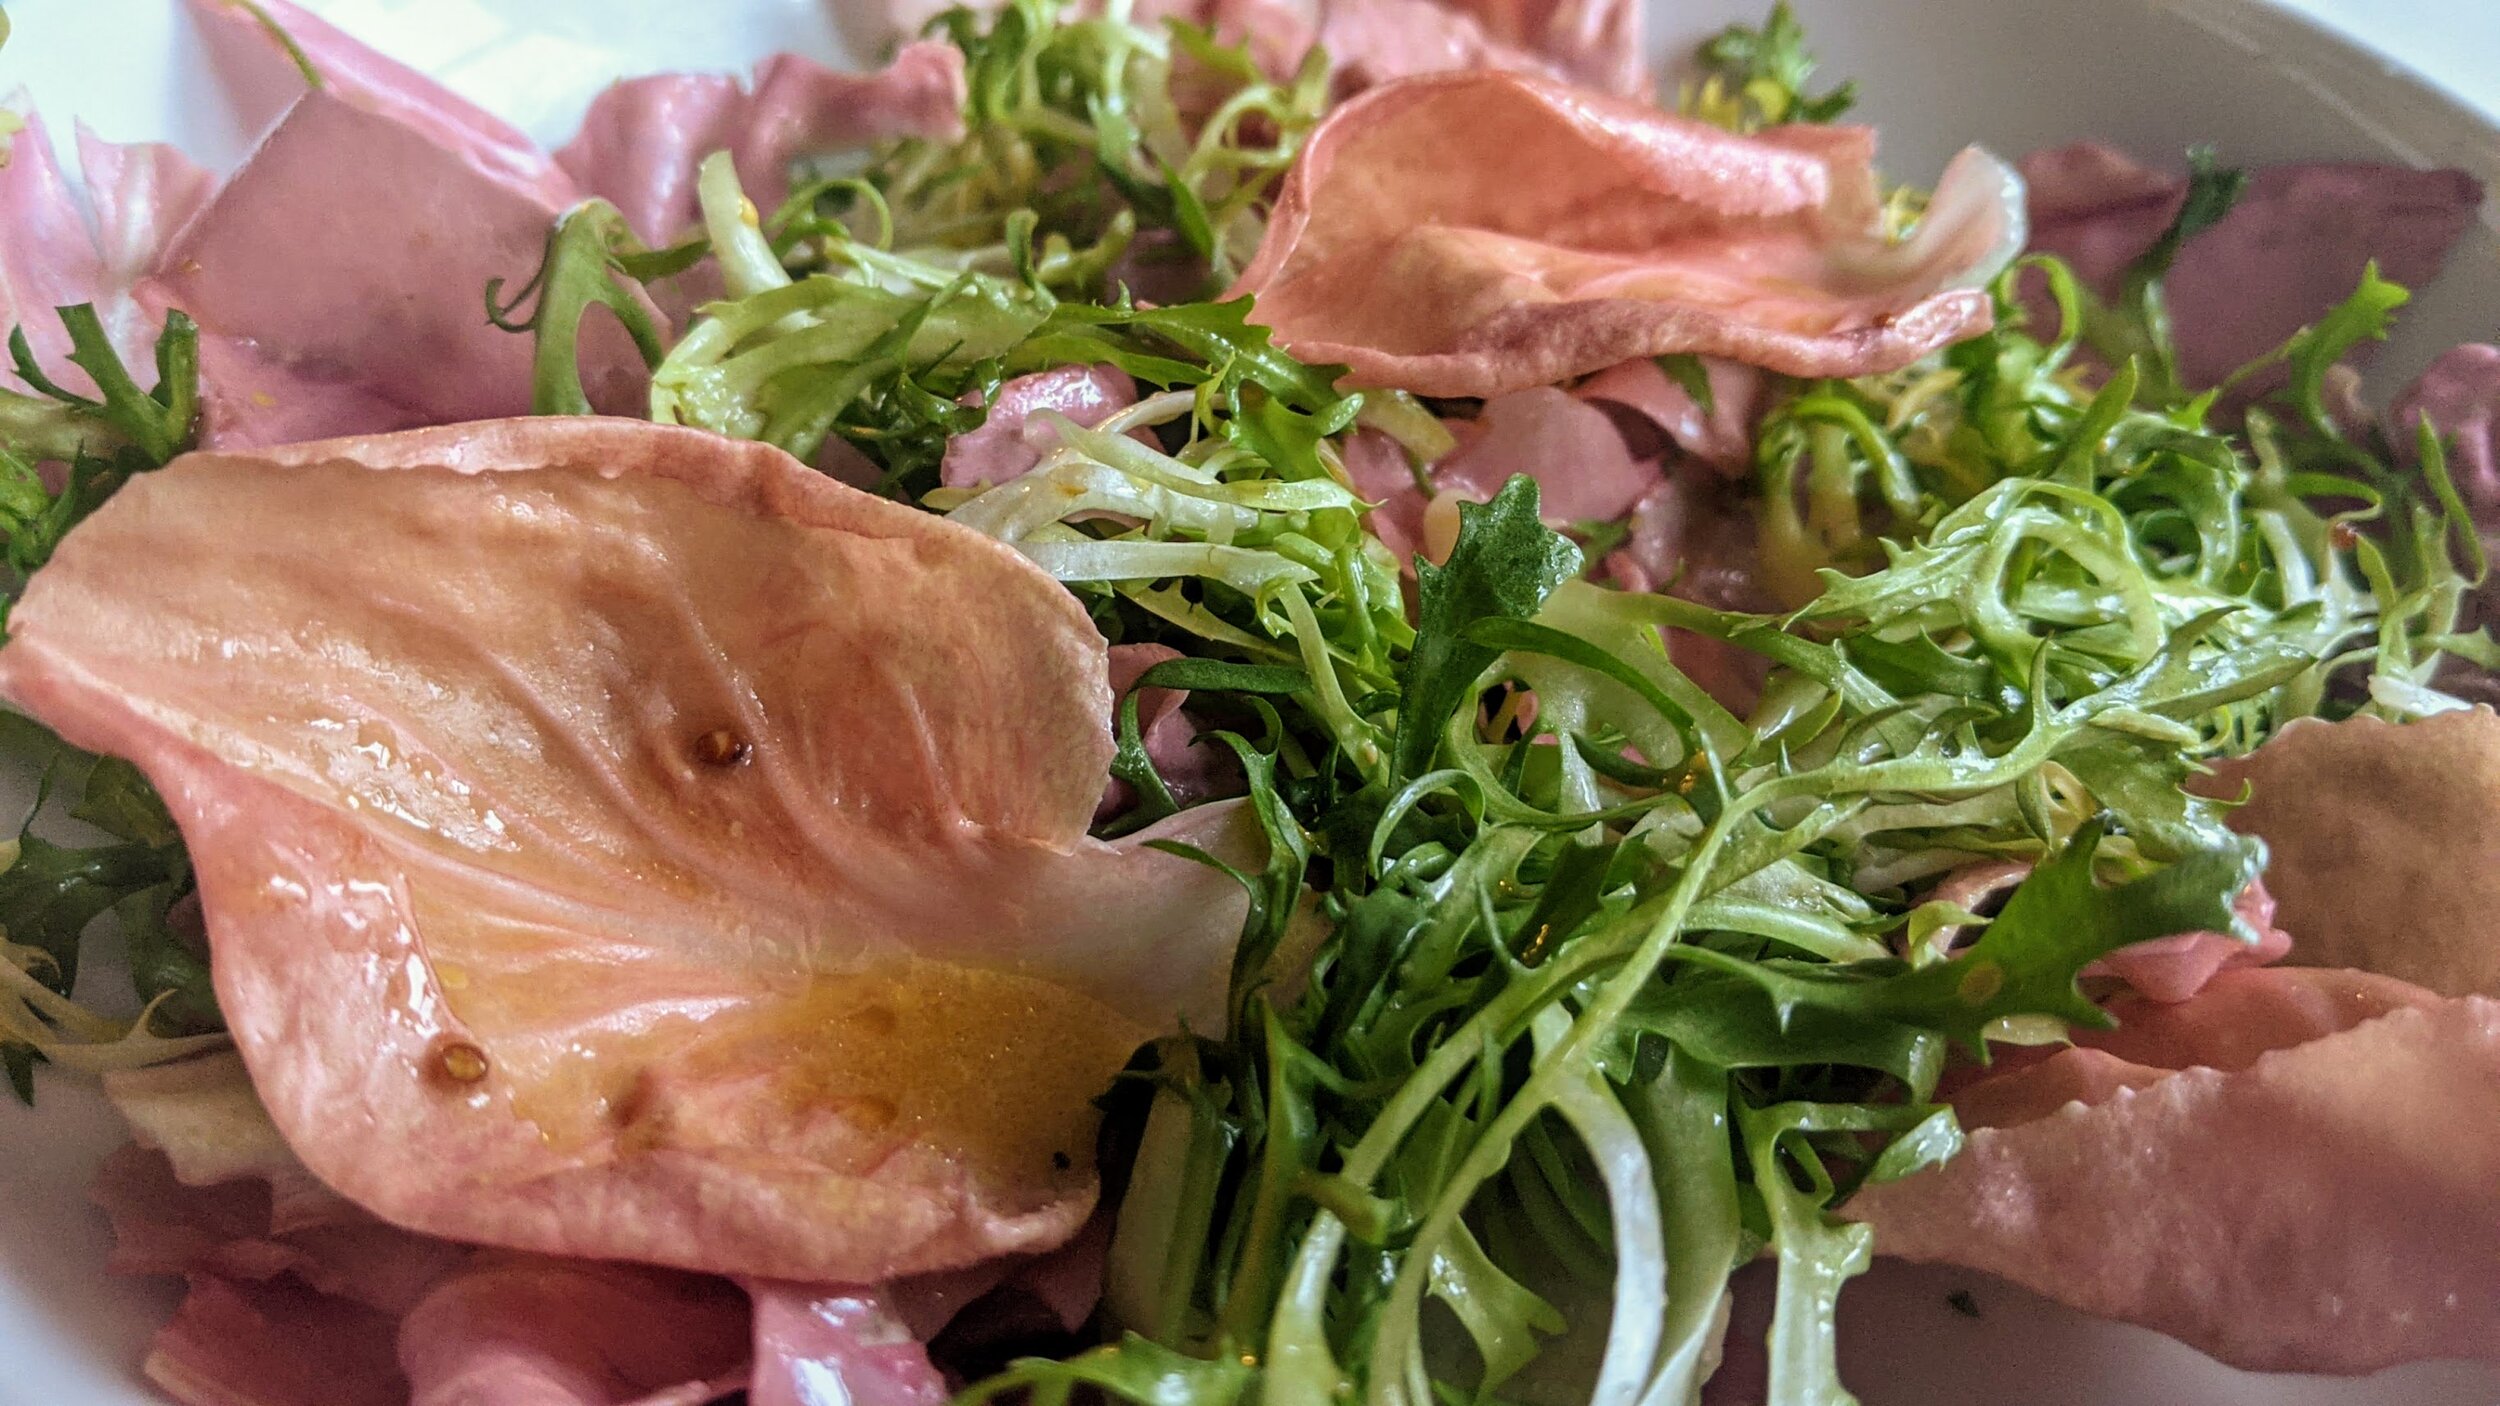
Did you notice that some of this salad is a little pink? That’s a fancy little chicory called Radicchio La Rosa del Veneto - aka pink radicchio from Venice. I’d never heard of it before, but my local shop had it and who could resist that color? Apparently it’s having a little moment and is being grown in the US with more regularity (some crazy restaurants actually import it from Venice!). It’s absolutely unnecessary to go on a mission to find it, though - red radicchio is equally delicious.

Eat this salad with these awesome garlic & goat cheese toasts, maybe some olives - and a big glass of wine.
Winter Greens Salad
Time: 10 minutes || Servings: 5 || Source: Slightly adapted from Mozza via NYT
Whole grain mustard - 1 ½ tsp
Dijon mustard - 1 ½ tsp
Lemon juice, freshly squeezed - 3 to 6 tbsp
Olive oil - ½ cup
Salt & pepper
Mixed winter greens, such as frisée, radicchio, or dandelion greens - 8 oz or ½ lb
When you’re ready to eat, wash and dry the greens. If there are signs of wilting, soak the greens in cold water - this can also help to reduce the bitterness of radicchio. Dry thoroughly using a salad spinner or kitchen towels. Tear greens into bite sized pieces. I like to keep small leaves whole because they’re pretty. Toss the greens together and place in a large bowl for serving, or individual bowls.
Make the dressing. Note: These amounts will make more dressing than you’ll need for this salad, but it’ll keep in the refrigerator for a week and works well on other greens. In a jar, combine the mustards, 3 tablespoons of lemon juice, and olive oil. Add salt and pepper to taste (I used ½ tsp salt to start). Cover and shake vigorously. When emulsified (the ingredients have come together and look creamy, and the olive oil isn’t separated), dip a small piece of radicchio or frisée into the dressing and taste it. The amount of lemon needed will depend on the acidity of your particular lemon and mustard; I needed 4 tablespoons to get some pop from the lemon. Add additional lemon and salt if needed and taste again - repeat until your palate is happy.
Toss the greens with just enough dressing to coat them. Start with less dressing than you think you need - it’s easy to add more, but an over-dressed salad is irretrievably soggy.
Variation: Although quite good as is, this salad wouldn’t suffer from the addition of toasted walnuts or pine nuts or a little shaved parmesan or roquefort if you feel so inclined.
Goat Cheese & Roasted Garlic Toasts
We’ve been enjoying a lot of rich, meaty foods recently (see: bolognese, beef stew), but with warmer weather peeking through - including an incredible 70°F March birthday, thank you thank you - it felt time to go for something a little lighter. We’re not quite at zucchini season, so I turned to winter greens and some pantry staples for support.

We’ve been enjoying a lot of rich, meaty foods recently (see: bolognese, beef stew), but with warmer weather peeking through - including an incredible 70°F March birthday, thank you thank you - it felt time to go for something a little lighter. We’re not quite at zucchini season, so I turned to winter greens and some pantry staples for support.
I love garlic. It has a distinct flavor, as vampires can attest, but it’s so versatile: crush a clove and plop it in a yogurt sauce for subtle flavor, grate it into a dressing for a spicy punch, mince it with onions as a base for tomato sauce. Or, in this case, mellow it out to sweetness with a long roast and eat it directly out of its crinkly skins.


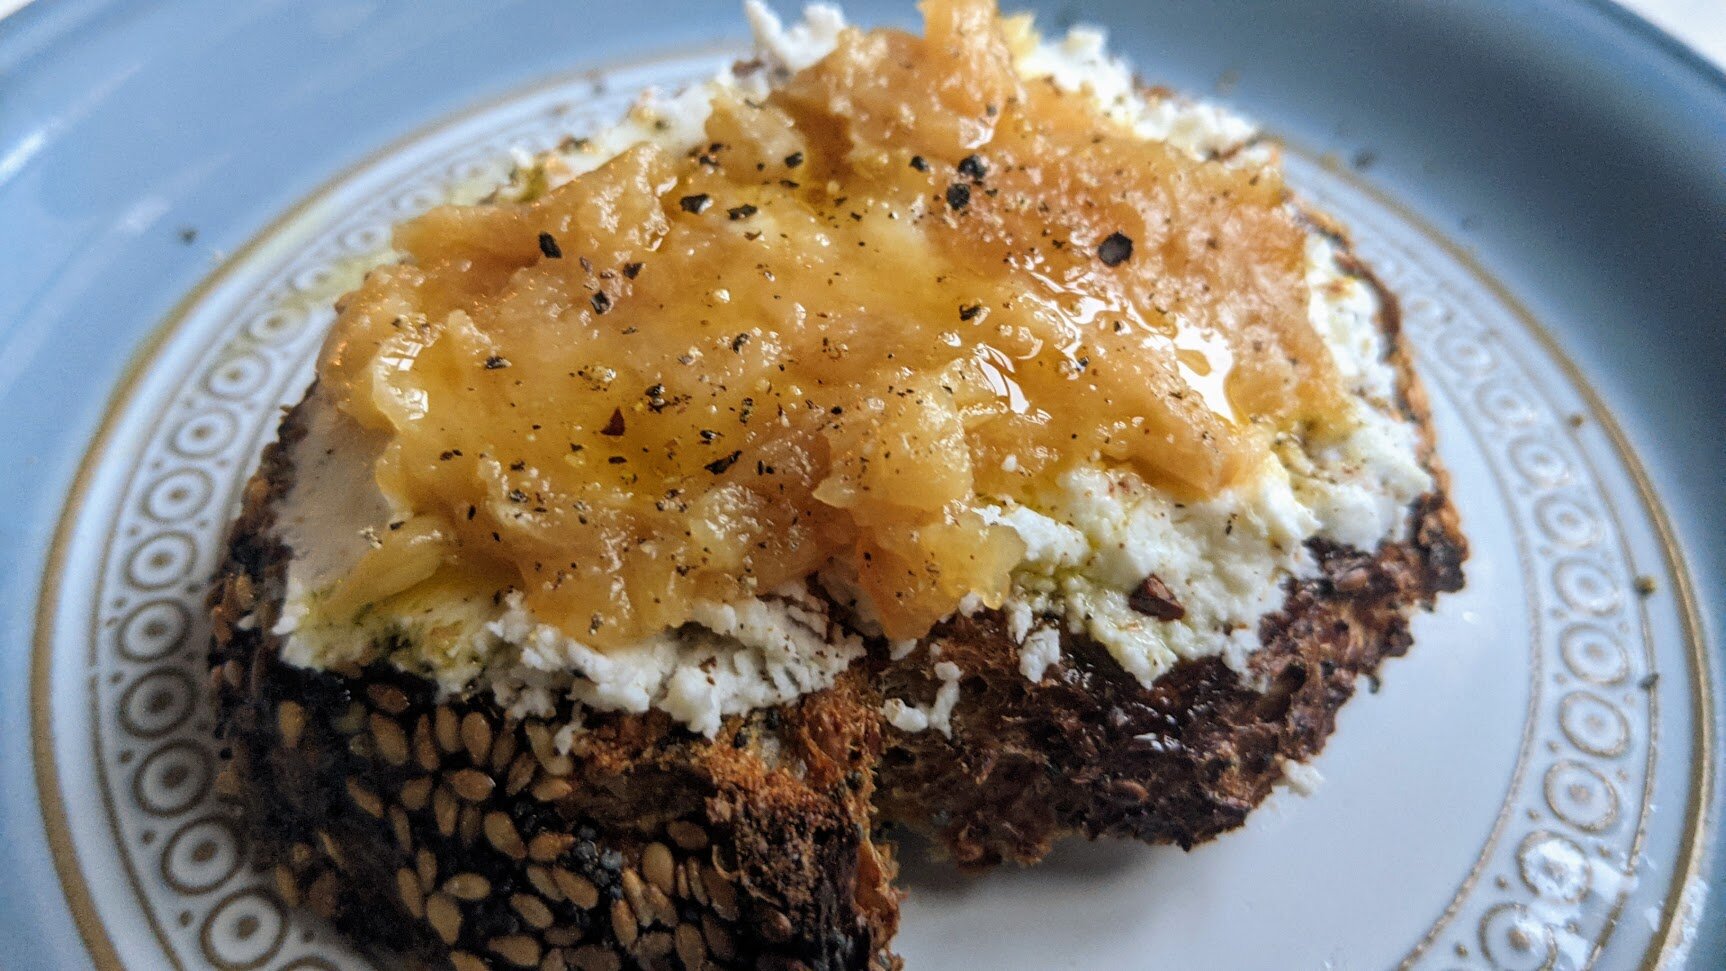
This toast is super simple and easy to prep ahead of time - and actually, you eliminate most of the prep if you just arrange the ingredients for a make-it-yourself experience. The garlic heads can be roasted anytime the day you’re planning to eat, making it easy to snag five minutes to get them in the oven. I used a seeded sourdough for this, but most toasted bread would work - I like having them be sort of crostini sized for easy assembly and consuming.


This is great for lunch with a salad, or bulk it out for dinner with more antipasti items, like raw or roasted vegetables, cured meats, olives, and, of course, wine.
Goat Cheese & Roasted Garlic Toasts
Time: 15 minutes active, 1 hour roasting || Servings: your call
Garlic heads - 1 per person
Olive oil
Goat cheese - 1-2 oz per person
Good bread, such as a baguette
Herbs, such as thyme or rosemary - optional
Salt & pepper
Roast the garlic. This can be done anytime the day you’re planning to eat. Heat the oven to 400°F. Slice about a half inch off the top of the garlic heads - the top of the garlic cloves should be visible. If not, slice a little more. Discard the tops. Place the garlic heads in a baking dish, cut side up. Drizzle the top lightly with olive oil and sprinkle with salt. Fill the baking dish about a quarter inch deep with water and cover tightly with foil. Roast in the oven for 45 minutes to 1 hour. When done, remove from the oven and remove the foil; the garlic should be soft and creamy. The garlic can sit at room temperature in its papery skin until you’re ready to use it.
When you’re closer to eating, put the goat cheese out to come to room temperature - this makes it easier to spread. Finely chop the herbs, if using, and combine with the goat cheese.
Cut the bread into pieces that are easy to pick up - slices for a baguette, or 1.5 inch squares for a boule. Toast the bread lightly.
You can assemble the toasts to serve, but I like putting all of the components out to let people assemble their own. This is how I assemble mine: I spread the goat cheese over the toast, then gently squeeze the bottom of the garlic cloves - they should squish right out. I spread the garlic over the goat cheese, then drizzle it with olive oil and sprinkle with chunky salt and a few grinds of black pepper.

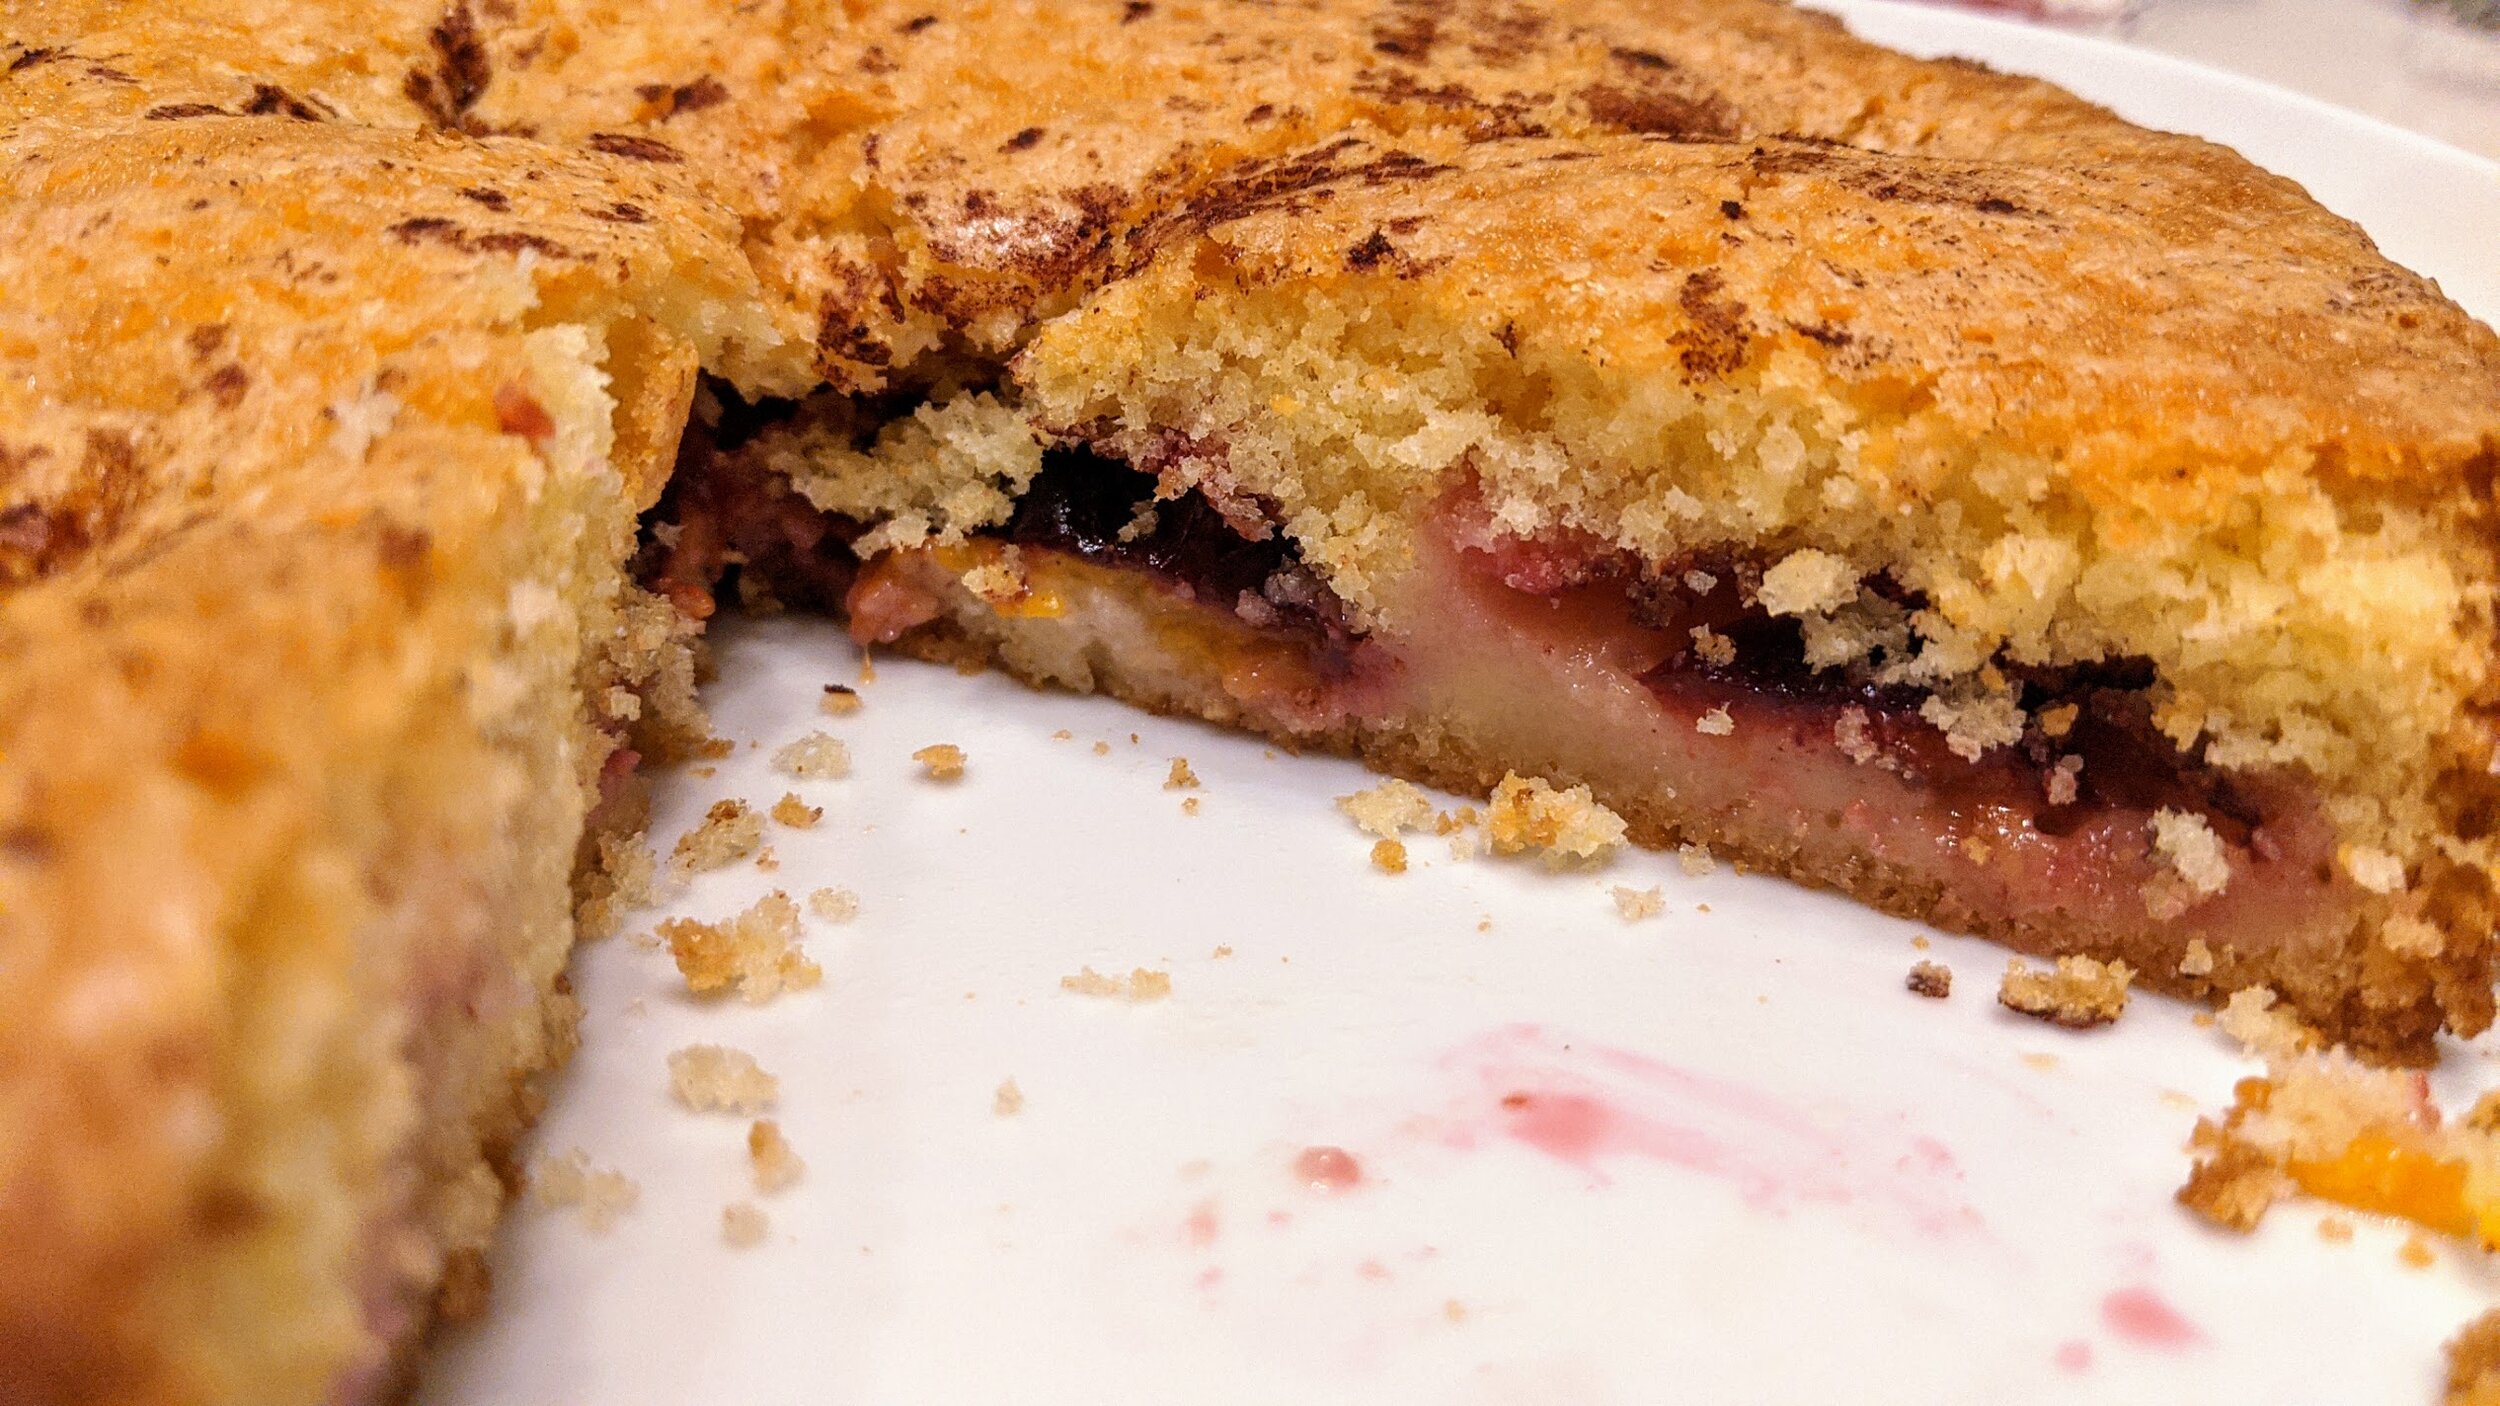
Plum Torte
As a baker, there are two things I absolutely love: 1) a recipe simple enough that I can remember it, not in small part because it makes me feel like a bonafide baker and not a hobbyist, and 2) a gorgeous end product that makes people think it took me all day to make it. Finding both of those things in a single recipe is kind of amazing.

As a baker, there are two things I absolutely love: 1) a recipe simple enough that I can remember it, not in small part because it makes me feel like a bonafide baker and not a hobbyist, and 2) a gorgeous end product that makes people think it took me all day to make it. Finding both of those things in a single recipe is kind of amazing.
It’s no surprise that, meeting both of these criteria, Marian Burros’s recipe for a gorgeous plum torte has been printed in the New York Times annually since 1983. It’s absolutely delicious and forgivingly versatile - any seasonal fruit will work with this beautiful batter, and you can mix up the spices or add herbs to suit your tastes and your pantry. Ms. Burros calls for an 8", 9”, or 10” pan and you don’t even have to grease it!


The most effort you have to put into this recipe is halving the plums. Look for the indent along the side of the plum, and run your knife along that until you’ve gone around the whole plum. Twist the two halves, and the plum will come apart. The pit should be in one half, flat side facing you. Wiggle a knife underneath the pit to remove it - or go crazy and use your fingers to pry it out.
I hope you can take a few minutes to make this incredibly easy classic dessert (…or breakfast?) to welcome the autumn season.
Plum Torte
Time: 15 minutes active, 1 hour baking || Servings: 8 || Source: Marian Burros, New York Times
Sugar - 3/4 cup
Unsalted butter - 1/2 cup (one stick), room temperature
All purpose flour - 1 cup
Baking powder - 1 tsp
Eggs - 2
Purple plums - 24, halved and pitted
Lemon juice, sugar, and cinnamon for topping
Heat oven to 350°F.
In a large bowl, cream together the butter and sugar. Sift in the flour, then add baking soda, eggs, and a pinch of salt. Mix well.
Pour batter into a springform pan between 8 and 10 inches and smooth. No need to grease the pan.
Top batter with plums as densely as possible. With a 10 inch pan, I didn’t use all 24 plums (which was great, I made a second torte!). Sprinkle the top with lemon juice, sugar, and up to a teaspoon of cinnamon. If your plums are very sweet, you may want more lemon juice and less sugar; if they are tart, you may want more sugar and less lemon juice.
Bake torte for 1 hour, checking in the last ten minutes. It’s done when it’s lightly browned and the plums are jammy and sunk into the cake. Cool and remove from pan. Serve warm or at room temperature. This also freezes well; reheat at 300°F for 10-15 minutes.

Simple Kale Salad
One of the reasons I really enjoy having a farm share is that it pushes me to eat foods I would normally avoid because I’m not familiar with how to treat them, or I’ve had a bad experience, or they’re just not on my radar. Kale’s definitely on my radar — it was THE thing to eat before cauliflower and after toasts, I think, right? But I have definitely had some bad experiences with it (steaming and smoothies come to mind) and I haven’t really dug into the right way to prepare it with confidence.

One of the reasons I really enjoy having a farm share is that it pushes me to eat foods I would normally avoid because I’m not familiar with how to treat them, or I’ve had a bad experience, or they’re just not on my radar. Kale’s definitely on my radar — it was THE thing to eat before cauliflower and after toasts, I think, right? But I have definitely had some bad experiences with it (steaming and smoothies come to mind) and I haven’t really dug into the right way to prepare it with confidence.
Cut to four weeks of enormous kale bunches from the farm share and me standing in my kitchen with a question mark over my head. As we enter autumn, I see that kale is going to need to enter my repertoire.
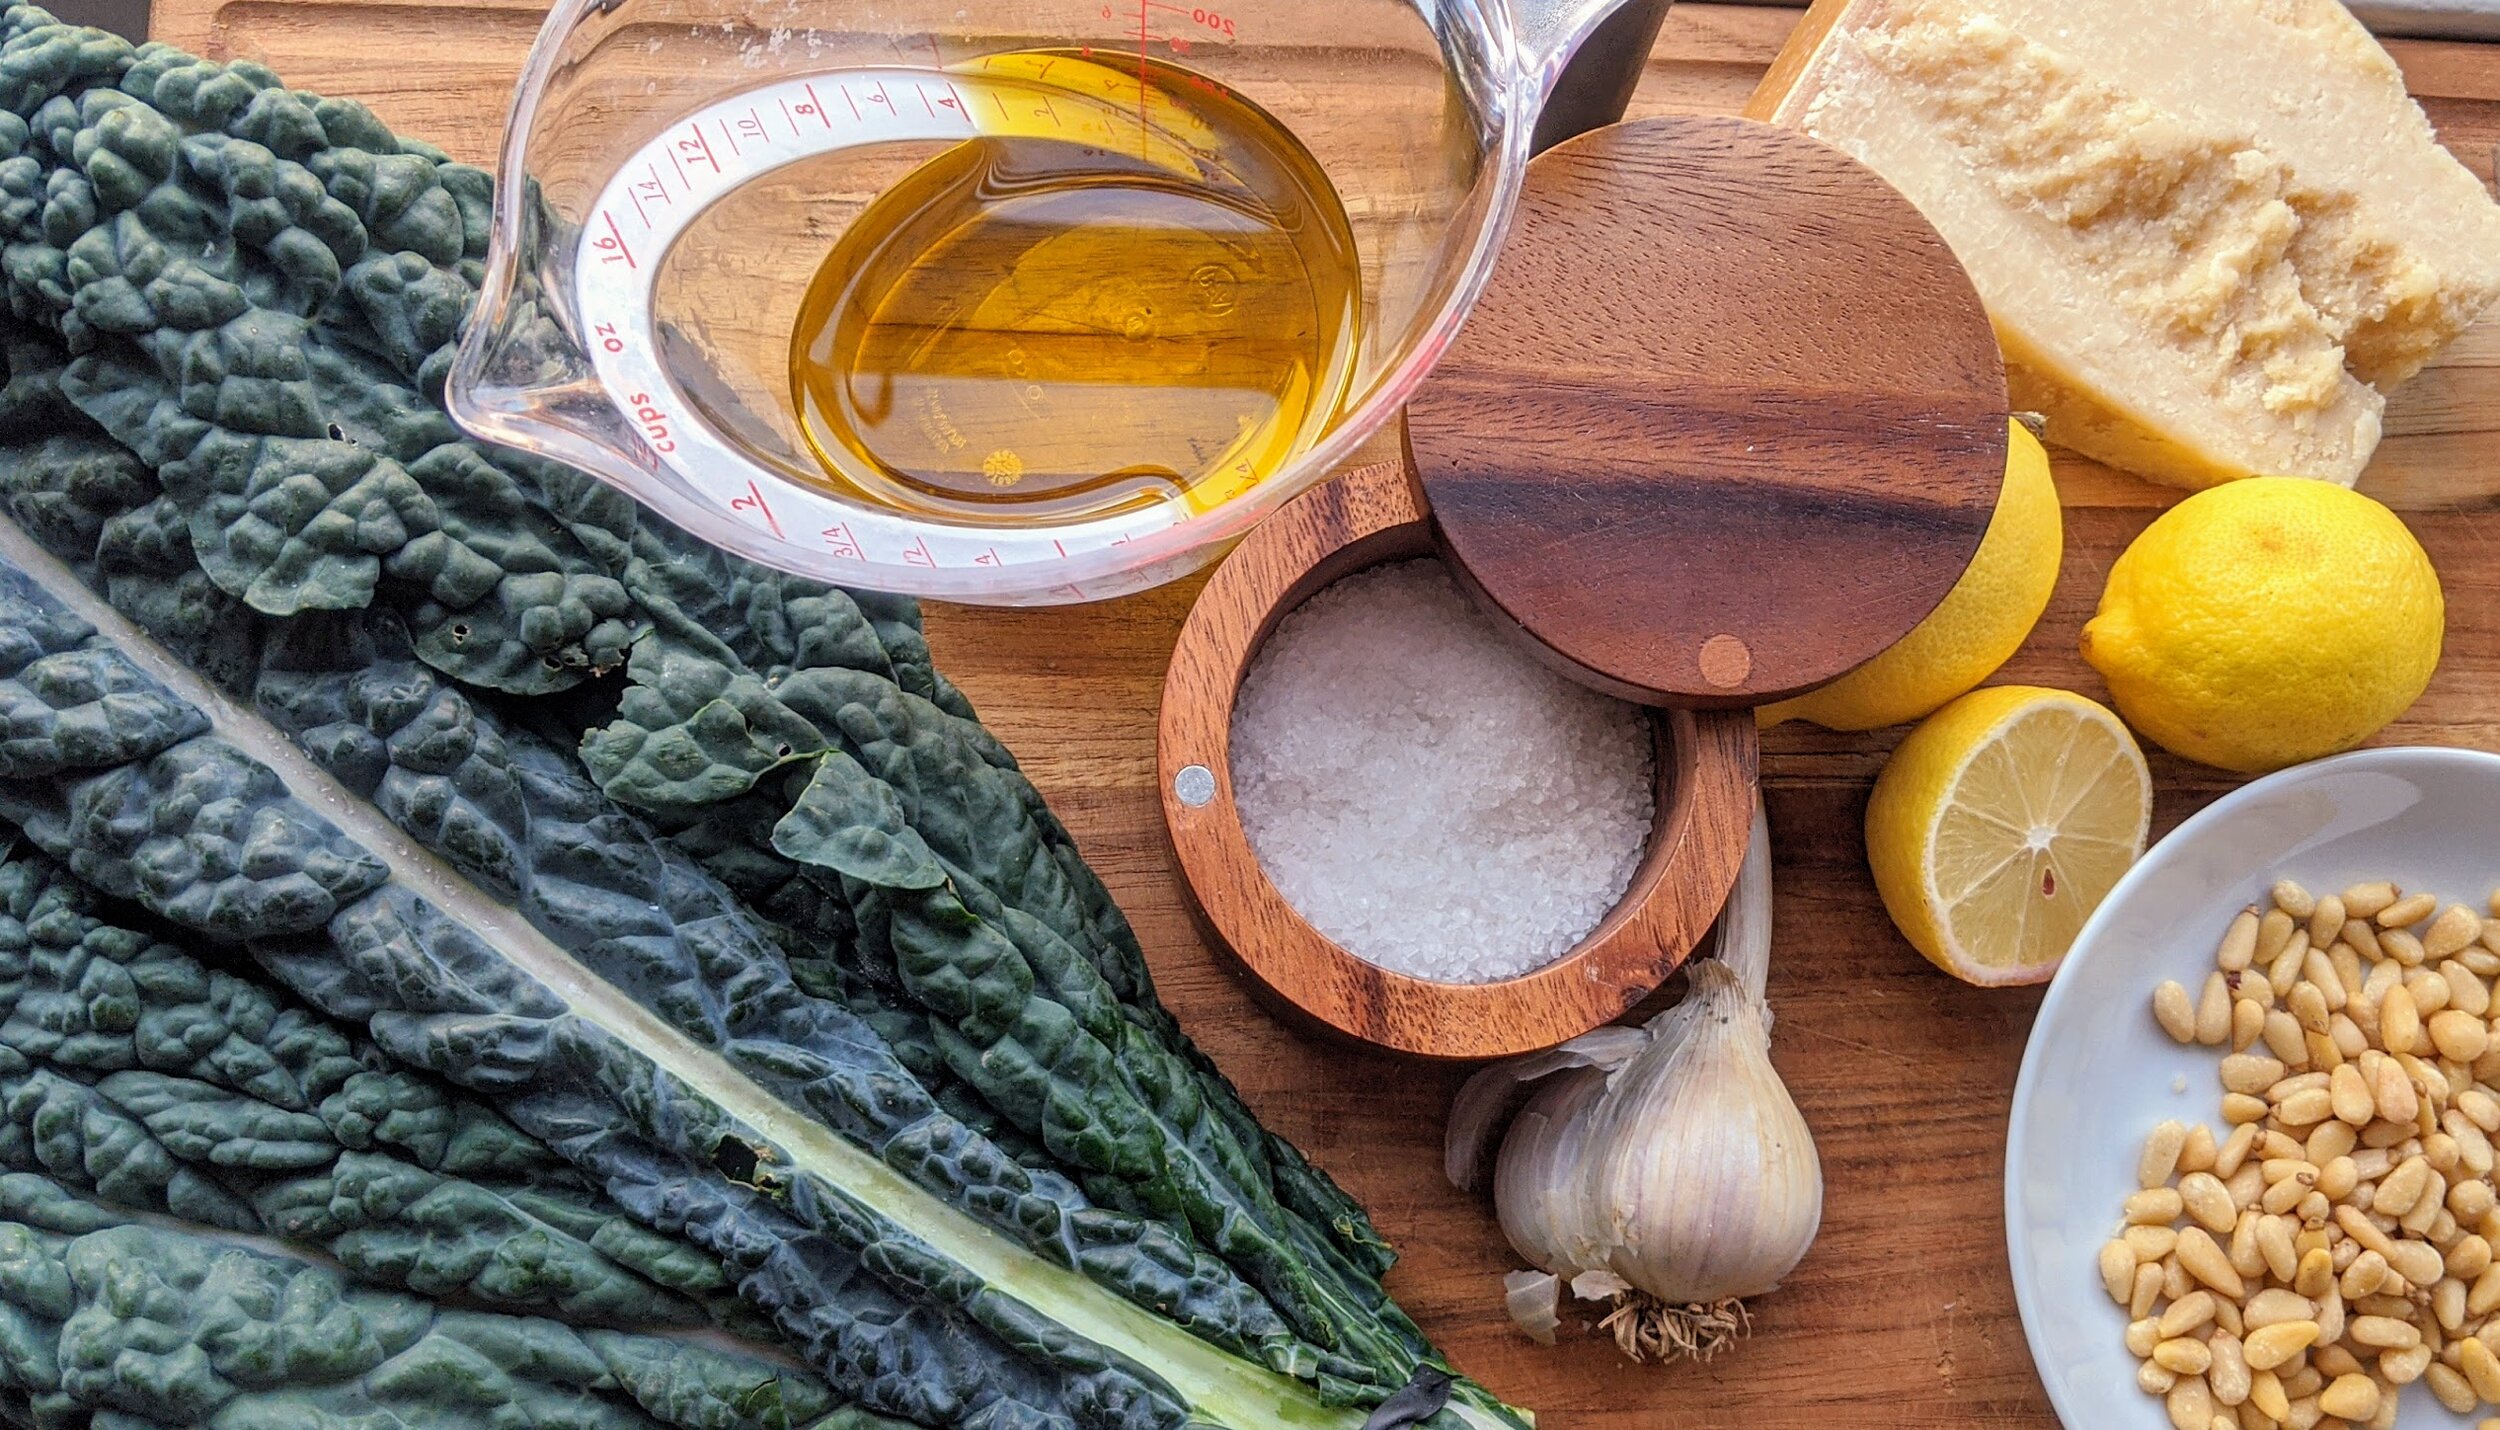
I found an abundance of kale salad recipes that I’ve riffed on and hybridized here to create a very simple and delicious salad. The kale is destemmed and sliced finely into a slaw, which mitigates the fibrousness of the leaf. The dressing leans heavily on acid, which helps the tough leaf break down, and the bright lemon and sharp garlic flavors stand up to the kale. Pine nuts add crunch and, of course, a shower of parmigiano reggiano adds umami deliciousness.


I have found this to be quite filling on its own, but I’ve also been serving it frequently with this gazpacho as a no-cook meal solution.
Simple Kale Salad
Servings: 2 large salads || Time: 15 minutes || Source: many many kale salad recipes
Lemon - 1
Olive oil - 1/2 cup
Garlic - 1
Pine nuts - 2 tbsp
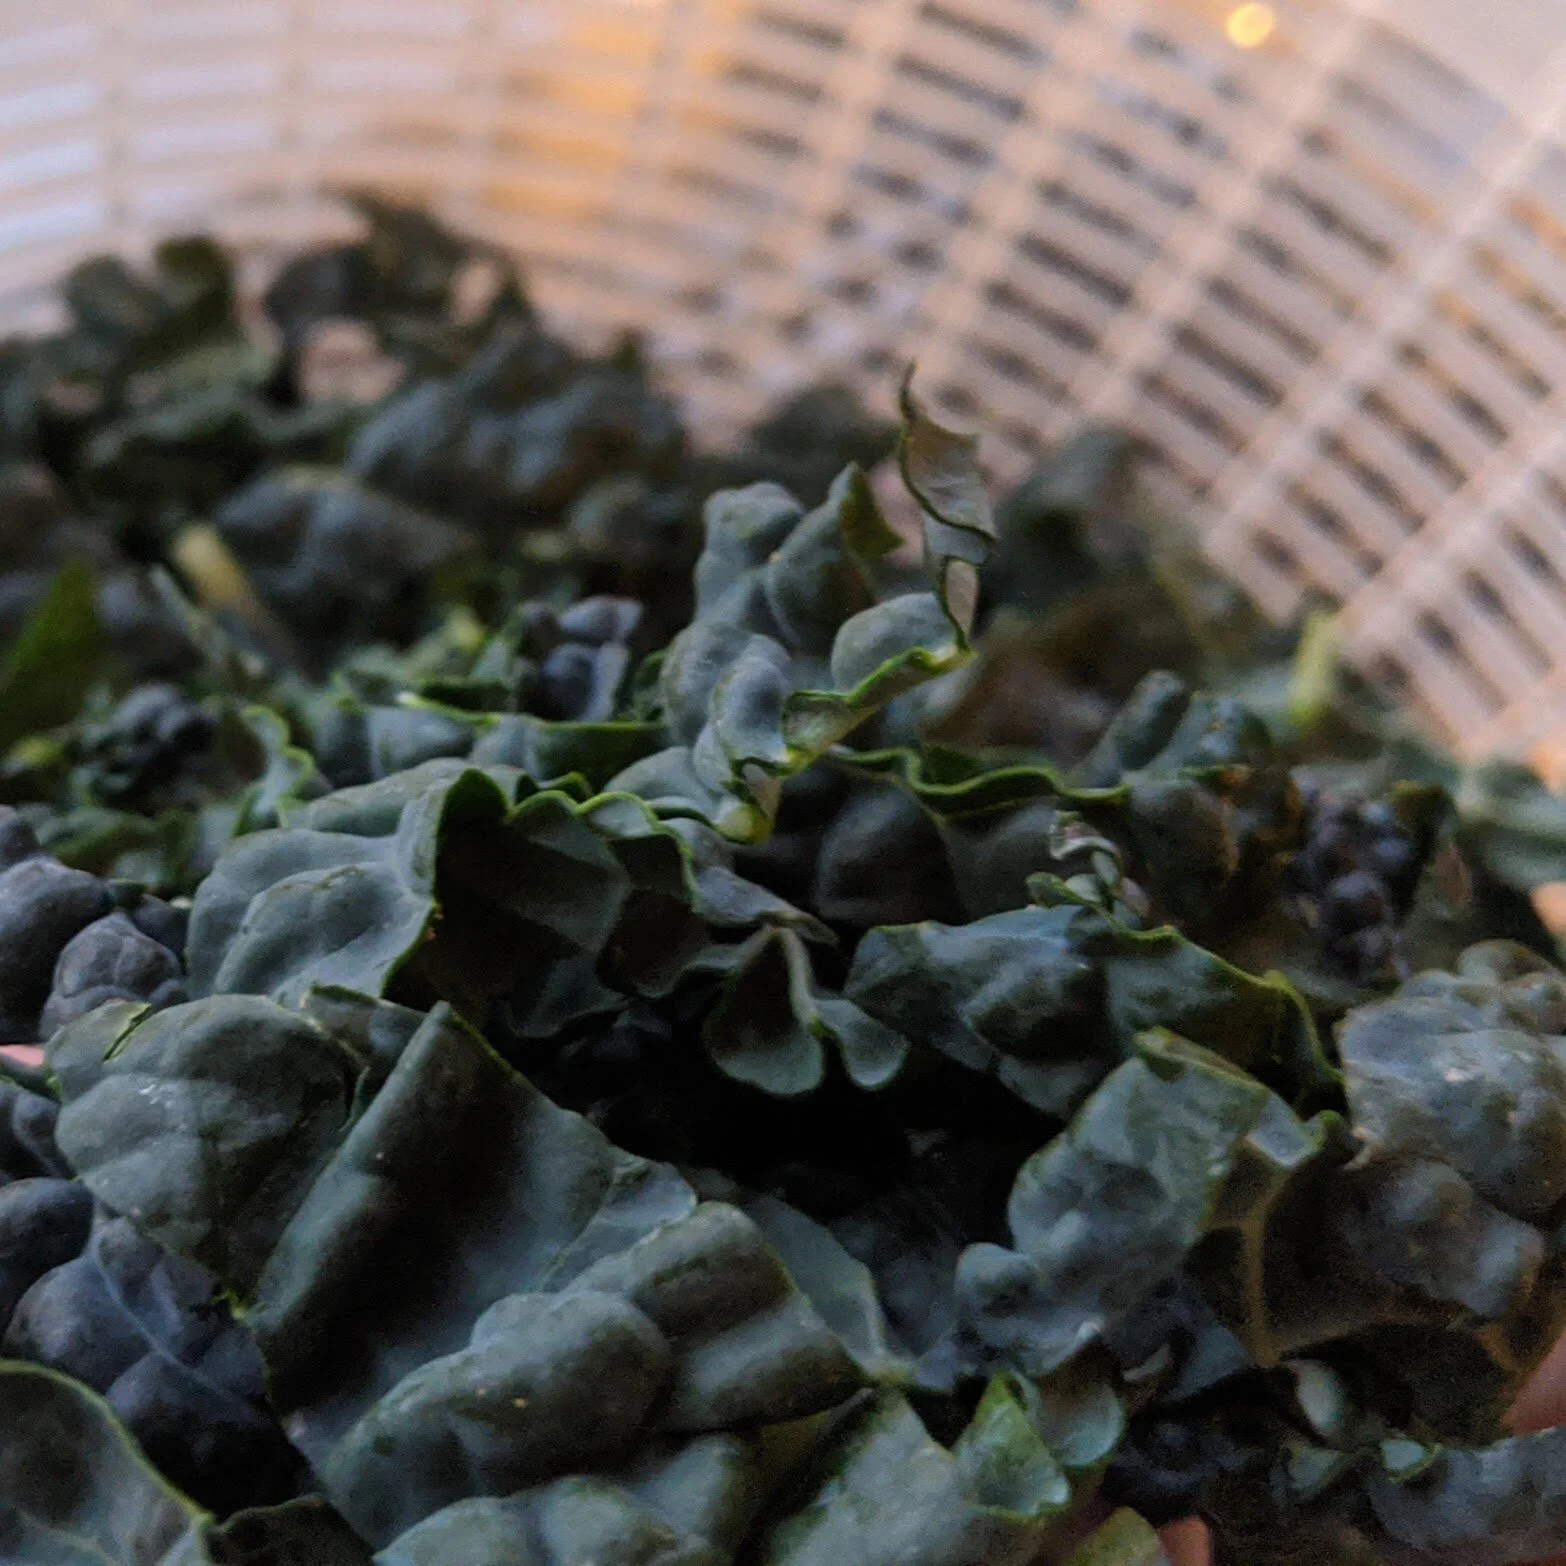
Kale - 1 bunch, washed
Parmesan (Parmigiano-Reggiano)
Over a small bowl, zest the lemon. Slice and squeeze the lemon juice into the same bowl. Add a generous pinch of salt and pepper. Whisk in about 1/3 cup of the olive oil, pouring slowly so that it emulsifies. Taste - the lemon flavor should be sharp, but not pucker-your-lips tart. Whisk in more olive oil as needed to reduce tartness and round out the dressing. Crush and peel the garlic clove and add to dressing (no need to chop; you’ll remove this before serving). Set aside to let the garlic infuse into the dressing.
Toast pine nuts in a small, dry skillet over medium-low heat. Keep a close eye and shake the pan from time to time to toast evenly and avoid burning. You’ll be able to smell them as they release oils and start to toast. Once toasted, remove from heat and set aside to cool.
Remove the tough parts of the stems from the kale leaves by slicing along the rib with a sharp knife. There’s no need to remove the smaller, more tender stems at the top of the leaves. Pile kale leaves on top of each other and slice thinly across the leaf to create strips, something like a kale slaw. This doesn’t need to be perfect.
Place kale slaw in a large bowl. Grate up to half a cup of Parmesan over the kale. Scatter pine nuts over the top, then toss ingredients together to mix. Remove garlic cloves from dressing and drizzle over the kale, reserving a couple of tablespoons. Toss the salad together; add more dressing if needed.
Serve, topped with more parmesan if desired.

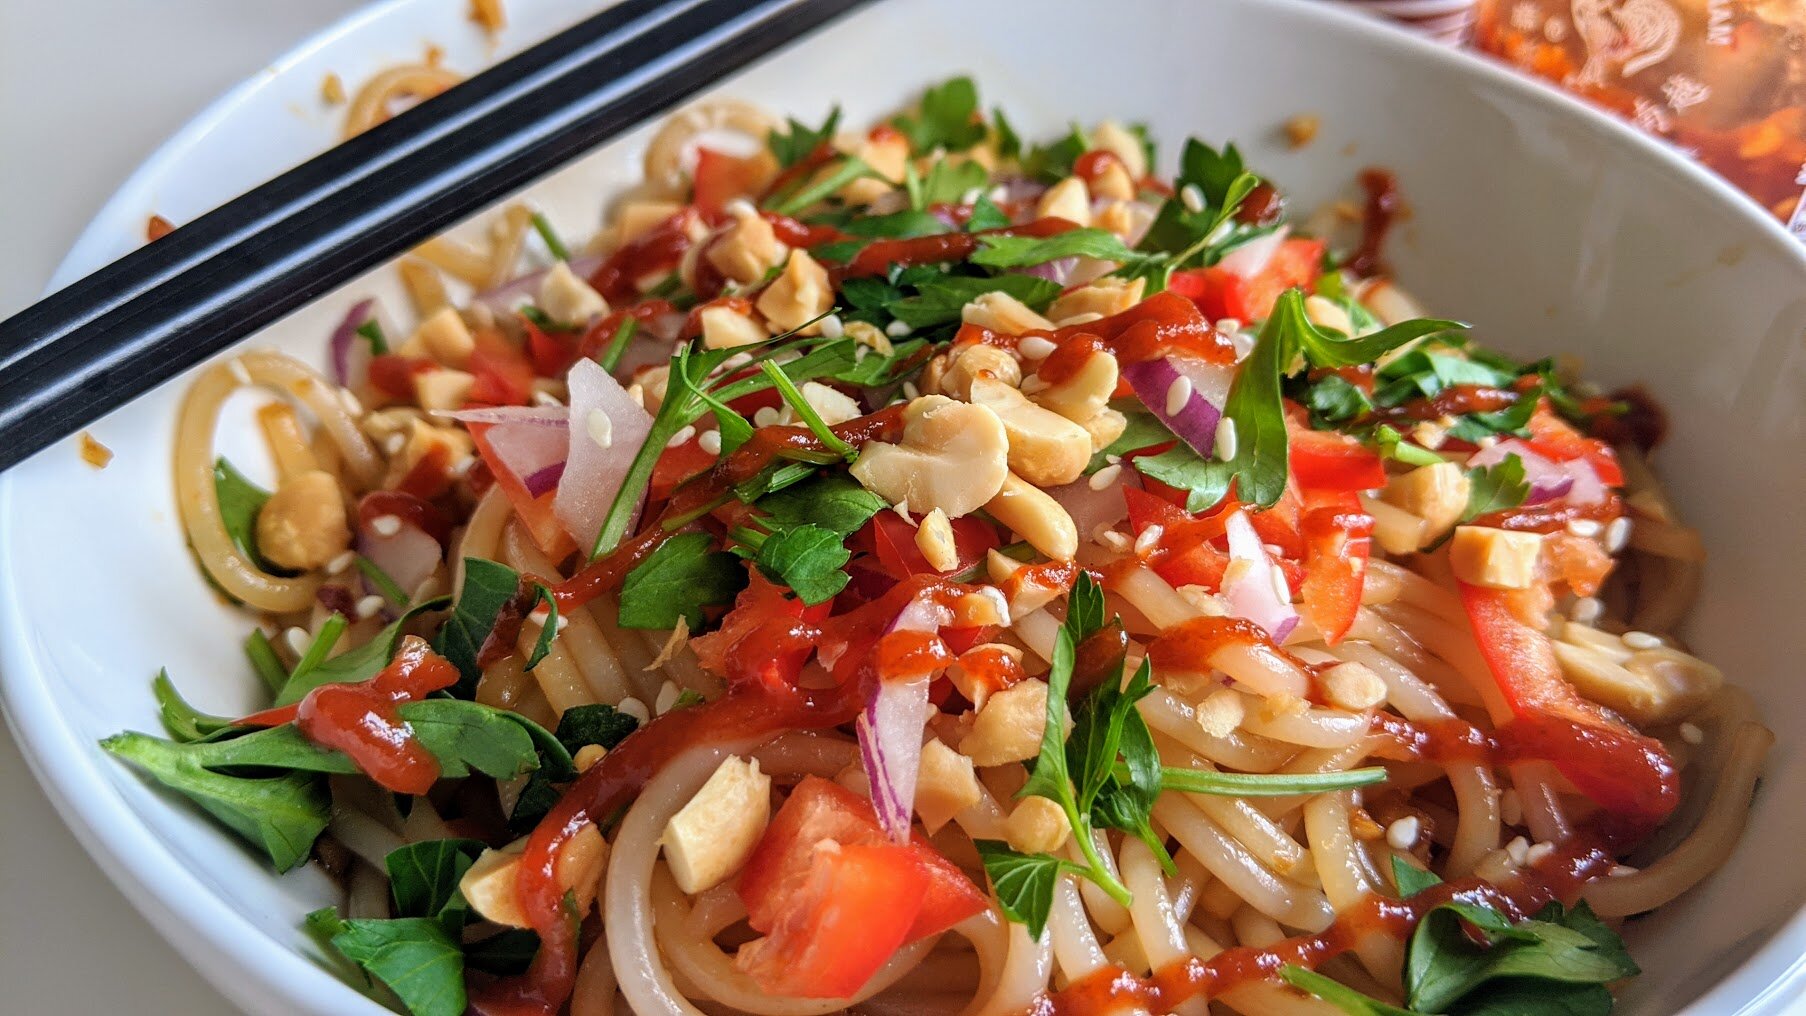
Chinese-Style Rice Noodles
My best friend since childhood, Cat, is Chinese. We had sleepovers weekly, attended our first concert together, went to dance classes together (…when my mom didn’t take us for ice cream instead - the antithesis of Cat’s strict Chinese parents). We grew up in each other’s homes during our formative years.
My best friend since childhood, Cat, is Chinese. We had sleepovers weekly, attended our first concert together, went to dance classes together (…when my mom didn’t take us for ice cream instead - the antithesis of Cat’s strict Chinese parents). We grew up in each other’s homes during our formative years.
My family introduced Cat to American, Middle Eastern, and European cuisines. She had her first hamburger at my house and most of the candy she consumed from elementary school through junior high. In an almost certainly overblown-in-the-retelling near drowning incident at a water park, my mom frantically yelled, “That’s my daughter!!!” at a confused lifeguard. (Interracial adoption was less prevalent in NH in the ‘90s, no doubt.)
On the reverse side, I spent a ton of time at Cat’s house. Hanging out with Cat included watching her practice piano, attending Chinese school as the awkward Caucasian tag-along, and going apple picking with her extended family. Her family still loves telling stories about the first time I used chopsticks (it didn’t go well), my reaction to chicken feet (it didn’t go well), and how I worked the room with all the non-English speaking relatives (it went really well, they loved me).


I had no idea how lucky I was to be exposed to Cat’s mother’s amazing culinary skills over the years. Even now, I remember what their home smelled like, the rice always in the pot, the balls of herbal medicine. All those years, and I have maybe three poorly pronounced words of Chinese and no recipes or instincts for Chinese food. For better or worse, all I have to go on now is Cat.
While I can’t really say whether this is authentically Chinese (I was ten, I wasn’t paying attention!), this noodle dish is based off of Cat’s “recipe” when she made it for me a couple of years ago. Measurements weren’t really involved, and she thought it was silly that I was even asking - “just taste it, does it taste good?” - so let’s just say this is a rough reimagining of what she did.


This has been a go-to recipe in my household for a quick and easy, mostly healthy, warm lunch. This is a very basic version of it, but it’s easily adapted to include vegetables (wilted greens, raw radishes, hot peppers) and meat or seafood. In what’s developing as a bit of a theme on this blog, I find this to be yet another good recipe for using up odds and ends in the kitchen.
Chinese-Style Rice Noodles
Yield: 2 servings || Time: 20 minutes || Source: Cat
Rice noodles - 4 oz
Ginger - 2 inches, grated or minced
Garlic - 1 clove, grated or minced
Soy sauce - 1/3 cup
Rice wine vinegar - 1 tbsp
Sesame oil - 1 tbsp
Chili garlic sauce - 1 tbsp or to taste (if you don’t have this, add some red pepper flakes to taste)
Red onion - 1/4 cup, chopped
Red pepper - 1/3 cup, chopped
Cilantro - 2 tbsp, chopped
Peanuts - 2 tbsp, chopped
Sesame seeds, for garnish
Sriracha or other hot sauce, for serving
Set a large pot of water to boil. When it’s boiling, cook noodles according to package directions. This usually takes 30 seconds if they’re fresh noodles and maybe 3 minutes if they’re dry.
In a small bowl, combine ginger, garlic, soy sauce, rice wine vinegar, sesame oil, and chili garlic sauce or red pepper flakes. Taste - it should be salty from the soy sauce and a little vinegary. Adjust to taste, but remember it’ll be absorbed by starchy noodles so it won’t taste as strongly when everything is combined.
When noodles are ready, drain and pour them into bowls. Divide sauce among bowls and toss the noodles. Top with chopped onion, red pepper, cilantro, and peanuts. Garnish with sesame seeds and serve with Sriracha.

White Bean Bruschetta
I am excited to start with a simple dish that we love from a sadly defunct but formerly lovely West Village restaurant, Pó. Pó was one of Mario Batali’s first restaurants and it was (in typical NYC style) a tiny, cozy spot that put out delicious Italian food. Amazingly, one of the best things they served was actually free.

Hello -- my name’s Marisa, I live in NYC with my partner and our new-ish baby girl (born in December!). I’m starting this blog to document our adventures in cooking and eating, two of my very favorite activities.

It’s been challenging to get back into cooking following the birth of our little one, but I’ve always found cooking to be a rewarding (read: delicious) and mostly relaxing activity. I also really believe in being close to your food - knowing where it comes from and the people who grow it, if you can. That’s easier to do when it’s not winter, of course.


I’m excited to start with a simple dish that we love from a sadly defunct but formerly lovely West Village restaurant, Pó. Pó was one of Mario Batali’s first restaurants — despite his other proclivities, he does know how to cook. In typical NYC style, it was a tiny, cozy spot that put out delicious Italian food. Delightfully, one of the best things they served was actually free.
This white bean bruschetta, studded with zingy sliced garlic and red pepper flakes, came to the table gratis. It was a mouth-watering way to start a meal and, as it turns out, not too difficult to make at home. I really like that it’s versatile -- simple enough for an any-night appetizer using mostly pantry items, impressive enough for guests, and easily scaled for a big group. This will be tasty no matter what, but I like to splurge on fresh, good quality olive oil and aged balsamic to make this extra.

White Bean Bruschetta from Pó (RIP)
Yield: 12 pieces || Time: 20 minutes || Source: Pó
Cannellini beans (white kidney beans) - 1 can, drained & well rinsed
Extra virgin olive oil - 3 tablespoons
Balsamic vinegar - 2 tablespoons
Red pepper flakes - 1/2 teaspoon or to taste
Basil leaves - 2 tablespoons, chopped*
Garlic - 2 cloves, thinly sliced or finely chopped
Salt and pepper
Baguette, sliced ½” thick
In a medium bowl, put the rinsed beans, olive oil, balsamic vinegar, red pepper flakes, basil, and garlic. Gently combine - I like to use my hands. Season with salt and pepper to taste. Let it sit in the refrigerator for a few hours to marinate and let the flavors come together.
Slice the baguette. Serve the bread with the bowl of the bean mixture, or spoon the bean mixture on ahead of time if you want to get fancy. If you do put the beans on the bread to serve, consider toasting the bread so it doesn’t get soggy (in an oven at 325°F for 5-10 minutes).
—————————-
*Although it makes no difference to how it tastes, basil is beautiful when it’s thinly sliced, aka chiffonade. To do it, pile a number of basil leaves on top of each other, then tightly roll the pile so you have a long thin roll. Slice thinly along the bundle of basil and you’ll get elegant ribbons!