
Butterscotch White Chocolate Pudding
Delicious and simple, this is butterscotch pudding with a caramelized white chocolate twist. Say what? Yep, caramelized white chocolate is a thing, and you’re going to want to try it.

Delicious and simple, this is butterscotch pudding with a caramelized white chocolate twist. Say what? Yep, caramelized white chocolate is a thing, and you’re going to want to try it.


I made this recipe at the request of my sister, Ashley, who has an inexplicable love of white chocolate. I generally object to white chocolate, which, for me, is too one-note sweet and weirdly soft and generally a liar. For those of you who still live under the illusion that white chocolate is chocolate: it’s cocoa butter, with no actual cocoa bean aka chocolate in it, masquerading as chocolate. But I’m definitely pro butterscotch pudding and I hold a strong belief that caramelization redeems just about anything. Plus, I love having a dessert ready made in my refrigerator that I can pull out and seem like an effortless boss.
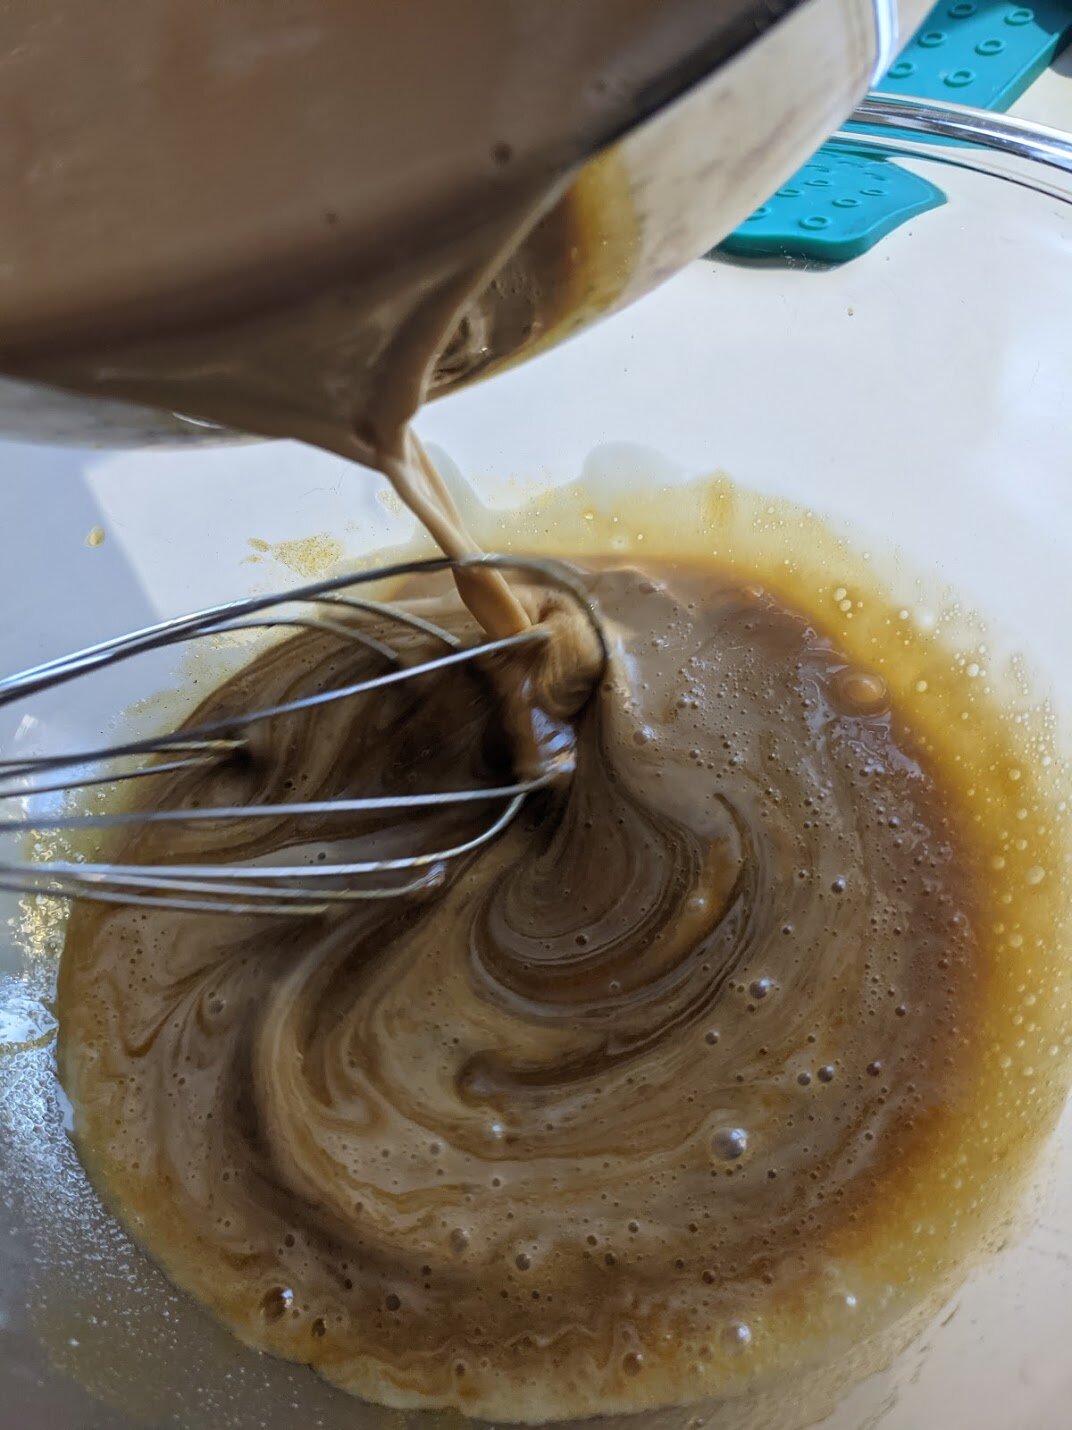

Overall, this was pretty simple to put together. Combine brown sugar, egg yolks, alcohol, and toasty cardamom. Melt the caramelized white chocolate in some milk, enjoy the amazing smell, then combine everything and strain. Pour it into ramekins, cover and put them in a pressure cooker to steam for all of 9 minutes. The hardest part might be waiting for these to chill to eating temperature!
Although the original recipe calls for rum, we are solidly a whiskey household and rarely have rum on hand. I’m happy to report that the whiskey was a delicious substitution and I personally did not miss the added sweetness from the rum at all. I tend to be into less sweet desserts in general, so if you’re into rum, you do you.


This recipe does call for some special tools - first off, you need a pressure cooker or Instant Pot. Although it’s an extra tool, it helps you avoid the need to stand over a hot stove stirring vigorously while the mixture thickens up. Next, you need to have a ramekins, espresso cups, or other heatproof bowls. This also could work with a larger heatproof bowl or soufflé dish as a family style dessert (see note below).
Butterscotch White Chocolate Pudding
Time: 1 hour + 3 hours chilling || Servings: 6 || Source: Dinner in an Instant by Melissa Clark
Heavy cream - 1 1/2 cups
Whole milk - 1/2 cup
Dulcey blond chocolate or butterscotch chips - 6 oz
Large egg yolks - 5
Dark brown sugar - 1/3 cup, packed
Whiskey or rum - 2 tsp or to taste
Cardamom or nutmeg - 1/2 tsp
Kosher salt - 1/8 tsp
Crème fraîche or whipped cream, for serving
Chocolate shavings, for serving
In a heavy bottomed pan, heat the cream and milk until steaming and just starting to simmer. Be careful not to overheat and scald the milk. Turn off the heat, then whisk in the blond chocolate or butterscotch chips until melted and well incorporated.
In a large bowl, whisk together the egg yolks, brown sugar, whiskey or rum, cardamom or nutmeg, and salt. Pour in the chocolate cream while whisking constantly so that you don’t cook the yolks. Continue whisking until the mixture is creamy and smooth, then pour through a very fine sieve into a bowl or measuring cup with a spout.
Choose your cooking vessel. If you want individual portions, select ramekins, espresso cups, or other heatproof cups that can hold 4 to 6 ounces. Fill the vessels of your choice with custard, then cover tightly with aluminum foil. Put a steamer rack into your pressure cooker or instant pot and fill with 1 ½ cups of water.
Arrange puddings on the steamer rack; if you have six, I recommend doing them in two batches so that they’ll cook more evenly and you reduce the chances of accidents — although you could stack them in a staggered fashion if you’re more coordinated than I am.
For the first batch, cover and seal the pressure cooker and cook on low pressure for 4 minutes. Allow the pressure to release naturally for 5 minutes, then release the remaining pressure manually. For the second batch, cook on low pressure for 5 minutes. Allow the pressure to release naturally for 5 minutes, then release the remaining pressure manually.
Once puddings are ready, remove them from the pressure cooker using oven mitts or tongs. Carefully remove the foil (be careful, there may be steam), and let the puddings come to room temperature. When cooled, cover with plastic wrap and chill them in the refrigerator for a minimum of three hours. Garnish with whipped cream or crème fraîche and chocolate shavings.
Notes:
If you prefer to caramelize your own white chocolate, heat the oven to 250°F. Cut white chocolate bars into cubes and spread out on a rimmed baking sheet. Bake, stirring every 10 minutes, for 30-60 minutes. When it’s caramelized, the chocolate will be the color of peanut butter. This has the upside of making your kitchen smell delicious.
If you’d prefer to have a single shareable pudding, or you don’t have enough small heat-proof cups on hand, you can use a 1-quart soufflé dish or other heatproof dish that will fit into your pressure cooker. In this case, cook on low pressure for 18 minutes. Allow the pressure to release naturally for 5 minutes, then release the remaining pressure naturally. Chill and garnish as indicated.
If you would like to make this ahead, the custard will keep in the refrigerator for two days before cooking. The cooked custards will keep for up three days after cooking.

Lentils with Sausage & Sage
This is the kind of dinner that will make you feel good. When we were done eating it, we said, “I feel good,” and we meant it. It tastes good, it’s filling, it’s not heavy, and it’s a quick and easy turnaround. Basically, everything I look for in a weeknight dinner.
This is the kind of dinner that will make you feel good. When we were done eating it, we said, “I feel good,” and we meant it. It tastes good, it’s filling, it’s not heavy, and it’s a quick and easy turnaround. Basically, everything I look for in a weeknight dinner.
Cooking dry lentils does take some time, to be completely honest - but, in my book, that’s easily dismissed because they can be done the night before or anytime the day you’re eating. Plus, simmering lentils with some roughly chopped vegetables never seems like much of a chore - I put it on and, while I might peek once in a while if I’m around, I pretty much check back again 90 minutes later. I used green lentils, but brown lentils would be a fine substitute. I would stay away from orange or red lentils, which tend to lose their shape and get mushy. Soak lentils for three hours, up to overnight, before cooking; this has the benefit of making them cook faster and makes them easier to digest.


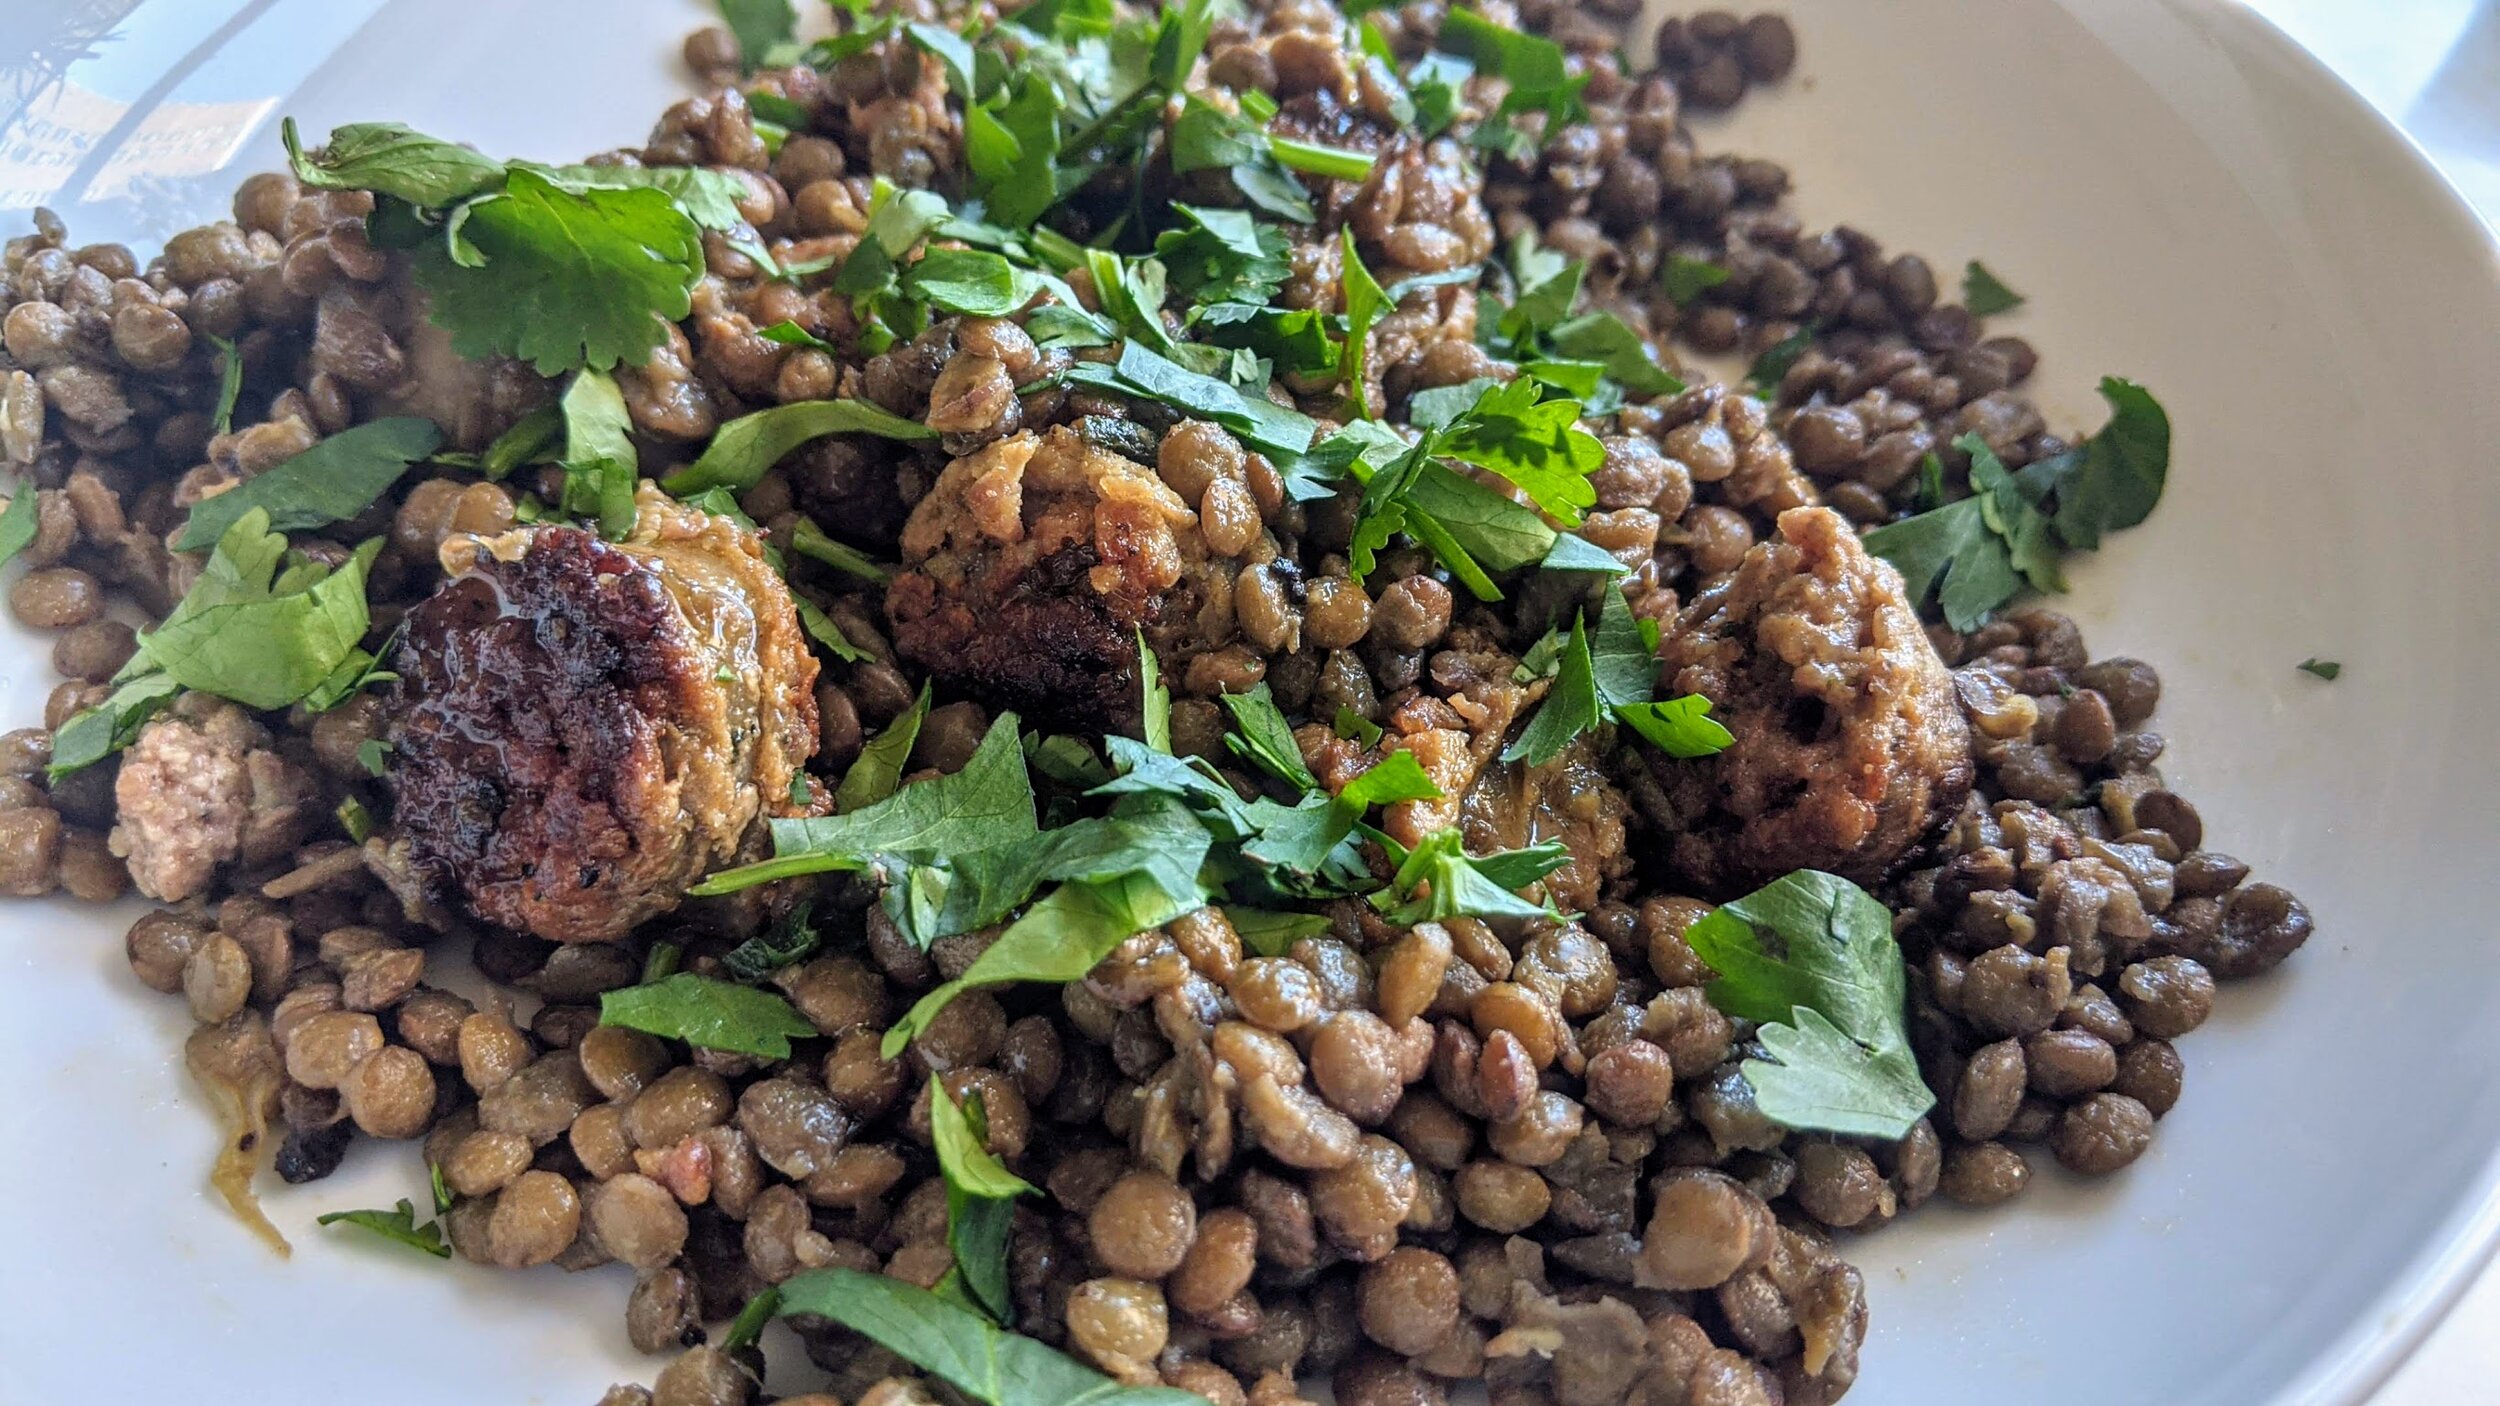
Once the lentils are done, the rest is simple: sear some sausage, sizzle sage and garlic (whole, not even chopped!) to flavor some olive oil, mix and serve. I chose to use chunks of sausage, but it would be faster cooking to use loose sausage and break it up as you cook - and you’d have the added benefit of more distributed sausage in your bites. I recommend a drizzle of olive oil and a squeeze of lemon at the end of this, along with the chopped parsley, to bring some brightness and freshness.
Lentils with Sausage & Sage
Time: 2 hours || Servings: 4 || Source: Slightly adapted from The Silver Spoon
Lentils, green or brown - 9 oz (approximately 1 ⅓ cups)
Celery stalk - 1
Carrot - 1
Onion, small - 1
Italian sausage (hot or sweet) - 4 links, around 12 oz
Olive oil - 3 tbsp, plus more for garnish
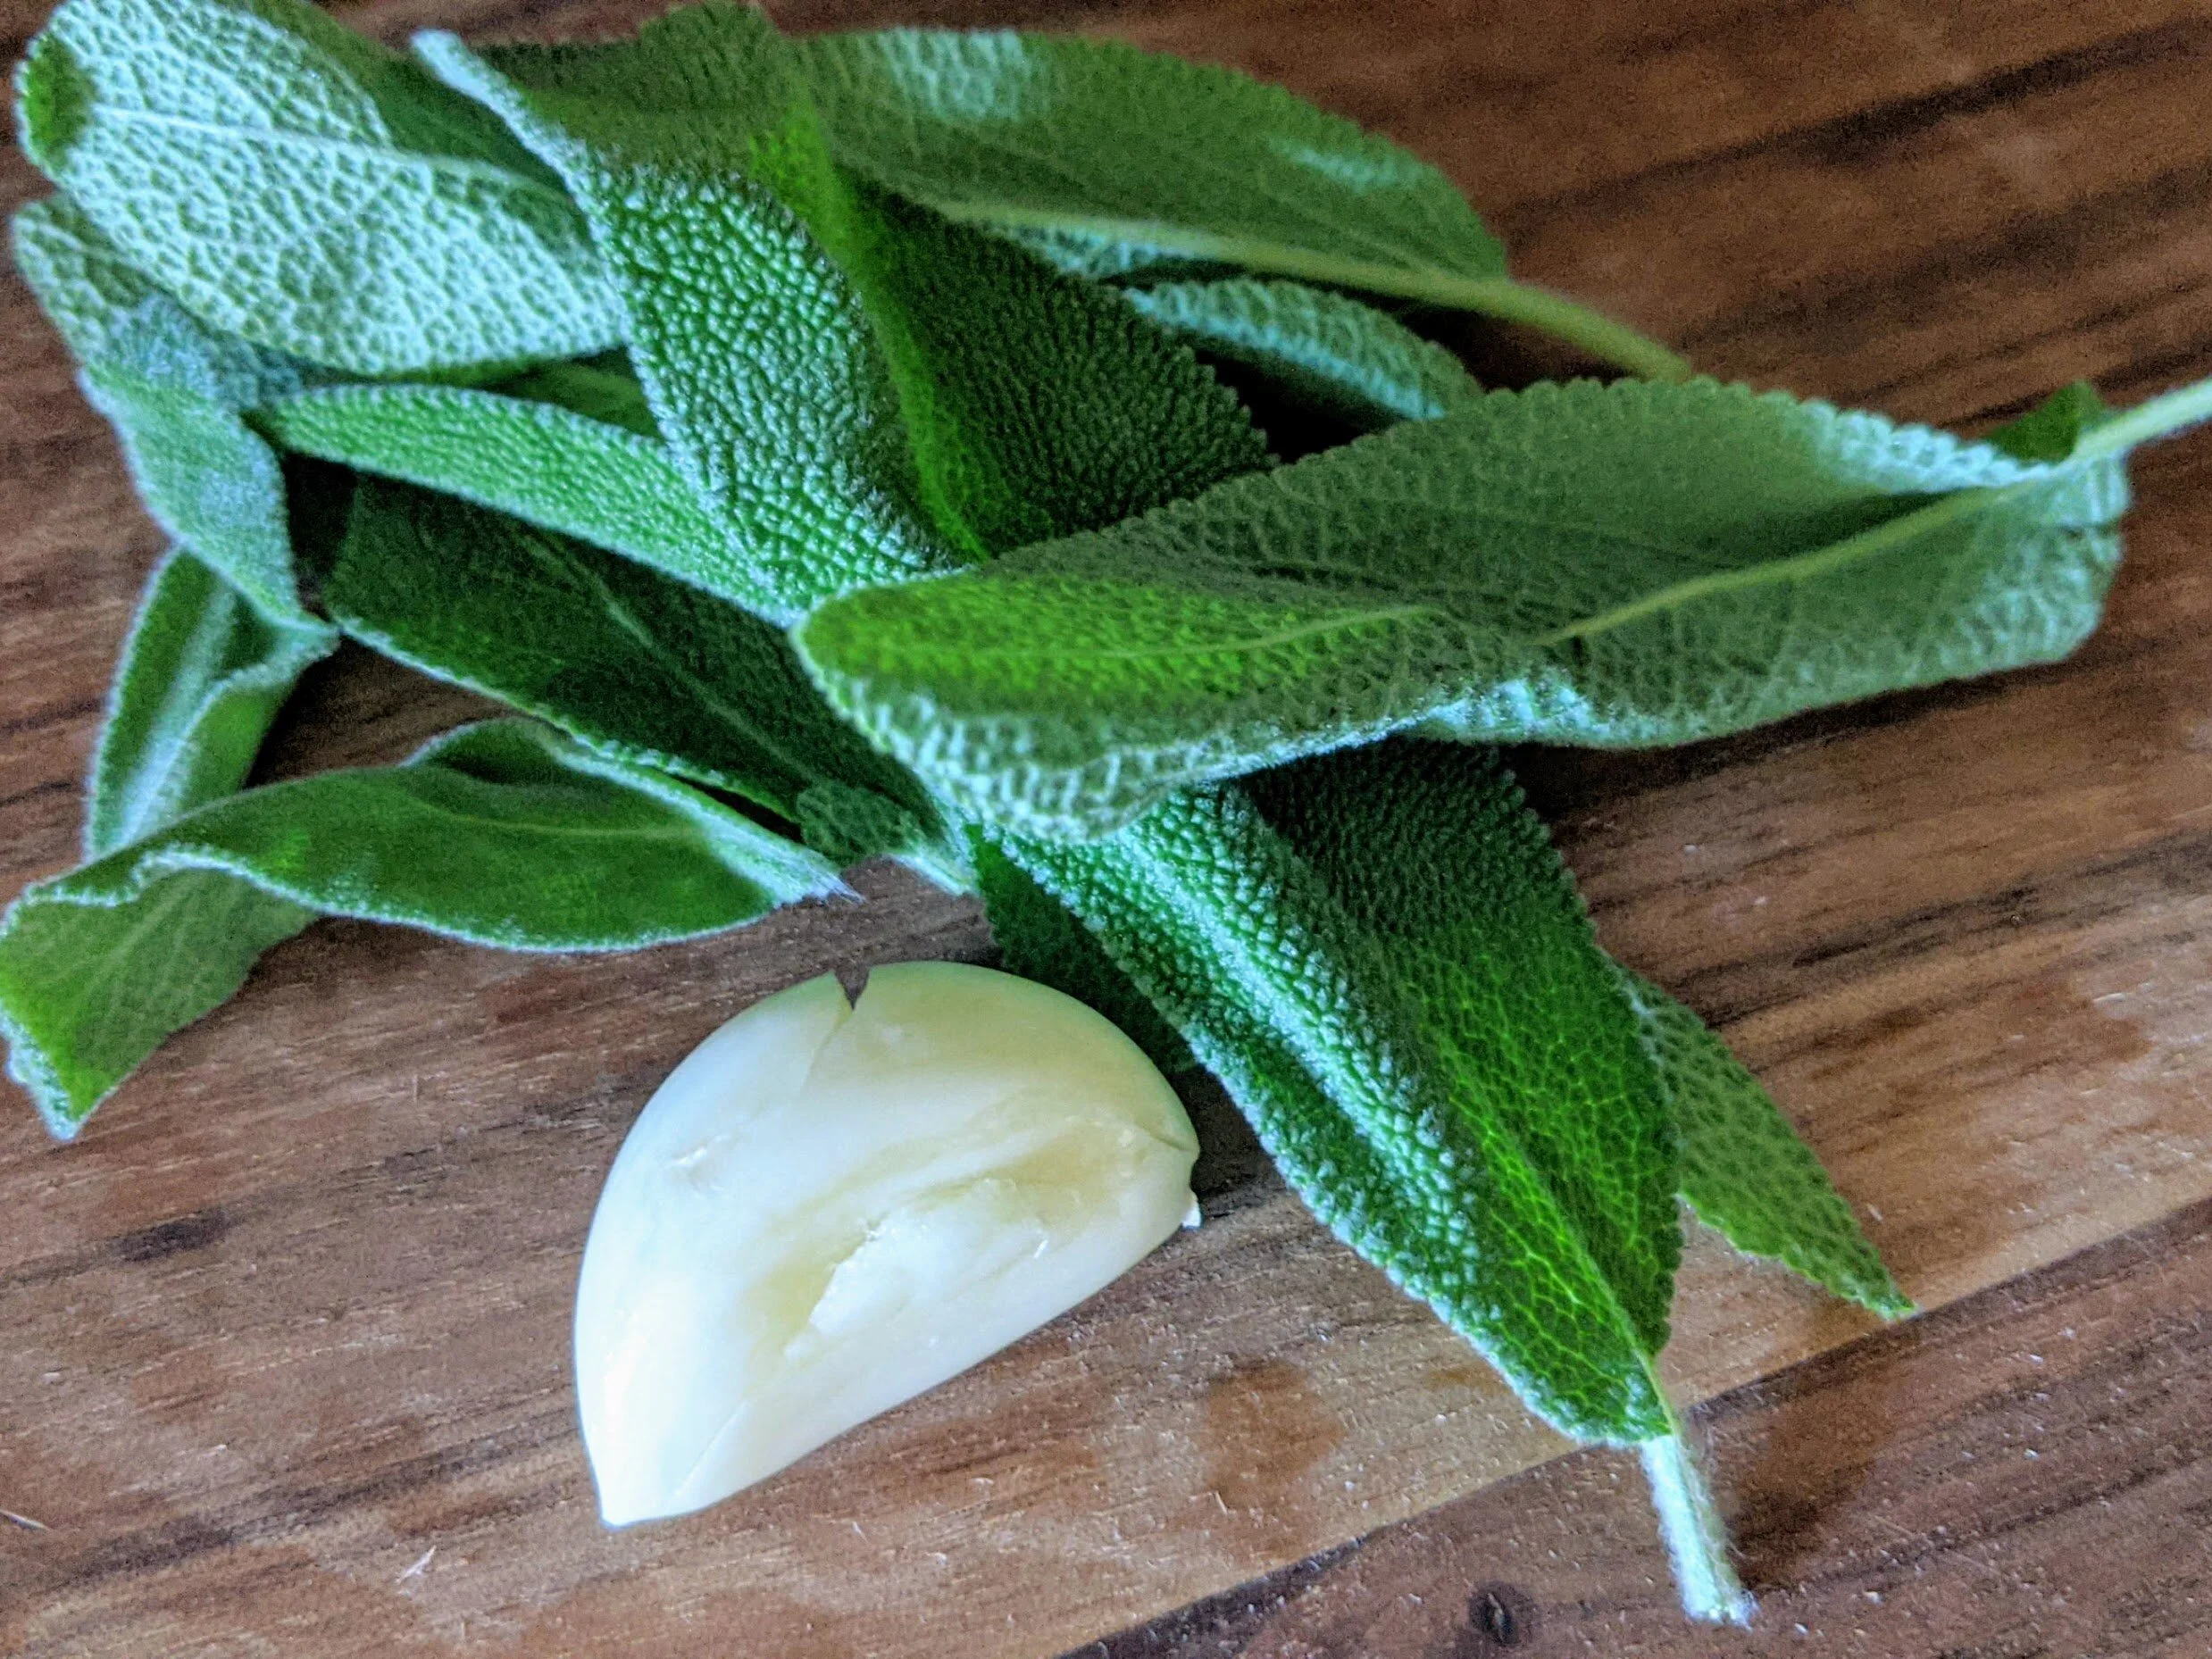
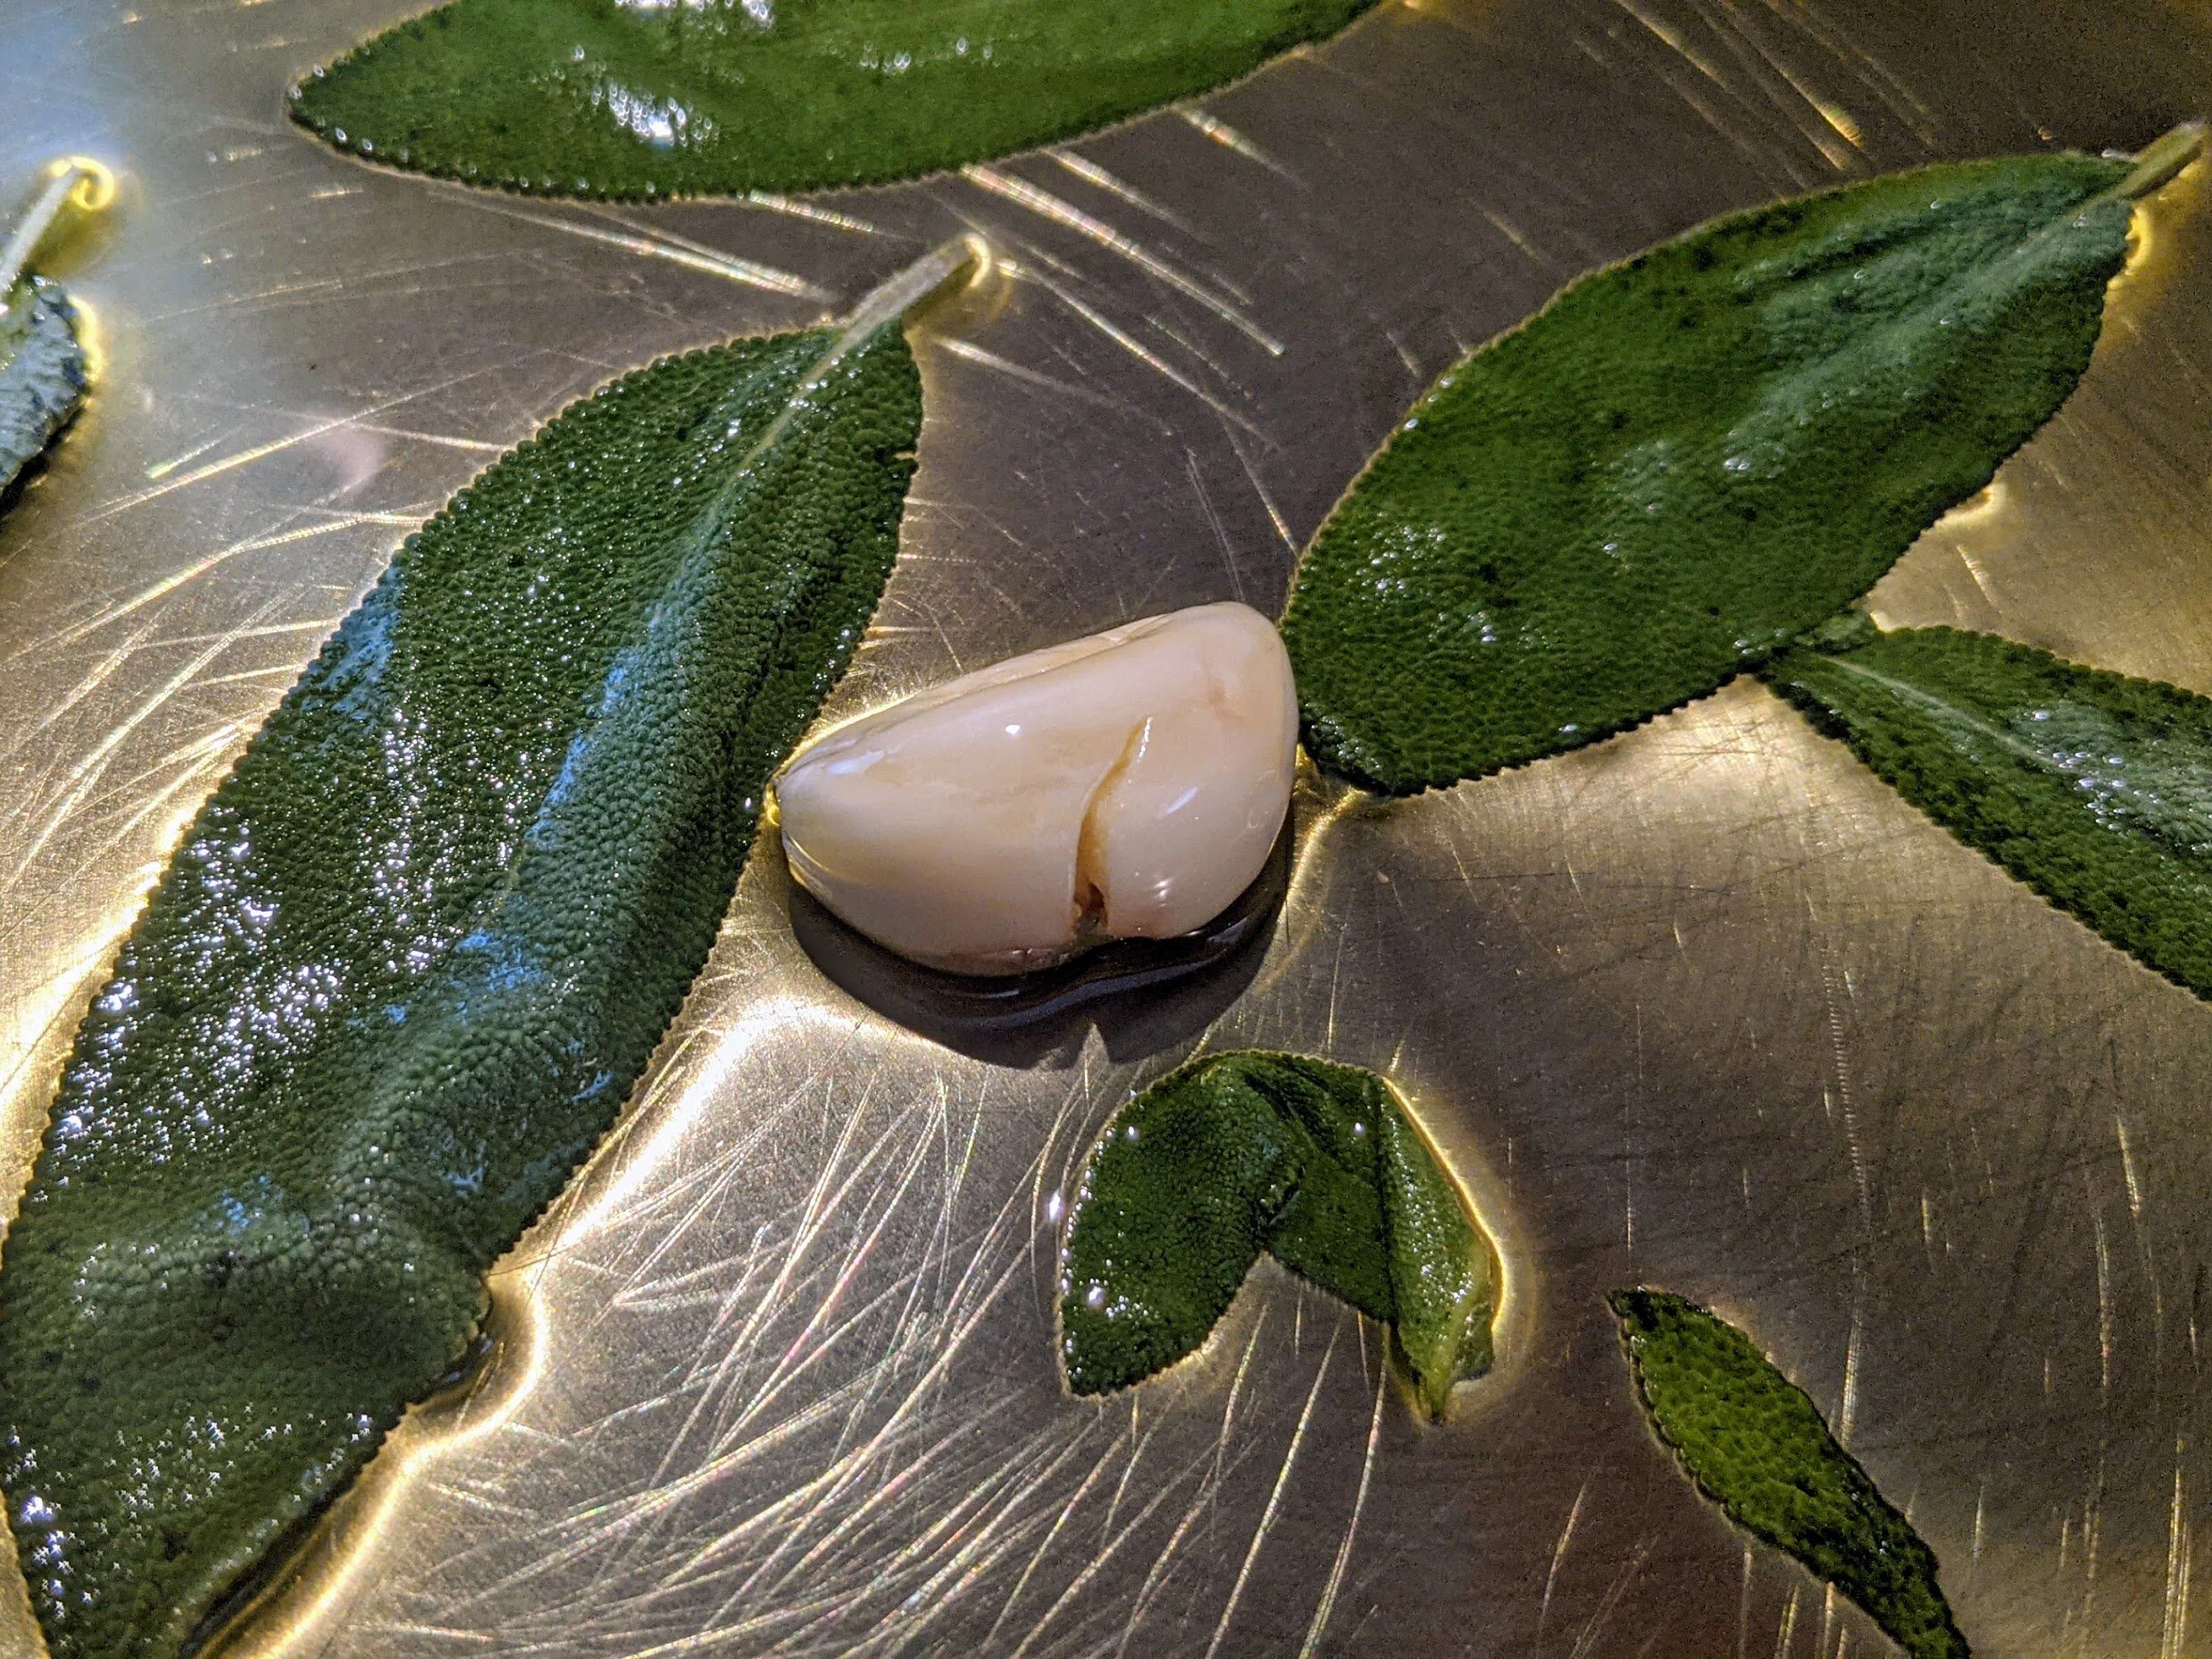
Sage leaves - 6
Garlic clove - 1
Lemon juice - 1/2 of a lemon, or to taste
Parsley - 1 tbsp, chopped
Soak the lentils for at least 3 hours, up to overnight. Discard any lentils that float to the top of the bowl. When you’re ready to cook them, drain and rinse the lentils. Place them in a pot and add water to cover; there should be about an inch of water above the lentils. Cut the onion in half and add to the pot with the celery stalk and carrot (roughly chop celery and carrot if needed to fit the pot). The vegetables should be washed but do not need to be peeled. Bring to a boil, then reduce heat and simmer for about 90 minutes, adding additional water if it drops below the lentils. Taste the lentils to determine that they are done; they should be tender to the bite, although some varieties may have more firmness. Cook until they reach your desired consistency, then drain and season with a pinch of salt.
Place a heavy bottomed pan over medium-high heat. Chop the sausages or remove them from their casing and crumble them. Add 1 tbsp of olive oil to the pan, then add the sausage. Cook, stirring occasionally, until browned on all sides, about ten minutes.
In a large pan, place the remaining 2 tbsp of olive oil over low heat. Add the sage and garlic and cook slowly until garlic is golden brown. Remove and discard the garlic. Add the sausages and lentils to the oil and remove from heat. Mix well. Serve with a squeeze of lemon, a drizzle of olive oil, and chopped parsley.
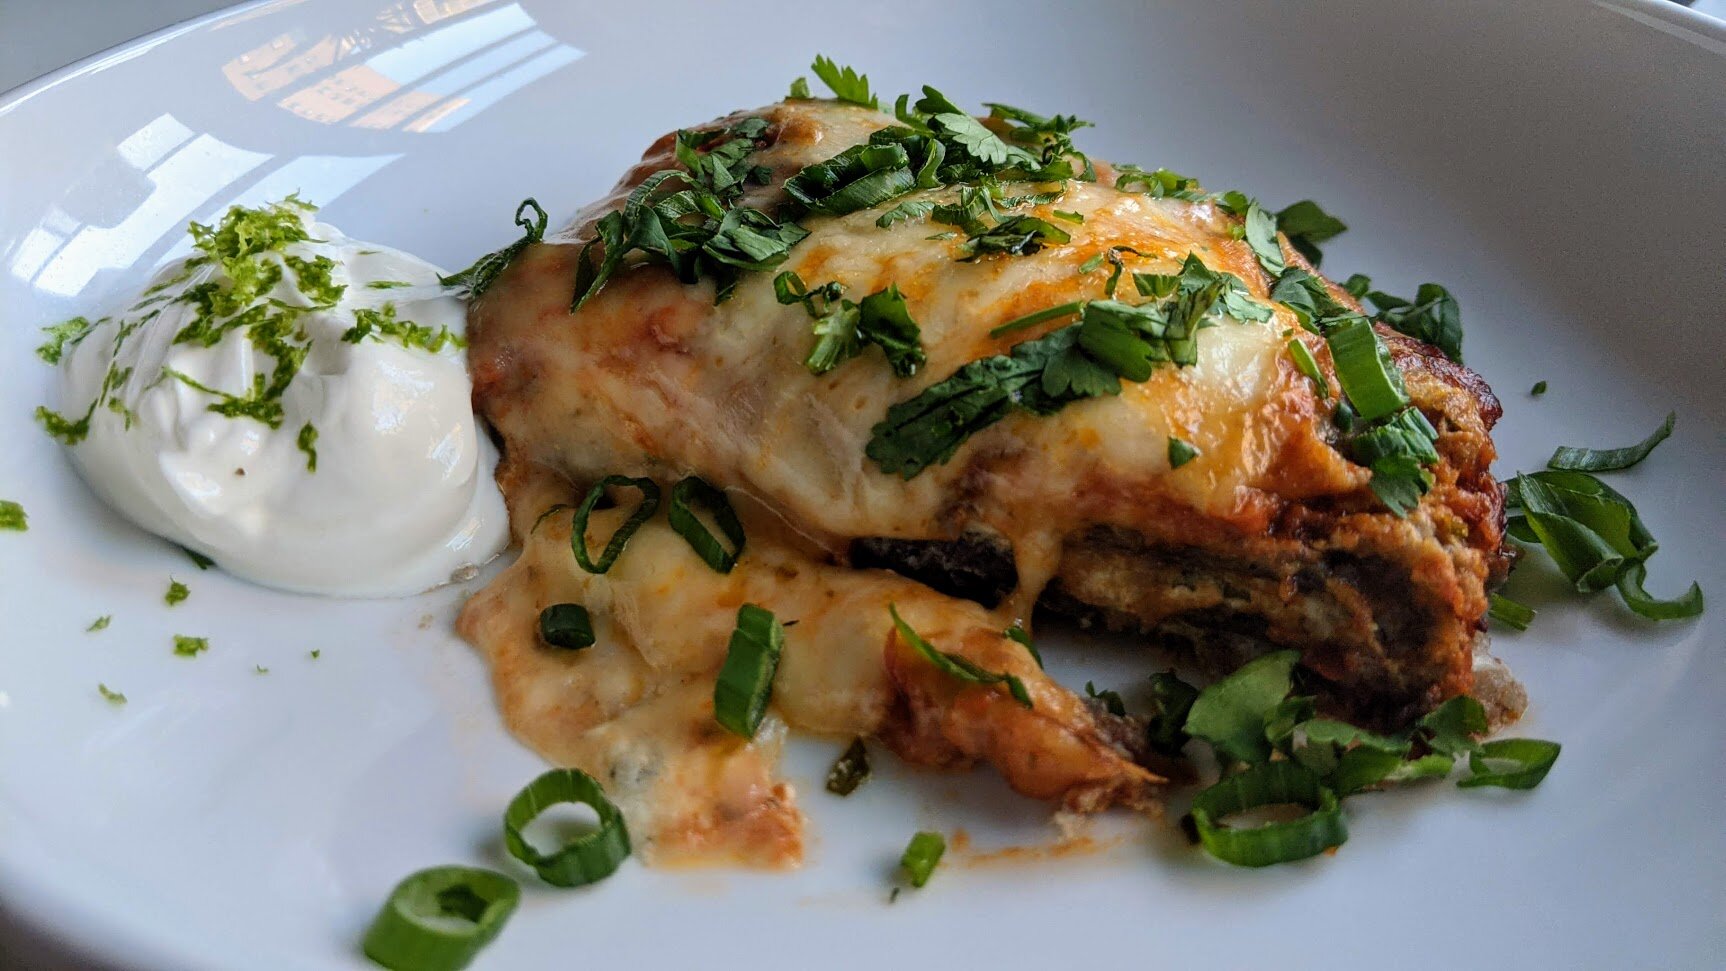
Goat Cheese Tortilla Casserole
I’ve been watching a lot of Beat Bobby Flay lately. It’s might be a little unhealthy. This is the premise of the show: Two professional chefs compete against each other for a chance to compete against Bobby. Two supposed friends of Bobby’s choose the winner of that matchup, and then the winning chef announces a signature dish that they and Bobby Flay will each make in a head-to-head competition. And then Bobby wins. The end.

I’ve been watching a lot of Beat Bobby Flay lately. It’s might be a little unhealthy. This is the premise of the show: Two professional chefs compete against each other for a chance to compete against Bobby. Two supposed friends of Bobby’s choose the winner of that matchup, and then the winning chef announces a signature dish that they and Bobby Flay will each make in a head-to-head competition. And then Bobby wins. The end.
The winning chef knows ahead of time what they’re going to be making and, one must assume, have selected something they make really well and probably practiced a lot. And then Bobby has to make it, whatever it is, on the fly - admittedly, in a kitchen he knows well, in a setting and under time pressure that he’s really familiar with. But still. Sometimes it’s something like enchiladas, and then you’re yelling at the screen, why why why would you choose something in his wheelhouse? You think you can beat him at his own game? Did you even watch the show before you signed up??? And then sometimes it’s something like goulash or spätzle and you think, absolutely no way he’ll win - and then he does. (I saw through an unreliable source that Bobby only has a 65% winning record over 18 seasons, but the only explanation I have for this is that he must have gotten better over time and his winning rate is much, much higher in recent seasons.)
If you don’t know the show, you should probably stop reading this and go watch it right now. I can wait.


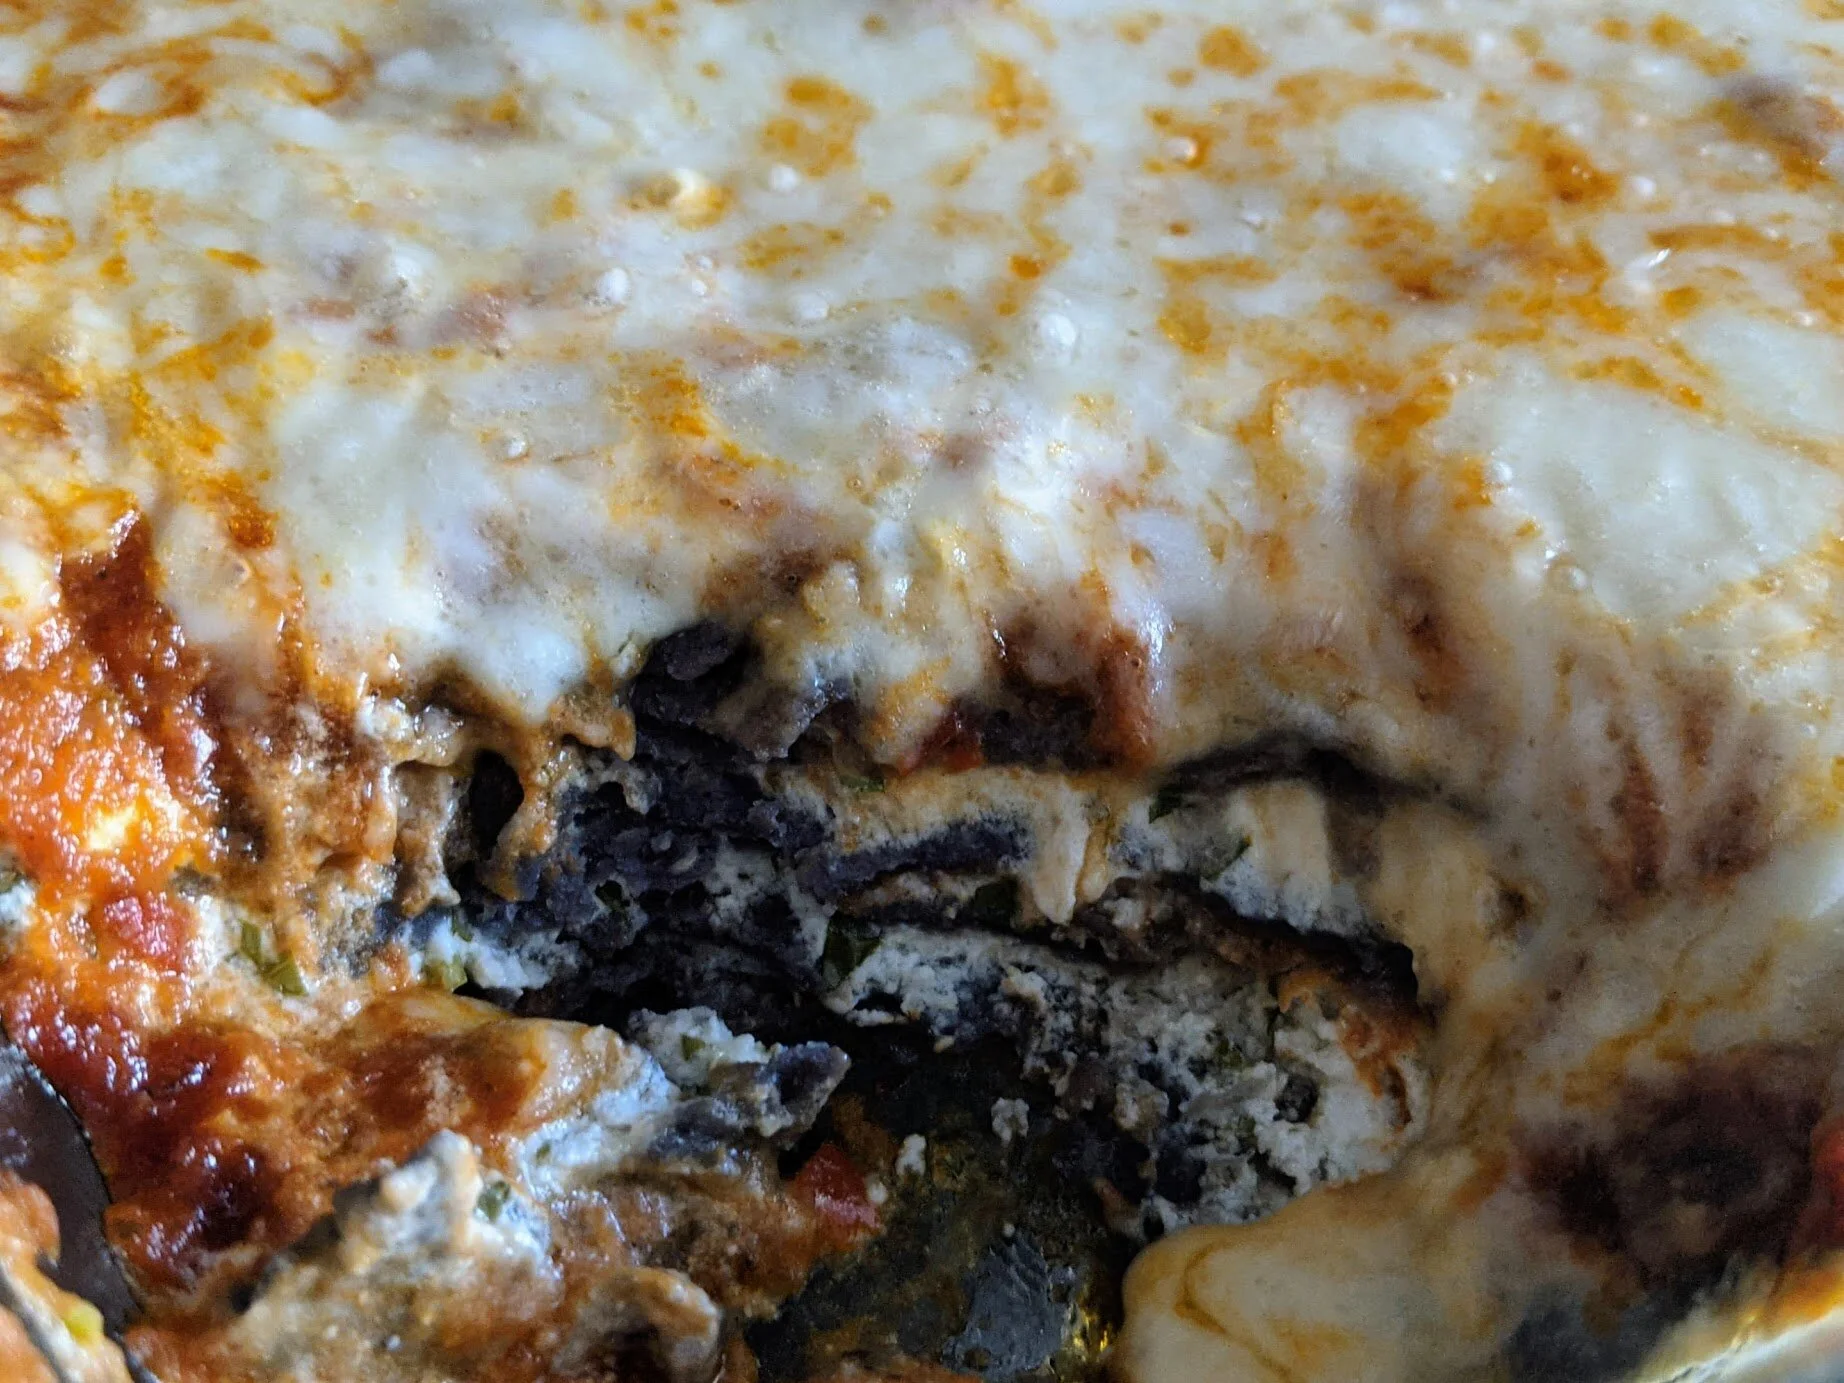
So, for no particular reason, I was looking into Bobby Flay’s recipes and am happy to share this goat cheese-enchiladas-turned-casserole. I know goat cheese enchiladas sound strange, but if you like cheese (I do) and if you’re okay with this being pretty rich (I am), then you’re going to like this recipe. The goat cheese is spiked with lime juice and garlic and blended until light and fluffy, then folded with spices and herbs. That goat cheese delight is stacked with blue corn tortillas in a casserole dish, smothered in a homemade tomato-chile sauce, and tucked into a cozy blanket of Monterey jack cheese. (I did warn you that it’s rich.)


This dish is a bit of an effort - there are two components to make before you assemble the casserole - but it’s worth it for the ooey gooey cheesy outcome. Rice and beans are highly recommended as a side, as is a green salad with a bright dressing to cut the richness.
Goat Cheese Tortilla Casserole
Time: 1.5 hours + 30 mins inactive || Servings: 4-6 || Source: Adapted from Bobby Flay
For the chile sauce:
Ancho chiles - 3
Vegetable oil - 3 tbsp
Red onion - 1 large, finely chopped
Garlic cloves - 3, chopped
Cumin - 1 tbsp
Mexican oregano or regular oregano - 1 tbsp
White wine - 1 cup
Canned tomatoes - 2 cans, 28 oz
Chicken or vegetable stock - 3 cups
Honey - 1-2 tbsp
For the filling:
Soft goat cheese - 1 1/4 lb
Garlic - 3 cloves, coarsely chopped
Cotija cheese - 1/4c, grated
Lime juice - 2 tbsp, more to taste
Cilantro leaves - 1/4c, finely chopped
For assembly:
Blue corn tortillas - 12
Monterey jack - 8 oz, grated
Cilantro - 3 tbsp, chopped
Sour cream, for garnish (mix with lime zest if you’re feeling fancy)
Scallions, sliced thinly, for garnish
Limes, for garnish
Make the chile sauce.
In a small saucepan, bring 2 cups of water to a boil. When boiling, remove from heat and add chiles. Let sit for 30 minutes (longer is okay, if needed). Remove the stems and seeds from the chiles, then place them in a food processor or blender with 1/4 cup of the soaking liquid. Puree until smooth.
In a medium skillet, heat vegetable oil over medium-high. Add onion and cook until soft, 5-7 minutes. Add garlic and cook for another minute, until fragrant. Lower heat if necessary to prevent it from burning. Add cumin and oregano and cook for another minute, until fragrant. Add the ancho puree and cook for another 3 minutes. Add wine, canned tomatoes, and stock to the pan. Raise the heat to bring to a boil and then reduce to a simmer. Allow to simmer for 30 minutes, until slightly thickened. Add salt and pepper, then taste. Add more seasoning as necessary, as well as honey, until you’re satisfied with the flavor.
You can leave the sauce as is if you like it chunky, or puree in a food processor, blender, or with an immersion blender for a smoother texture.
Make the filling.
Place the goat cheese, garlic, cotija cheese, and lime juice in a food processor or blender. Process until smooth and fluffy; this may take a few minutes. Season with salt and pepper, and fold in the chopped cilantro. Taste and adjust seasoning.
Assemble the casserole.
Heat the oven to 375°F.
Spread 1/2 cup or so of the chile sauce on the bottom of a casserole dish. Place three tortillas in the pan, slightly overlapping. You may want to cut the tortillas to get more pan coverage, but this isn’t strictly necessary. Spread 1/2 cup of the sauce over the tortillas, then spread the goat cheese. Top with two more layers, repeating tortillas, sauce, and cheese. Top with a final layer of tortillas, another generous layer of sauce, and the Monterey jack cheese.
Bake for 20 to 30 minutes, until the enchiladas are heated through and the cheese is melted. Remove from the oven. Serve sprinkled with cilantro and scallions, a dollop of sour cream, and a lime wedge.

White Bean Bruschetta
I am excited to start with a simple dish that we love from a sadly defunct but formerly lovely West Village restaurant, Pó. Pó was one of Mario Batali’s first restaurants and it was (in typical NYC style) a tiny, cozy spot that put out delicious Italian food. Amazingly, one of the best things they served was actually free.

Hello -- my name’s Marisa, I live in NYC with my partner and our new-ish baby girl (born in December!). I’m starting this blog to document our adventures in cooking and eating, two of my very favorite activities.

It’s been challenging to get back into cooking following the birth of our little one, but I’ve always found cooking to be a rewarding (read: delicious) and mostly relaxing activity. I also really believe in being close to your food - knowing where it comes from and the people who grow it, if you can. That’s easier to do when it’s not winter, of course.


I’m excited to start with a simple dish that we love from a sadly defunct but formerly lovely West Village restaurant, Pó. Pó was one of Mario Batali’s first restaurants — despite his other proclivities, he does know how to cook. In typical NYC style, it was a tiny, cozy spot that put out delicious Italian food. Delightfully, one of the best things they served was actually free.
This white bean bruschetta, studded with zingy sliced garlic and red pepper flakes, came to the table gratis. It was a mouth-watering way to start a meal and, as it turns out, not too difficult to make at home. I really like that it’s versatile -- simple enough for an any-night appetizer using mostly pantry items, impressive enough for guests, and easily scaled for a big group. This will be tasty no matter what, but I like to splurge on fresh, good quality olive oil and aged balsamic to make this extra.

White Bean Bruschetta from Pó (RIP)
Yield: 12 pieces || Time: 20 minutes || Source: Pó
Cannellini beans (white kidney beans) - 1 can, drained & well rinsed
Extra virgin olive oil - 3 tablespoons
Balsamic vinegar - 2 tablespoons
Red pepper flakes - 1/2 teaspoon or to taste
Basil leaves - 2 tablespoons, chopped*
Garlic - 2 cloves, thinly sliced or finely chopped
Salt and pepper
Baguette, sliced ½” thick
In a medium bowl, put the rinsed beans, olive oil, balsamic vinegar, red pepper flakes, basil, and garlic. Gently combine - I like to use my hands. Season with salt and pepper to taste. Let it sit in the refrigerator for a few hours to marinate and let the flavors come together.
Slice the baguette. Serve the bread with the bowl of the bean mixture, or spoon the bean mixture on ahead of time if you want to get fancy. If you do put the beans on the bread to serve, consider toasting the bread so it doesn’t get soggy (in an oven at 325°F for 5-10 minutes).
—————————-
*Although it makes no difference to how it tastes, basil is beautiful when it’s thinly sliced, aka chiffonade. To do it, pile a number of basil leaves on top of each other, then tightly roll the pile so you have a long thin roll. Slice thinly along the bundle of basil and you’ll get elegant ribbons!