
French Onion Soup
French onion soup is so simple, so inexpensive, and so classic. The sweet onions, gooey cheese, and soaked bread is so comforting, eating it is like getting a warm hug from the inside. Slicing the onions for this dish is a bit of a chore - but it’s French onion soup, so I guess you expected to slice onions? And caramelizing them to achieve the deep, nutty brown sweetness of your onion soup dreams takes time, but largely unattended time. Your patience will be well rewarded.

French onion soup is so simple, so inexpensive, and so classic. The sweet onions, gooey cheese, and soaked bread is so comforting, eating it is like getting a warm hug from the inside. Slicing the onions for this dish is a bit of a chore - but it’s French onion soup, so I guess you expected to slice onions? And caramelizing them to achieve the deep, nutty brown sweetness of your onion soup dreams takes time, but largely unattended time. Your patience will be well rewarded.


I pulled this recipe from The Food Lab by J. Kenji López-Alt, a heavy tome of a book detailing everything from how to make canned beans taste good to how to make perfectly crispy roasted potatoes (outlining several trials leading to success). If you like understanding the science behind cooking, I highly recommend - this is a book for geeks who like to eat good food. Mr. López-Alt explains that your onion eating needs are best served by slicing onions from tip-to-tip (or, if you want to think of your onion as a globe, from pole-to-pole). So that’s what we do here, for 5 pounds or 7 cups of onions. I suggest that step one is sharpening your knife (or grabbing your mandoline).
Once sliced, this abundance of onions goes into a dutch oven with some butter and salt to sweat out over very low heat for 2 hours. Over this time, the onions collapse down to a more reasonable amount, surrounded by their sugary juices. The heat goes up, the water evaporates, and the onions turn sweet and deeply browned. Simmer with some fresh herbs, sherry, and chicken stock, and your soup base is done. A chunky slice of baguette, a healthy dose of shredded cheese (metaphorically speaking), and trip to the broiler officially make this French onion soup.


Make sure to use broiler-proof bowls for this - crocks or ramekins or whatnot. In a pinch, you could cover a sheet pan with some foil, broil the cheese directly onto the bread, and then add it to your soup. But then you’d probably want to make sure the soup is piping hot and add some additional cheese to melt into it… because, you know, cheese.
French Onion Soup
Time: 3 hours || Servings: 4 || Source: The Food Lab
Yellow onions - 5 lbs, about 7 cups, thinly sliced pole to pole
Butter, unsalted - 4 tbsp
Salt - 1 tsp
Sherry - ¼ cup
Chicken stock - 6 cups
Bay leaves - 2, fresh or dried
Thyme - 6 sprigs fresh, or 1 tsp dried
Gruyere or Swiss cheese - 8 oz, about 2 cups grated
Baguette - sliced 1/2 inch thick, either a day old or toasted
Use a large Dutch oven or other heavy bottomed pot with a tight fitting lid. Place pot over medium heat and melt butter. Add onions and the salt. The pot will be full of onions - it will seem ridiculous, but it will cook down to a reasonable amount over time. Cook for about 5 minutes, stirring now and then with a wooden spoon, until the onions have begun to soften and wilt a bit. Cover the pot with the lid (if it’s not tight fitting, cover with aluminum foil and then the lid) and reduce to the lowest heat possible. Cook for 2 hours, giving the onions a stir every 45 minutes or so, until the onions are completely tender.
Remove the lid and foil, if using, and increase the heat to medium-high. The onions will have released a lot of water. Cook for about 15 minutes, stirring frequently, until the liquid has evaporated and you see a brown crust starting to form on the bottom of the pot. This is the start of your caramelization! Deglaze the pan by adding 2 tbsp of water and scrape up the brown crust with a wooden spoon. Distribute the onions evenly over the bottom of the pot, then let it cook for another 5 minutes, undisturbed, until the brown crust develops again. Repeat this pattern of deglazing and undisturbed cooking until the onions become a deep golden brown and taste sweet and delicious. This might take 4 or 5 total cycles.
Once your onions reach the desired color, add the sherry, chicken stock, bay leaves, and thyme to the pot. Bring the liquid to a boil, then reduce to a simmer. Simmer, uncovered, for 15 minutes. The stock will reduce slightly and turn dark. Taste and season with salt and pepper. Discard the bay leaves and the thyme sprigs, if using.
Heat the broiler. Place four broiler-proof bowls on a baking sheet (I used large ramekins). Distribute soup among bowls, top with a slice of baguette and the shredded cheese. Slide the pan under the broiler for about 5 minutes, keeping an eye on it, until the cheese is melted and turning brown in spots. Serve piping hot.
Note: After the 2 hours of low heat, it won’t hurt your onions to allow them to sit without heat for a couple of hours before moving on to evaporating the remaining water and caramelizing them.

Butternut Squash Soup with Rosemary Croutons
Okay, I’m ready for warm weather. I can’t wait for sunny park walks with just a light jacket - or, dare we dream, no jacket? - and, on the other side of that, days of abundant fresh produce hand selected from the market. In the meantime, I’m clinging to my winter squashes and citrus, and trying hard to embrace the moment. Because along with the park walks and jacketless freedom come seasonal allergies and sunblock - so there are benefits to the here and now. Like this creamy butternut squash soup.

Okay, I’m ready for warm weather. I can’t wait for sunny park walks with just a light jacket - or, dare we dream, no jacket? - and, on the other side of that, days of abundant fresh produce hand selected from the market. In the meantime, I’m clinging to my winter squashes and citrus, and trying hard to embrace the moment. Because along with the park walks and jacketless freedom come seasonal allergies and sunblock - so there are benefits to the here and now. Like this creamy butternut squash soup.

The most difficult thing you’ll do for this recipe is chop the butternut squash. If knives aren’t your thing, you could purchase prepared chopped squash - no shame in saving your time and/or fingers. If you have a whole squash on hand, start with peeling. It’ll take a little patience, but a simple vegetable peeler (Y-shaped preferred) will do the trick. Once peeled, take a thin slice off the bottom and top to form a stable surface for cutting. Stand the squash upright so it’s tall on its base and, using a sharp knife, carefully cut it vertically, applying firm pressure until you cut through. Scoop out the seeds, then chop. For this recipe, you’re looking for 2-inch chunks.


This is a pretty basic soup as far as soups go: chopped vegetables boiled in water. Sure, we fancy it up a little with some floral notes from the rosemary, some umami from the parmesan, some crunchy breadcrumbs - maybe a little sherry if you have it on hand to add some depth and complexity. But the star of this soup is butternut squash, and it delivers with sweetness, nuttiness, and a velvety texture. Thanks, winter.
Butternut Squash Soup
Time: 1 ½ hours || Servings: 8
Butternut squash - 1 ½ lbs, one large or two small squash
Olive oil - 1 tbsp
Onion - 1 cup, chopped from 1-2 onions
Garlic - 4 cloves, peeled and crushed
Water - 3 cups
Rosemary sprigs - 2
Chicken or vegetable stock - 1 cup
Sherry - ¼ cup
Chunky breadcrumbs - you can buy or make these by pulsing a day-old baguette in a food processor; alternatively, pull some bread into big chunks and toast a bit longer
Parmesan cheese - grated, for serving
Peel the butternut squash and cut a thin slice from the bottom and top to give it an even surface to stand on. Carefully halve the butternut squash vertically. Scoop out the seeds and discard, then roughly chop the squash into 2-inch chunks.
In a large, heavy bottomed pot, heat the olive oil over medium-low heat. Add the onions and cook, stirring occasionally, until golden, about 15 minutes. Don’t let the onions brown. Then add the garlic and cook, stirring, until fragrant, 1-2 minutes. Add the squash, water, and one rosemary sprig, then cover and simmer for about 45 minutes.
While the squash simmers, heat the oven to 350°F. Line a baking sheet with parchment paper and spread the breadcrumbs out on the baking sheet. Chop the leaves from the second sprig of rosemary and sprinkle them over the breadcrumbs. Drizzle breadcrumbs with the oil, then give them a toss to coat them. Toast in the oven for 10 minutes, tossing occasionally to allow the crumbs to brown evenly. Remove when breadcrumbs are crisp, and sprinkle lightly with coarse salt. Set aside to cool.
When the squash is tender and easily pierced with a fork, turn off the heat and discard the rosemary sprig. Puree the mixture using an immersion blender or food mill, or let it cool slightly and use a blender or food processor to puree in as many batches as necessary. Return the puree to the pot over low heat and add the sherry. Slowly add stock until you reach desired consistency. Add a large pinch of salt and a few grinds of pepper, then taste and add sherry and seasoning to your taste. Serve topped with the breadcrumbs and a generous sprinkling of grated parmesan.
Marcella Hazan’s Bolognese
My one year old will try and mostly eat just about anything so far — she likes pickles, she’s ravenous for beets, she thinks broccoli is great, she devours sourdough like a fiend. But she is picky in terms of quality. She won’t eat bits and pieces of cobbled together leftovers, she knows and handily rejects beans that are stale, she notices if her food is different from the adults’. Purees are out of the question (even mashed potatoes are too suspiciously like baby food for her taste).
Even with all of her food enthusiasm, I have never, ever, seen her eat with as much gusto as she ate Marcella Hazan’s bolognese.

My one year old will try and mostly eat just about anything so far — she likes pickles, she’s ravenous for beets, she thinks broccoli is great, she devours sourdough like a fiend. But she is picky in terms of quality. She won’t eat bits and pieces of cobbled together leftovers, she knows and handily rejects beans that are stale, she notices if her food is different from the adults’. Purees are out of the question (even mashed potatoes are too suspiciously like baby food for her taste).
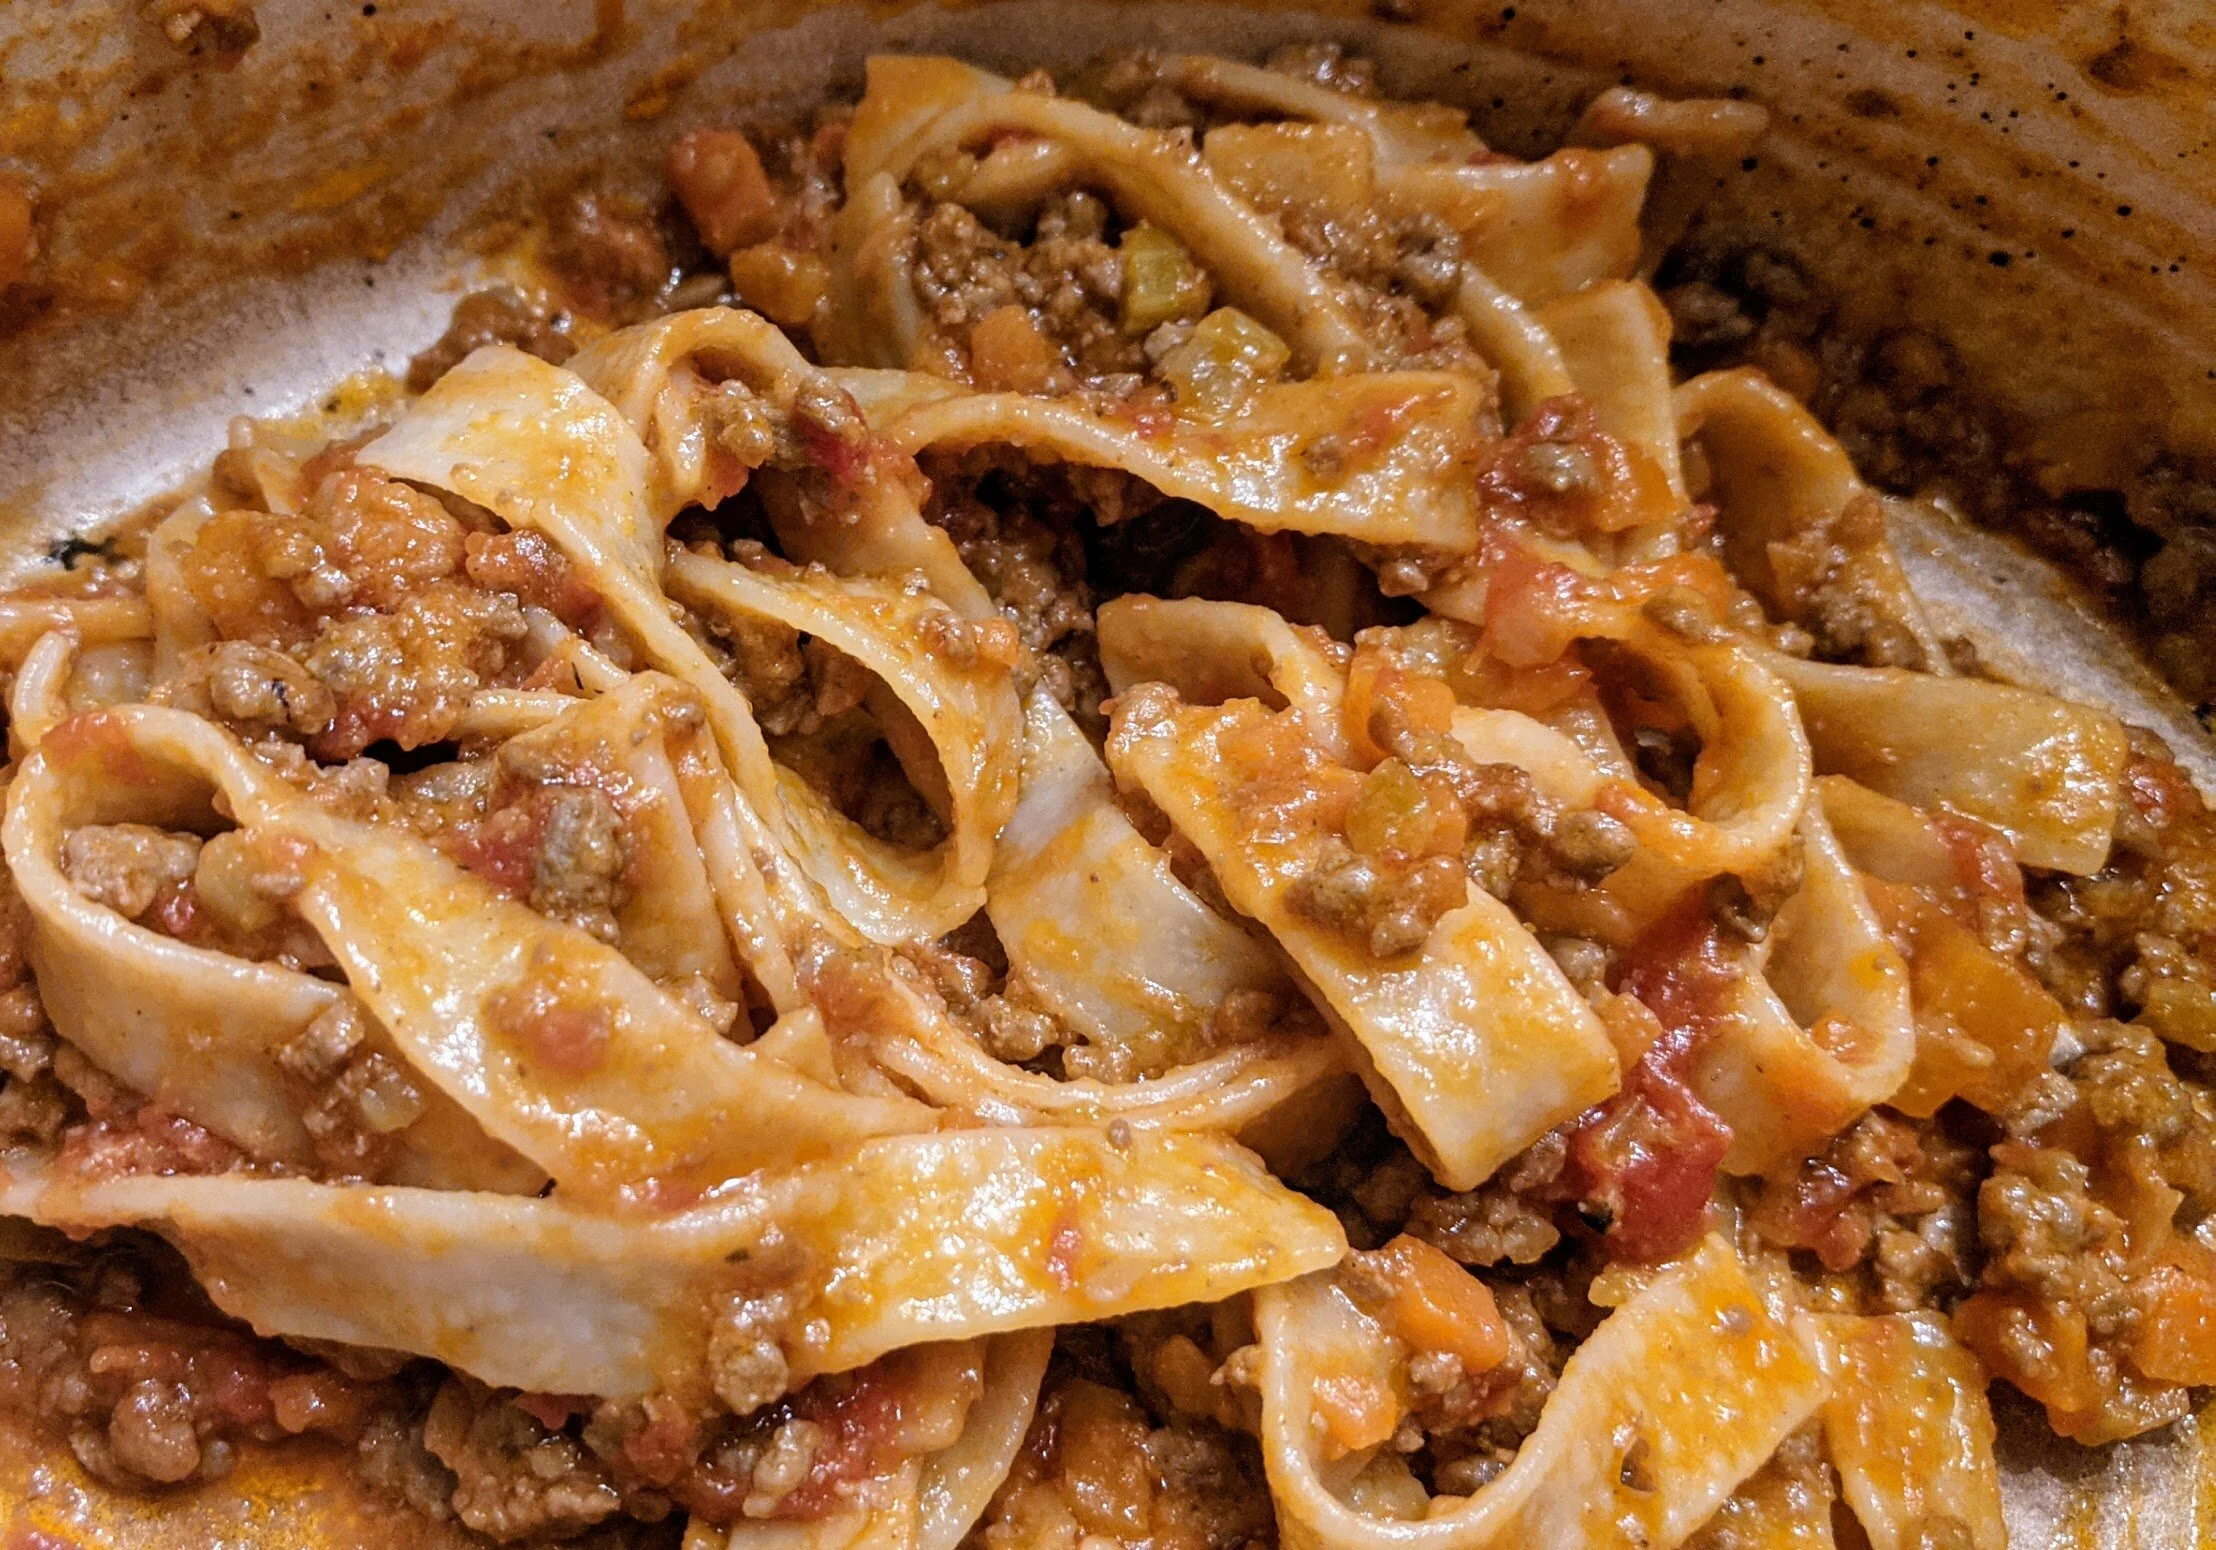
Even with all of her food enthusiasm, I have never, ever, seen her eat with as much gusto as she ate Marcella Hazan’s bolognese. (Close second: this beef stew.) Between industrious slurps, punctuated by “MMM”s, there was impatient huffing and flailing fists while she waited for her fork to be loaded. She is head over heels for this dish, and with good reason: it’s delish.


This is a pretty straightforward bolognese: a soffritto (carrot, onion, celery sauté) base with ground beef gently simmered in milk and then tomatoes. It requires patience - this isn’t a difficult dish in terms of chopping or technique, but it is absolutely a waiting game. Make sure you let the milk fully evaporate before adding the tomatoes, and then let those tomatoes just barely bubble all afternoon. The wait is so worth it for the outcome: creamy, decadently rich sauce tossed with steaming pasta.

Marcella Hazan’s Bolognese
Time: 1 hour active, several hours simmering || Servings: 6 || Source: Essentials of Classic Italian Cooking by Marcella Hazan
Vegetable oil - 1 tbsp
Butter - 4 tbsp
Onion - 1/2 cup, chopped
Celery - 2/3 cup, chopped
Carrot - 2/3 cup, chopped
Ground beef chuck - 3/4 lb (a higher fat content will make a sweeter sauce)
Whole milk - 1 cup
Whole nutmeg, for grating
White wine - 1 cup
Canned tomatoes - 1 1/2 cup, cut up or crushed with their juices
Pasta - 1 1/2 pounds, typically tagliatelle
Parmesan for garnish
Salt & pepper
In a dutch oven or other heavy bottomed pot, heat the oil and butter over medium. Place the onion in the pot and cook until tender and translucent, about 10 minutes. Add celery and carrot and cook for an additional 2 minutes, stirring.
Add the ground beef, a large pinch of salt (don’t be shy), and several grinds of pepper. The salt will help to release the juices of the beef, dispersing flavor into the sauce. Break up the beef as it cooks, until it’s started to brown - some pinkness is fine.
Add the milk. Simmer, stirring regularly, until the milk has simmered away completely. This will take time - as long as 20 minutes in my experience. If you keep the heat low, you can just stir now and then as you pass through the kitchen, perhaps opening and sipping the wine you’re about to use. When the milk has evaporated, add a few gratings of nutmeg to the pot and stir.
Add the wine and, as with the milk, let it simmer until evaporated.
Add the tomatoes to the pot. Rather than chop them, I usually crush them with my hands as they go into the pot. Stir thoroughly, then bring to a lazy, barely bubbling simmer. Cook, uncovered, for a minimum of 3 hours and longer if you have time - up to 5, 6 hours. (You can shut off the heat and resume cooking again later within the same day if you don’t have several continuous hours to keep an eye on it.) Stir every once in a while, adding 1/2 cup water if the sauce looks dry; typically, I have to do this a few times over the course of cooking. When you’re ready to take the sauce off of the heat, make sure all of the water has evaporated. Toss with cooked, drained pasta (tagliatelle is classic) and one tablespoon of butter. Serve with parmesan cheese on the side.
This sauce works well made a few days ahead and freezes well - if cold, simmer for 15 minutes before using.

Beef Stew
I can’t say enough about this beef stew from Alice Waters. This is a winter staple in my home because it’s simply delicious. A typical beef stew, in my experience, is thick with potatoes and peas. This is not that stew. This has savory tender beef, time-mellowed garlic, sweet onions, carrots, and tomatoes, spiced cloveyness (new word), orange brightness. I’ve been making this stew for years, and I still find myself stealing tastes checking the quality while it simmers all afternoon. And, although this a generously sized stew, I’ve learned not to expect much in the way of leftovers.

I can’t say enough about this beef stew from Alice Waters. This is a winter staple in my home because it’s simply delicious. A typical beef stew, in my experience, is thick with potatoes and peas. This is not that stew. This has savory, tender beef, time-mellowed garlic, sweet onions, carrots, and tomatoes, spiced cloveyness (new word), orange brightness. I’ve been making this stew for years, and I still find myself stealing tastes checking the quality while it simmers all afternoon. And, although this a generously sized stew, I’ve learned not to expect much in the way of leftovers.


I’d recommend using high quality beef stock, homemade if possible… but the honest truth is I’ve used both amazingly good stock and, in a pinch, so-so stock filled out with water and this always turns out amazing. The flavors here are solid, in part because Alice recommends you sear everything before you toss it in the pot. It’s a little extra work, but it makes a difference — instead of muddled flavors, you get depth and nuttiness from the browning. If you use a cast iron, you can deglaze (and sip) with some red wine, then just wipe it out and move on with your life, making this an almost-one-pot recipe.


I’m including the recipe as Alice designed it here, but I find that I skimp at the beginning and end of the recipe. Very rarely do I render the bacon or add raw garlic as a garnish. I’ve tried both, and they’re great - but sometimes I just don’t have bacon on hand and quite often I’m too impatient to chop garlic before digging into my bowl. One thing I am loyal to is the orange peel; it’s small but adds significant brightness to the dish.
Beef Stew
Time: 1 hour active, 2-3 hours simmering || Servings: 4 || Source: The Art of Simple Food by Alice Waters
Beef chuck - 3 pounds, cut into 1.5 inch cubes
Olive oil - 2 tbsp
Bacon - 3 slices, cut into 1/2 inch pieces (optional)
Onions - 2, peeled and quartered
Cloves - 2, stuck into onion quarters
Carrots - 2, cut into 2 inch pieces
Thyme, savory, parsley - 2 sprigs each
Bay leaf - 1
Peppercorns - a few, 5ish
Red wine - 1 3/4 cup
Diced tomatoes - 3, fresh or canned
Garlic - 1 small head, peeled and roughly chopped, plus a couple more finely chopped
Parsley - 1 tbsp, chopped
The day before you plan to cook, salt the beef generously and refrigerate.
Pull out a cast iron or other heavy bottomed pan and place it over medium-high heat. Also pull out a dutch oven or braising dish and place nearby. You’ll be cooking ingredients in the cast iron and then transferring them to the dutch oven to braise into deliciousness.
Put olive oil into the cast iron. When it shimmers but isn’t smoking, add bacon, if using, and cook until the fat has rendered and it’s lightly brown but isn’t crispy. Remove from cast iron and place in dutch oven.
Place beef cubes in the cast iron without crowding. You’ll probably need to cook the beef in multiple batches. Turn beef every few minutes until browned on all sides. The beef will not be fully cooked; it’ll cook through when it’s braising. When browned, transfer beef to the dutch oven.
Turn down the heat. Pour off most of the fat from the cast iron, leaving a thin layer; add more oil if the pan is dry. Add onion, cloves, carrots, herb sprigs, bay leaf, and peppercorns to pan and cook until lightly browned, turning every now and then. This is just for additional flavor - they’ll get plenty of cooking time as they braise. When lightly browned, transfer to dutch oven.
Raise the heat to high. Pour red wine into the cast iron and let it bubble down by two-thirds. While it’s boiling, use a wooden spoon to scrape up all the yummy bits stuck to the bottom of the pan. When reduced, pour into the dutch oven over the beef and vegetables.
Add the tomatoes, roughly chopped garlic, orange zest, and stock to the dutch oven. The liquid should come at least three-quarters of the way up the beef and vegetables. If not, add more - water is fine if you don’t have more stock on hand.
Bring the stew to a simmer and cover. At this point, you can reduce the heat and let it barely simmer on the stovetop, or transfer to a 325° oven. Let stew barely simmer for 2-3 hours, checking occasionally to make sure the heat isn’t too high and to add more liquid if needed.
When the beef is tender and your home smells amazing, remove the stew from the heat. Allow to sit for a few minutes so the fat will settle on top, then skim as well as you can. If you can fish them out, discard the bay leaf, cloves, and peppercorns (I usually just warn eaters and let them gamble with getting a spicy bite). Taste and add salt if needed. Garnish with parsley and finely chopped garlic, and then tuck in.
Variation: You can make this as a pot roast by keeping the meat whole and cooking for an additional hour. In this case, the liquid only needs to come halfway up the beef and vegetables.