
French Onion Soup
French onion soup is so simple, so inexpensive, and so classic. The sweet onions, gooey cheese, and soaked bread is so comforting, eating it is like getting a warm hug from the inside. Slicing the onions for this dish is a bit of a chore - but it’s French onion soup, so I guess you expected to slice onions? And caramelizing them to achieve the deep, nutty brown sweetness of your onion soup dreams takes time, but largely unattended time. Your patience will be well rewarded.

French onion soup is so simple, so inexpensive, and so classic. The sweet onions, gooey cheese, and soaked bread is so comforting, eating it is like getting a warm hug from the inside. Slicing the onions for this dish is a bit of a chore - but it’s French onion soup, so I guess you expected to slice onions? And caramelizing them to achieve the deep, nutty brown sweetness of your onion soup dreams takes time, but largely unattended time. Your patience will be well rewarded.


I pulled this recipe from The Food Lab by J. Kenji López-Alt, a heavy tome of a book detailing everything from how to make canned beans taste good to how to make perfectly crispy roasted potatoes (outlining several trials leading to success). If you like understanding the science behind cooking, I highly recommend - this is a book for geeks who like to eat good food. Mr. López-Alt explains that your onion eating needs are best served by slicing onions from tip-to-tip (or, if you want to think of your onion as a globe, from pole-to-pole). So that’s what we do here, for 5 pounds or 7 cups of onions. I suggest that step one is sharpening your knife (or grabbing your mandoline).
Once sliced, this abundance of onions goes into a dutch oven with some butter and salt to sweat out over very low heat for 2 hours. Over this time, the onions collapse down to a more reasonable amount, surrounded by their sugary juices. The heat goes up, the water evaporates, and the onions turn sweet and deeply browned. Simmer with some fresh herbs, sherry, and chicken stock, and your soup base is done. A chunky slice of baguette, a healthy dose of shredded cheese (metaphorically speaking), and trip to the broiler officially make this French onion soup.


Make sure to use broiler-proof bowls for this - crocks or ramekins or whatnot. In a pinch, you could cover a sheet pan with some foil, broil the cheese directly onto the bread, and then add it to your soup. But then you’d probably want to make sure the soup is piping hot and add some additional cheese to melt into it… because, you know, cheese.
French Onion Soup
Time: 3 hours || Servings: 4 || Source: The Food Lab
Yellow onions - 5 lbs, about 7 cups, thinly sliced pole to pole
Butter, unsalted - 4 tbsp
Salt - 1 tsp
Sherry - ¼ cup
Chicken stock - 6 cups
Bay leaves - 2, fresh or dried
Thyme - 6 sprigs fresh, or 1 tsp dried
Gruyere or Swiss cheese - 8 oz, about 2 cups grated
Baguette - sliced 1/2 inch thick, either a day old or toasted
Use a large Dutch oven or other heavy bottomed pot with a tight fitting lid. Place pot over medium heat and melt butter. Add onions and the salt. The pot will be full of onions - it will seem ridiculous, but it will cook down to a reasonable amount over time. Cook for about 5 minutes, stirring now and then with a wooden spoon, until the onions have begun to soften and wilt a bit. Cover the pot with the lid (if it’s not tight fitting, cover with aluminum foil and then the lid) and reduce to the lowest heat possible. Cook for 2 hours, giving the onions a stir every 45 minutes or so, until the onions are completely tender.
Remove the lid and foil, if using, and increase the heat to medium-high. The onions will have released a lot of water. Cook for about 15 minutes, stirring frequently, until the liquid has evaporated and you see a brown crust starting to form on the bottom of the pot. This is the start of your caramelization! Deglaze the pan by adding 2 tbsp of water and scrape up the brown crust with a wooden spoon. Distribute the onions evenly over the bottom of the pot, then let it cook for another 5 minutes, undisturbed, until the brown crust develops again. Repeat this pattern of deglazing and undisturbed cooking until the onions become a deep golden brown and taste sweet and delicious. This might take 4 or 5 total cycles.
Once your onions reach the desired color, add the sherry, chicken stock, bay leaves, and thyme to the pot. Bring the liquid to a boil, then reduce to a simmer. Simmer, uncovered, for 15 minutes. The stock will reduce slightly and turn dark. Taste and season with salt and pepper. Discard the bay leaves and the thyme sprigs, if using.
Heat the broiler. Place four broiler-proof bowls on a baking sheet (I used large ramekins). Distribute soup among bowls, top with a slice of baguette and the shredded cheese. Slide the pan under the broiler for about 5 minutes, keeping an eye on it, until the cheese is melted and turning brown in spots. Serve piping hot.
Note: After the 2 hours of low heat, it won’t hurt your onions to allow them to sit without heat for a couple of hours before moving on to evaporating the remaining water and caramelizing them.

Lentils with Sausage & Sage
This is the kind of dinner that will make you feel good. When we were done eating it, we said, “I feel good,” and we meant it. It tastes good, it’s filling, it’s not heavy, and it’s a quick and easy turnaround. Basically, everything I look for in a weeknight dinner.
This is the kind of dinner that will make you feel good. When we were done eating it, we said, “I feel good,” and we meant it. It tastes good, it’s filling, it’s not heavy, and it’s a quick and easy turnaround. Basically, everything I look for in a weeknight dinner.
Cooking dry lentils does take some time, to be completely honest - but, in my book, that’s easily dismissed because they can be done the night before or anytime the day you’re eating. Plus, simmering lentils with some roughly chopped vegetables never seems like much of a chore - I put it on and, while I might peek once in a while if I’m around, I pretty much check back again 90 minutes later. I used green lentils, but brown lentils would be a fine substitute. I would stay away from orange or red lentils, which tend to lose their shape and get mushy. Soak lentils for three hours, up to overnight, before cooking; this has the benefit of making them cook faster and makes them easier to digest.


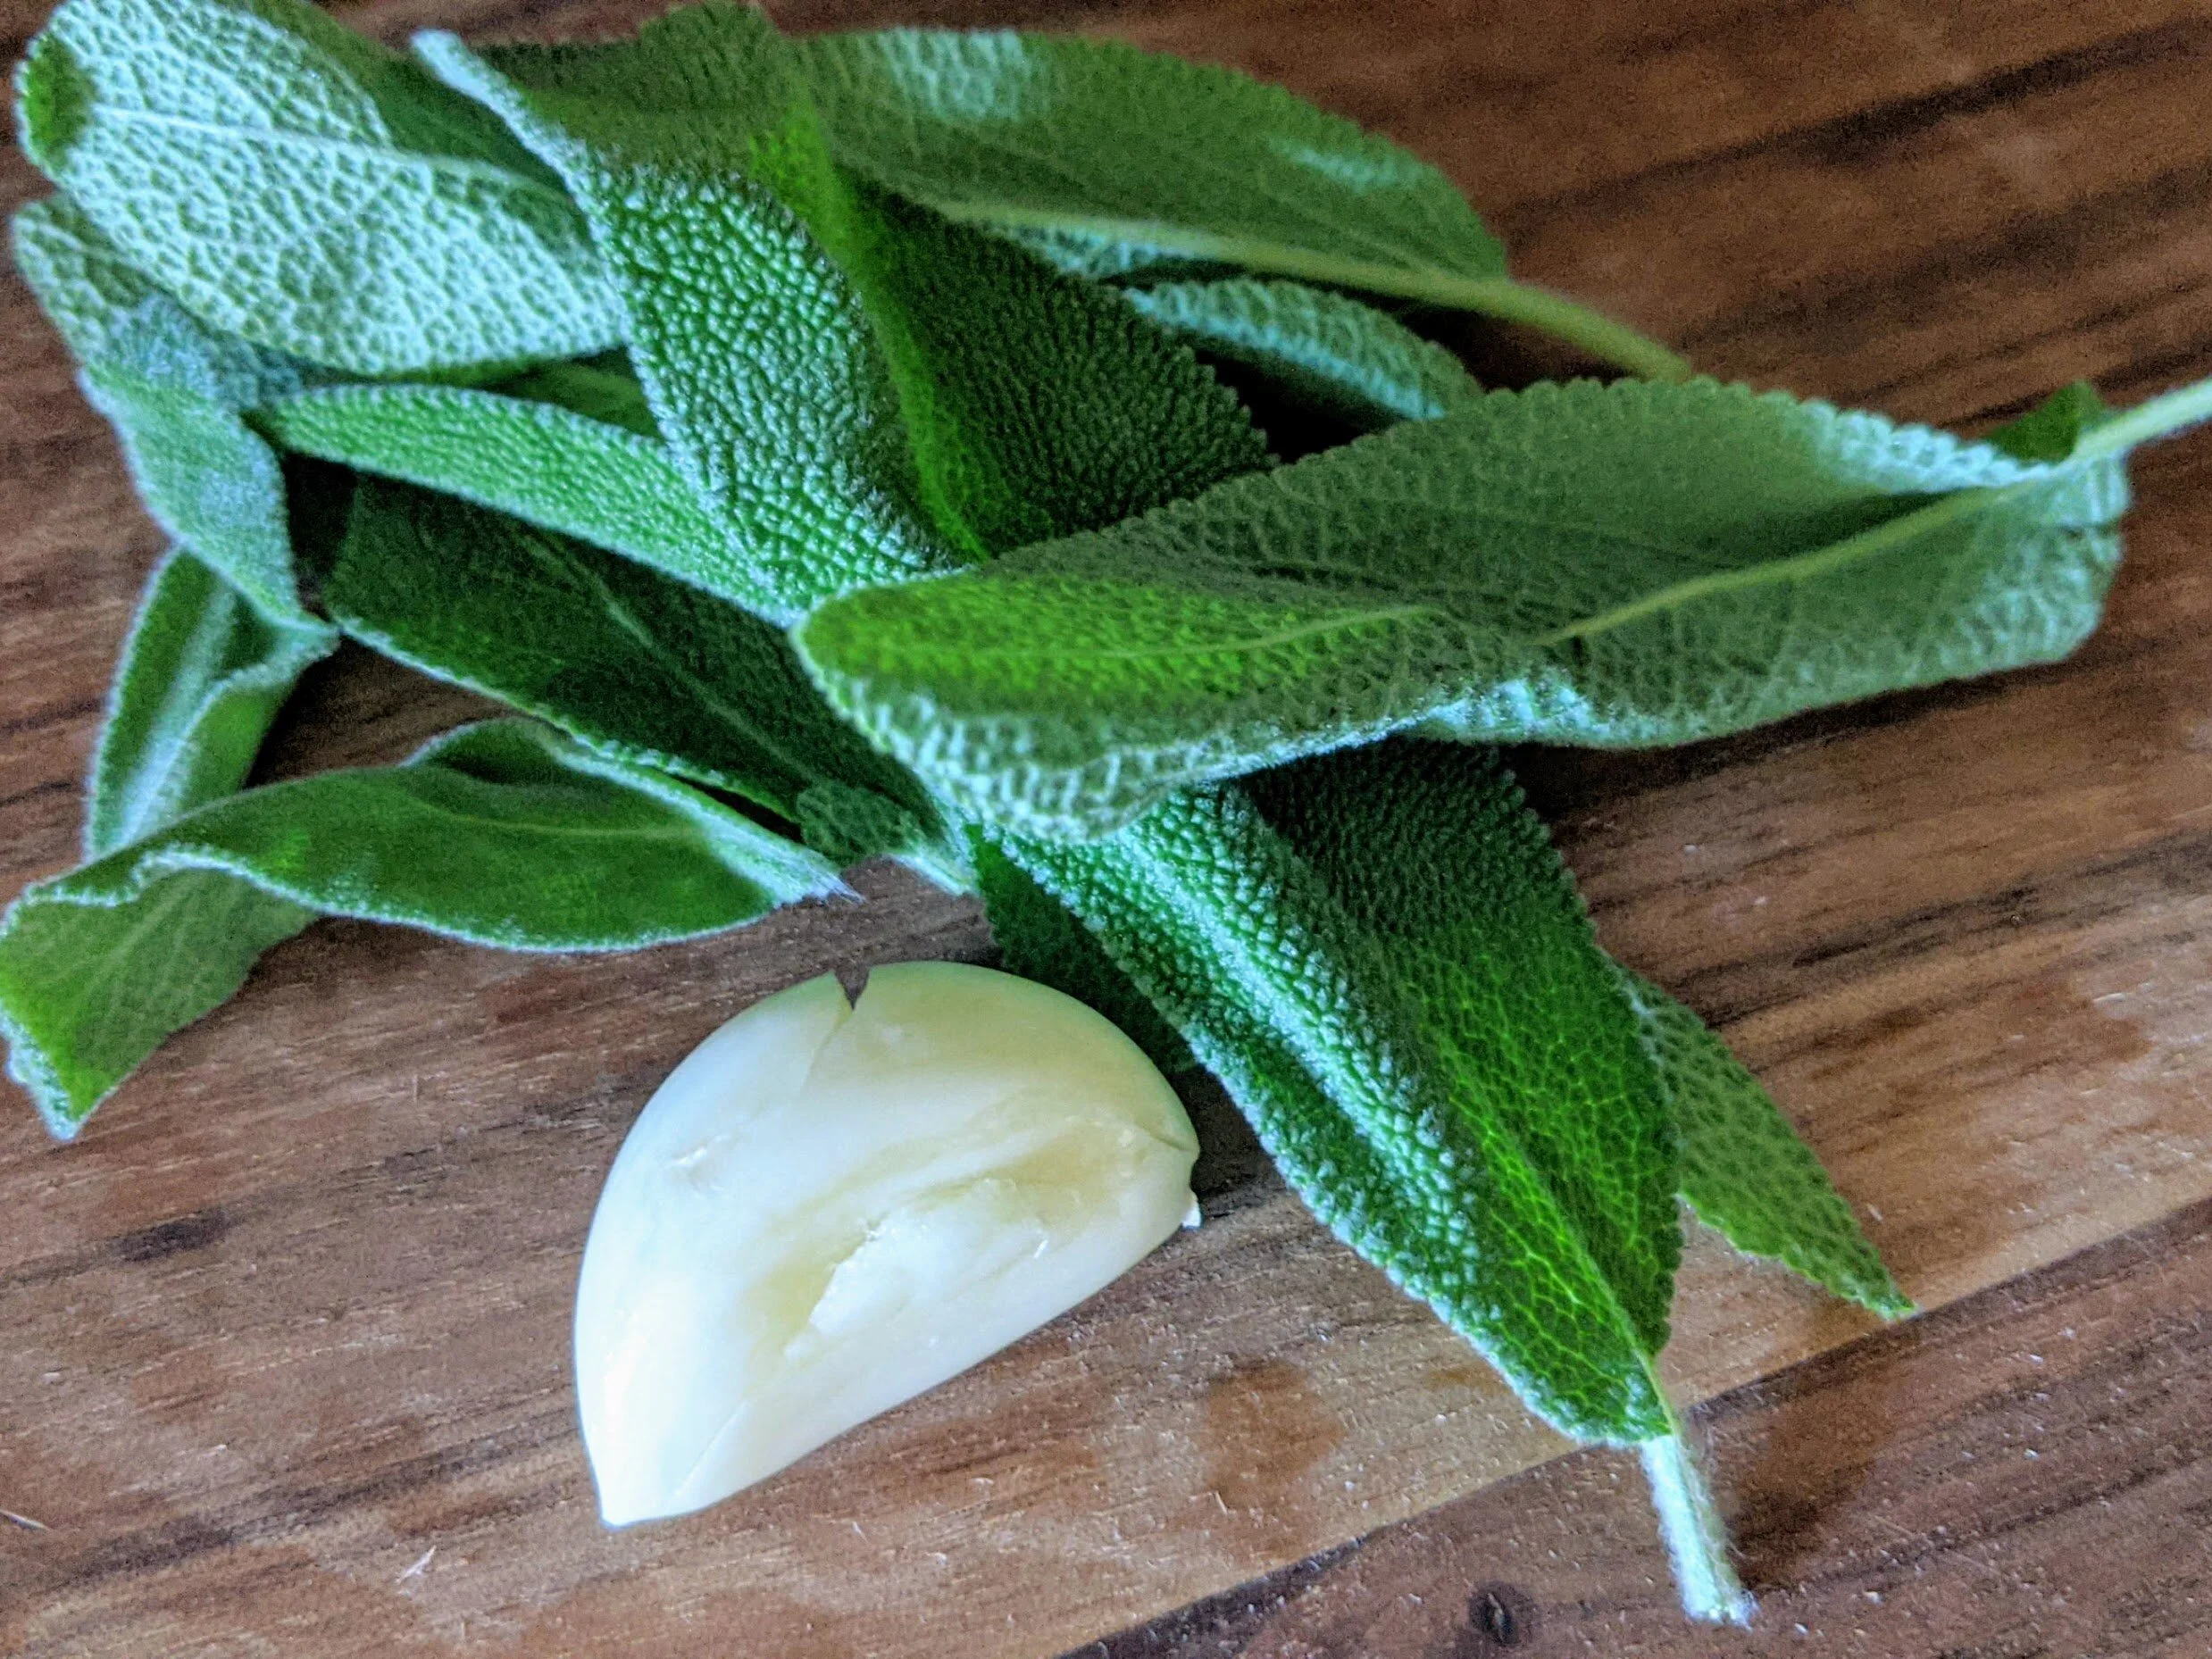
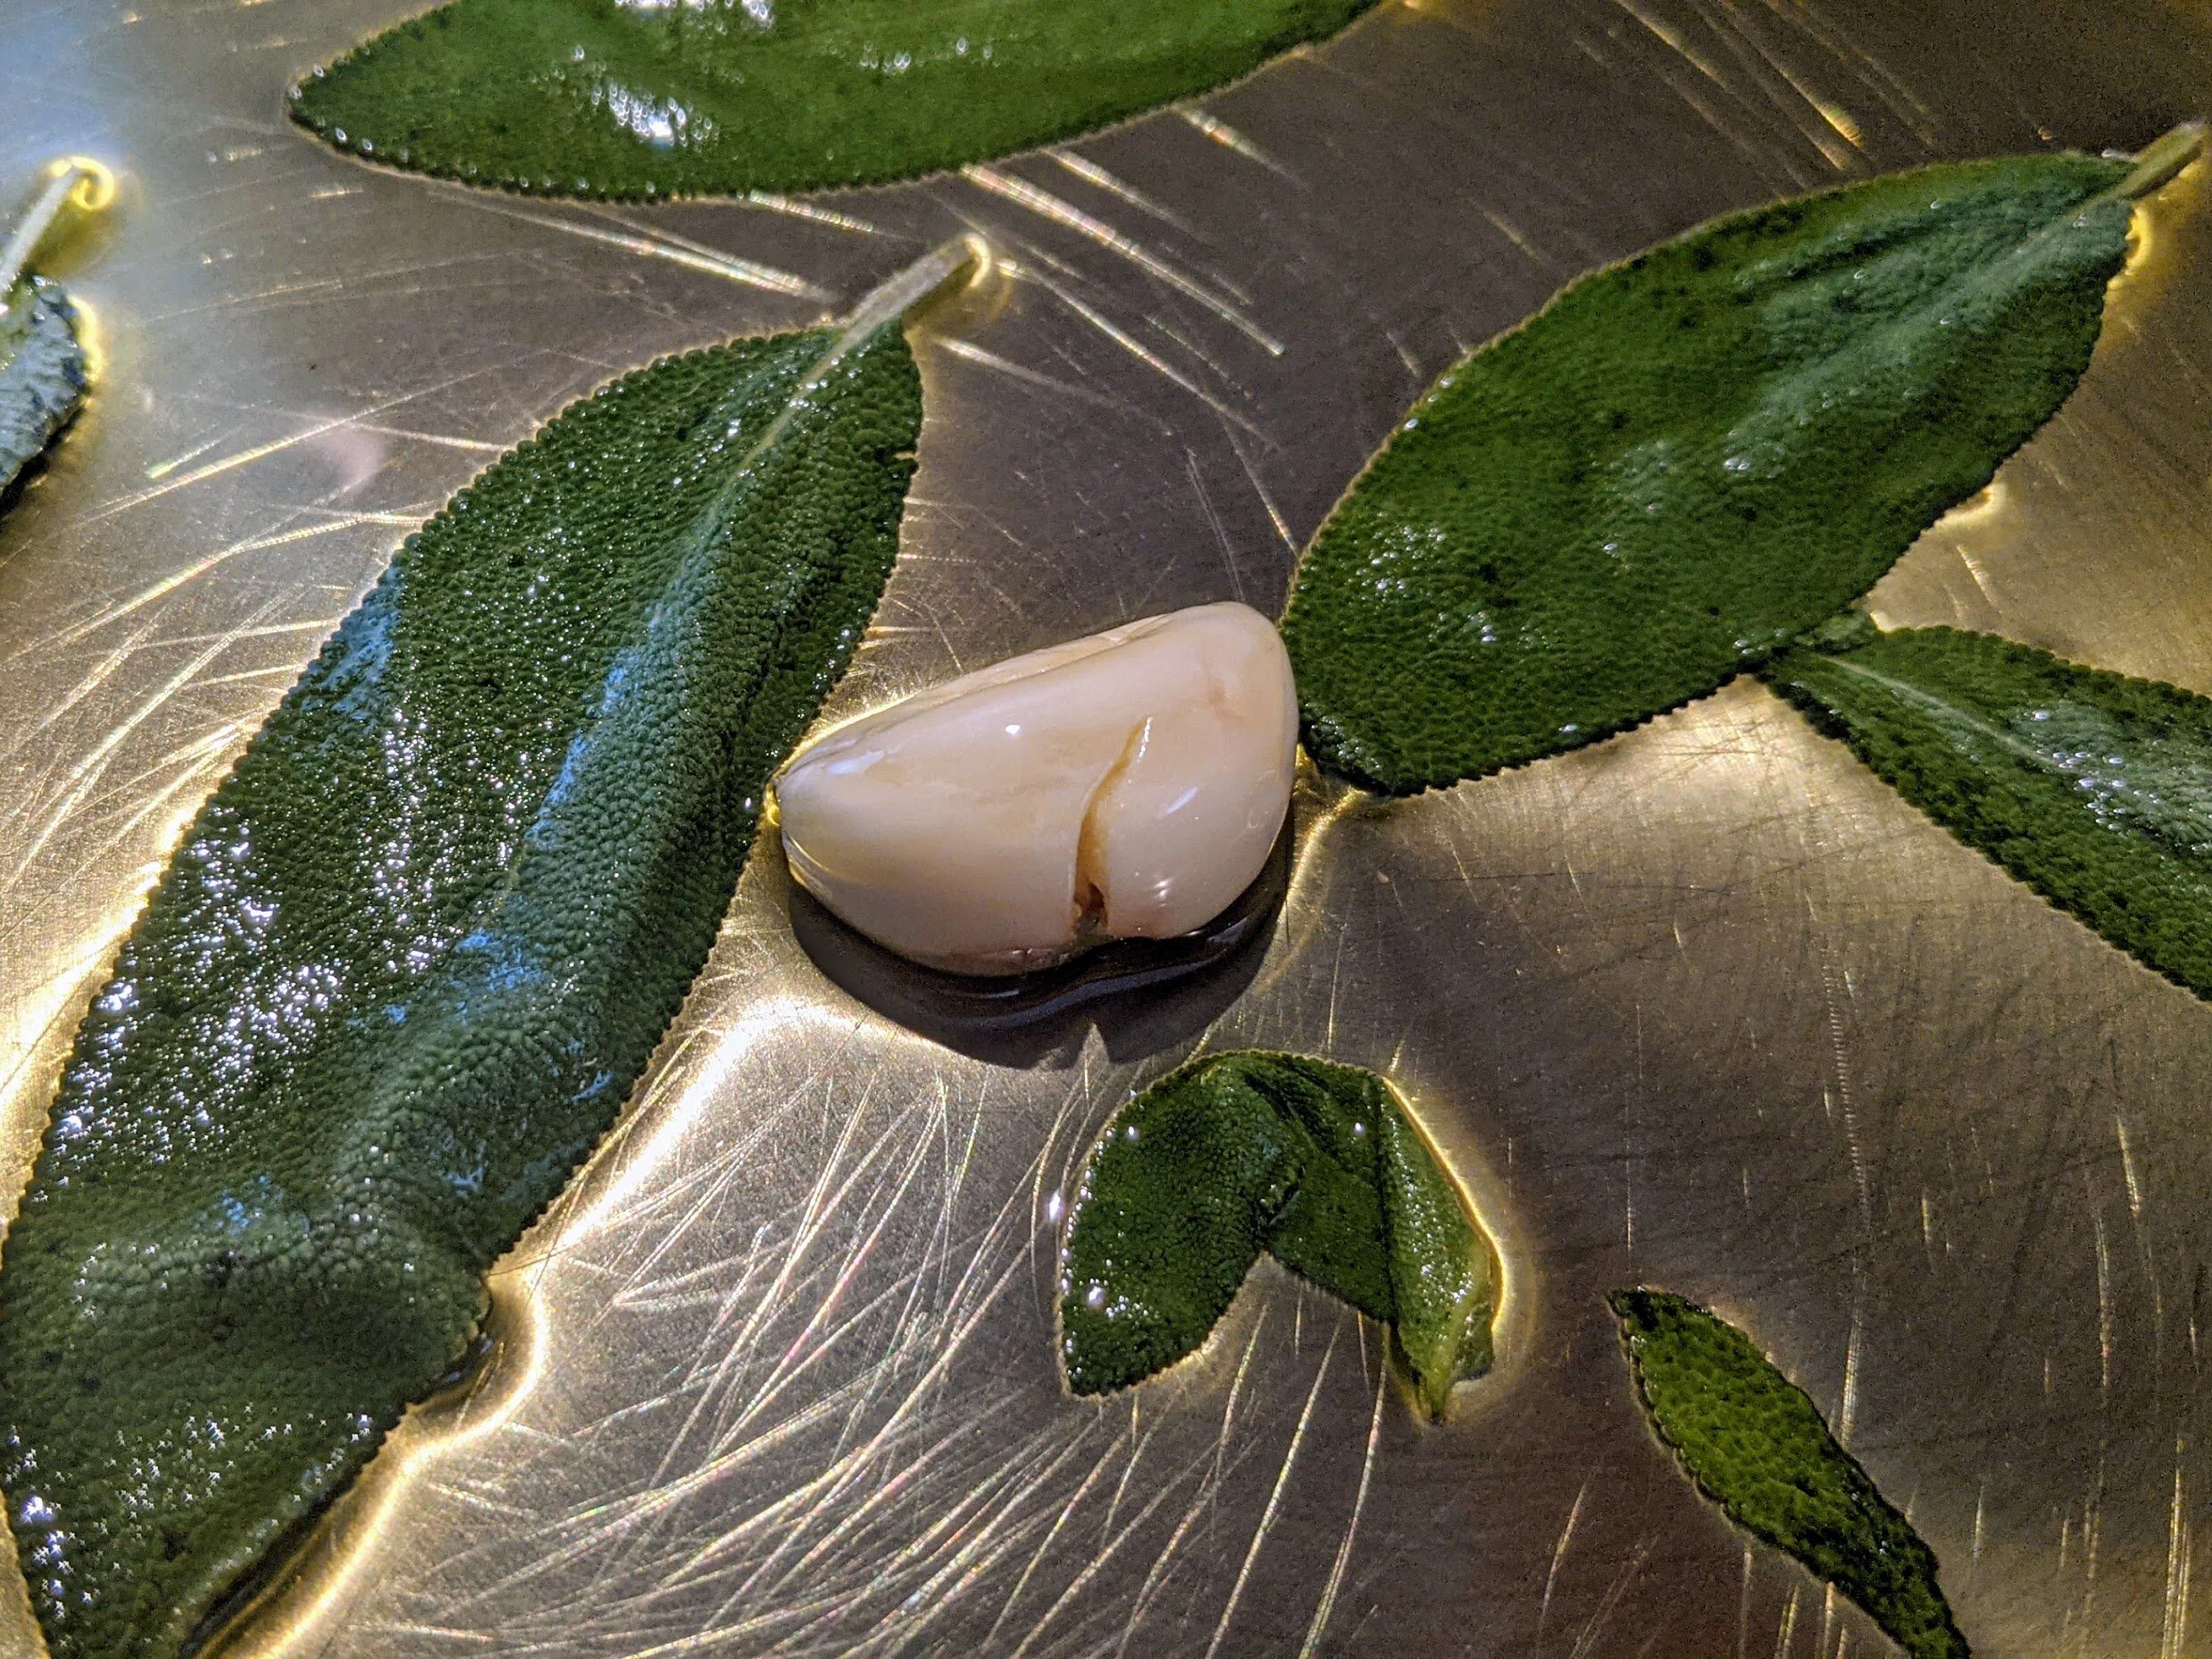
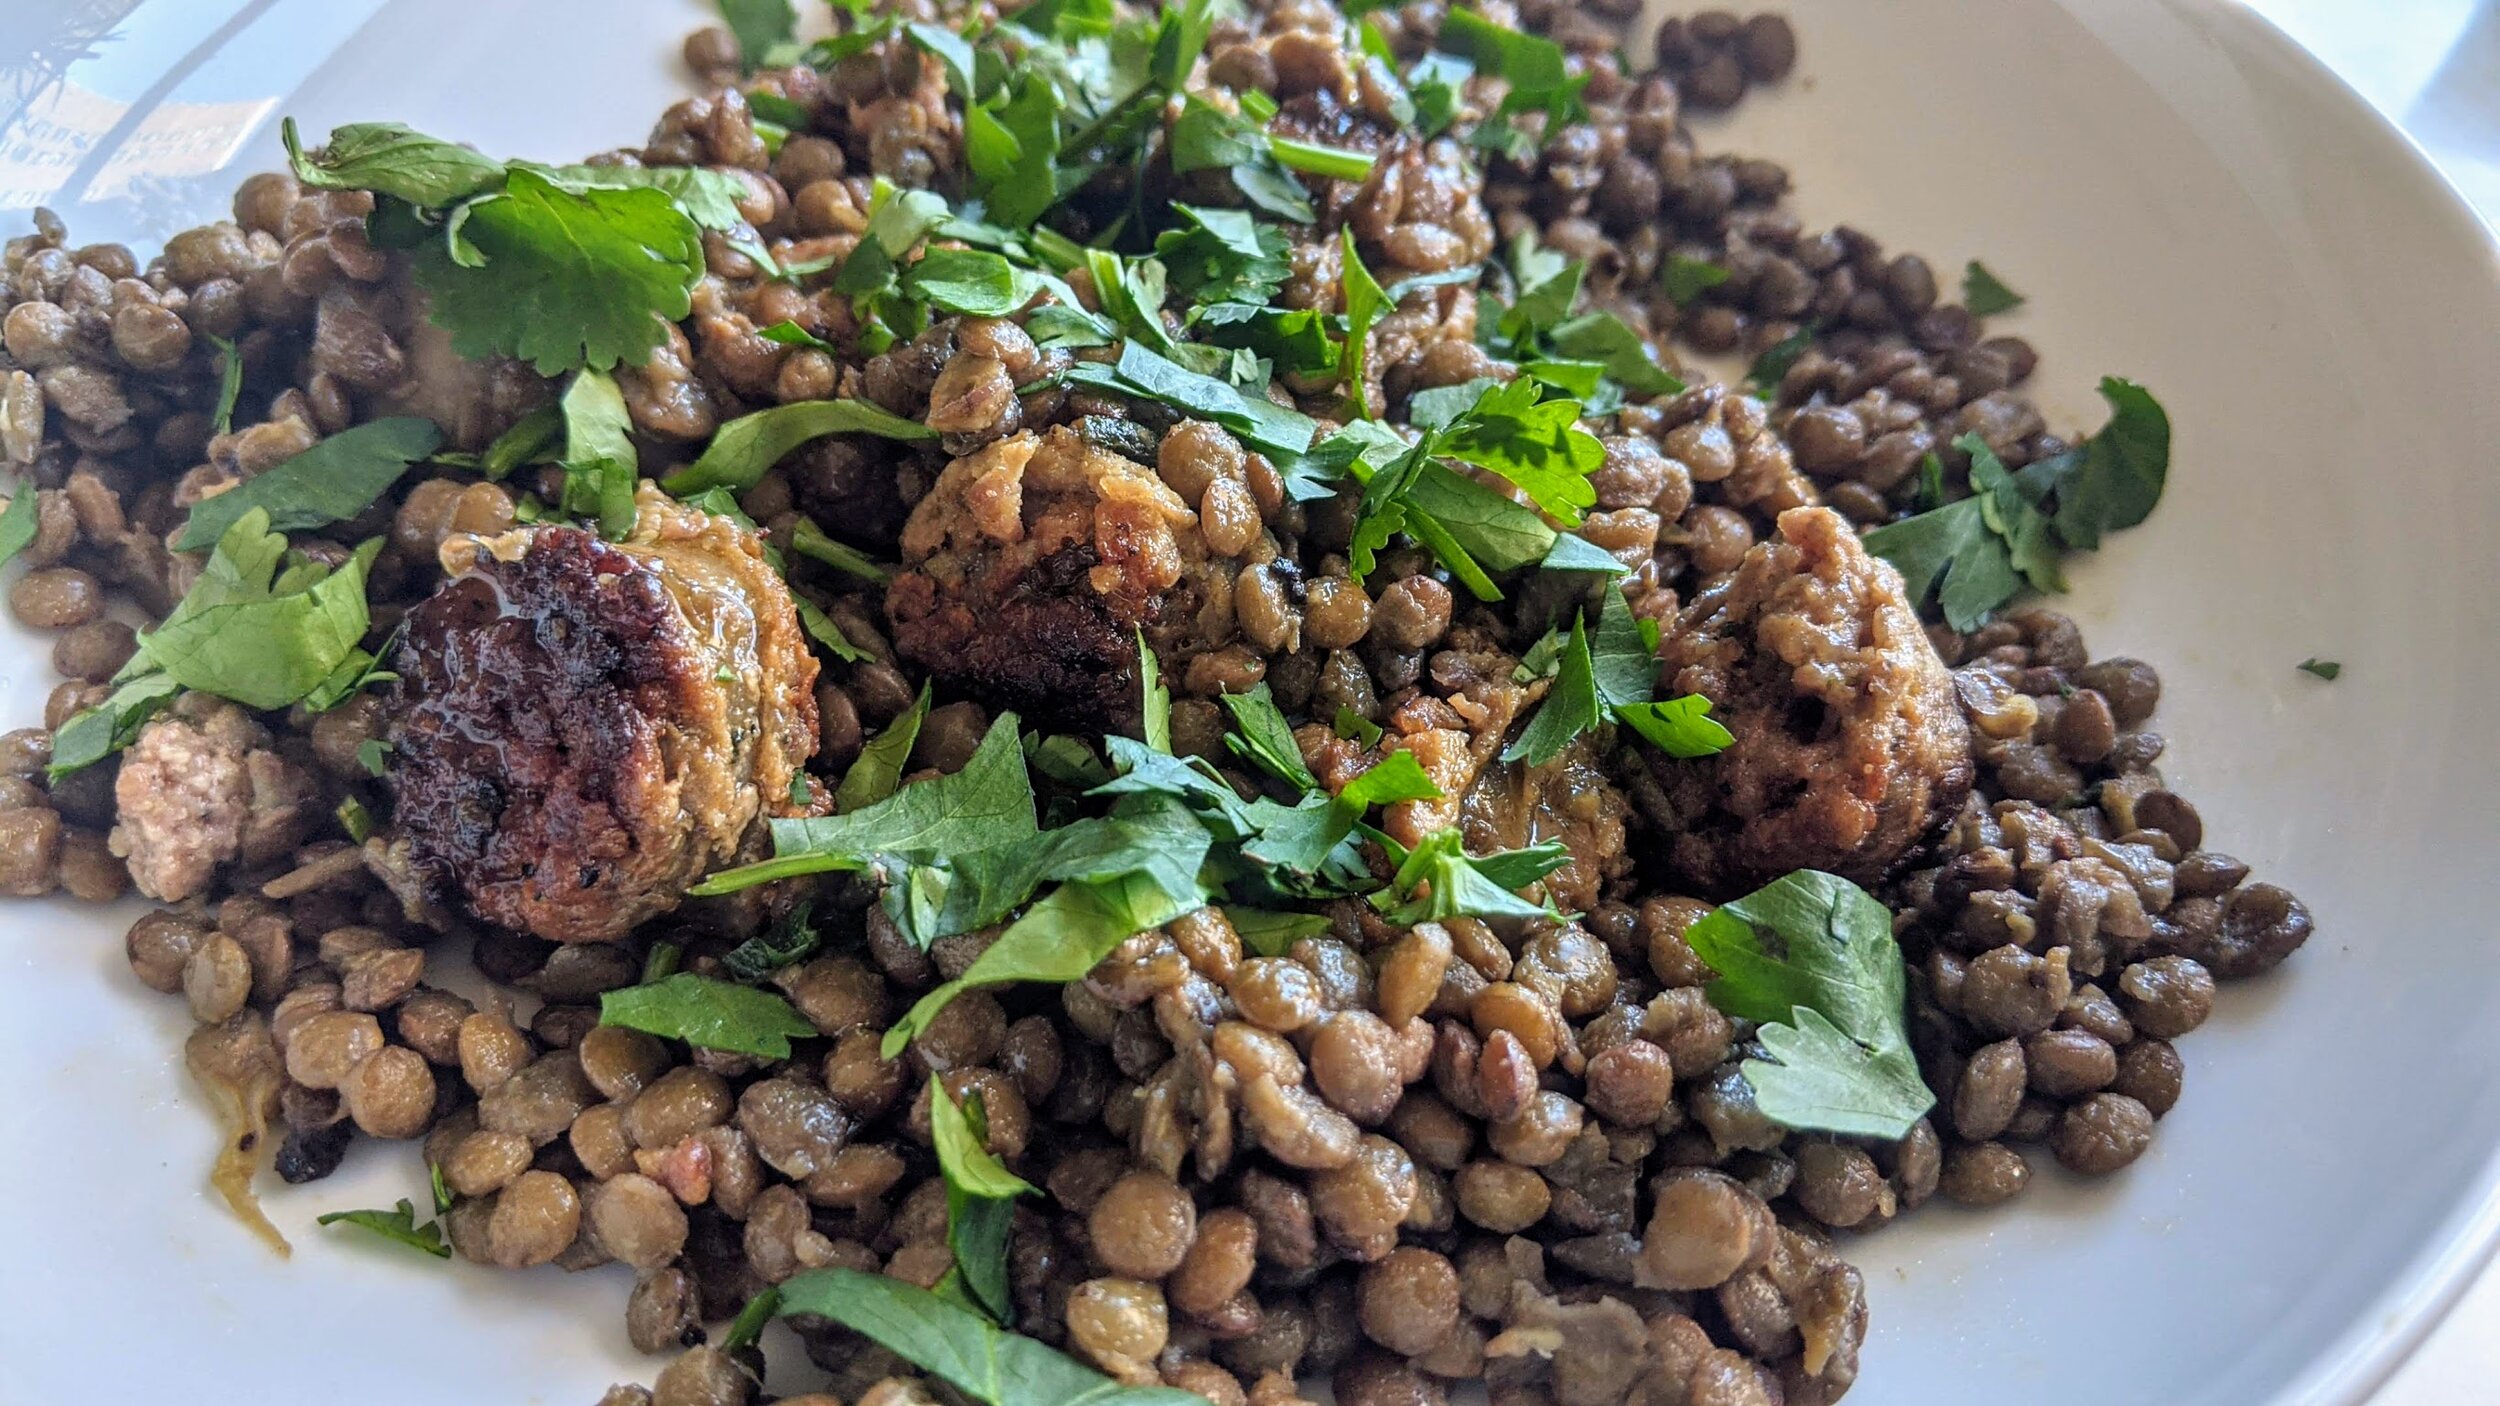
Once the lentils are done, the rest is simple: sear some sausage, sizzle sage and garlic (whole, not even chopped!) to flavor some olive oil, mix and serve. I chose to use chunks of sausage, but it would be faster cooking to use loose sausage and break it up as you cook - and you’d have the added benefit of more distributed sausage in your bites. I recommend a drizzle of olive oil and a squeeze of lemon at the end of this, along with the chopped parsley, to bring some brightness and freshness.
Lentils with Sausage & Sage
Time: 2 hours || Servings: 4 || Source: Slightly adapted from The Silver Spoon
Lentils, green or brown - 9 oz (approximately 1 ⅓ cups)
Celery stalk - 1
Carrot - 1
Onion, small - 1
Italian sausage (hot or sweet) - 4 links, around 12 oz
Olive oil - 3 tbsp, plus more for garnish
Sage leaves - 6
Garlic clove - 1
Lemon juice - 1/2 of a lemon, or to taste
Parsley - 1 tbsp, chopped
Soak the lentils for at least 3 hours, up to overnight. Discard any lentils that float to the top of the bowl. When you’re ready to cook them, drain and rinse the lentils. Place them in a pot and add water to cover; there should be about an inch of water above the lentils. Cut the onion in half and add to the pot with the celery stalk and carrot (roughly chop celery and carrot if needed to fit the pot). The vegetables should be washed but do not need to be peeled. Bring to a boil, then reduce heat and simmer for about 90 minutes, adding additional water if it drops below the lentils. Taste the lentils to determine that they are done; they should be tender to the bite, although some varieties may have more firmness. Cook until they reach your desired consistency, then drain and season with a pinch of salt.
Place a heavy bottomed pan over medium-high heat. Chop the sausages or remove them from their casing and crumble them. Add 1 tbsp of olive oil to the pan, then add the sausage. Cook, stirring occasionally, until browned on all sides, about ten minutes.
In a large pan, place the remaining 2 tbsp of olive oil over low heat. Add the sage and garlic and cook slowly until garlic is golden brown. Remove and discard the garlic. Add the sausages and lentils to the oil and remove from heat. Mix well. Serve with a squeeze of lemon, a drizzle of olive oil, and chopped parsley.
Goat Cheese Tortilla Casserole
I’ve been watching a lot of Beat Bobby Flay lately. It’s might be a little unhealthy. This is the premise of the show: Two professional chefs compete against each other for a chance to compete against Bobby. Two supposed friends of Bobby’s choose the winner of that matchup, and then the winning chef announces a signature dish that they and Bobby Flay will each make in a head-to-head competition. And then Bobby wins. The end.

I’ve been watching a lot of Beat Bobby Flay lately. It’s might be a little unhealthy. This is the premise of the show: Two professional chefs compete against each other for a chance to compete against Bobby. Two supposed friends of Bobby’s choose the winner of that matchup, and then the winning chef announces a signature dish that they and Bobby Flay will each make in a head-to-head competition. And then Bobby wins. The end.
The winning chef knows ahead of time what they’re going to be making and, one must assume, have selected something they make really well and probably practiced a lot. And then Bobby has to make it, whatever it is, on the fly - admittedly, in a kitchen he knows well, in a setting and under time pressure that he’s really familiar with. But still. Sometimes it’s something like enchiladas, and then you’re yelling at the screen, why why why would you choose something in his wheelhouse? You think you can beat him at his own game? Did you even watch the show before you signed up??? And then sometimes it’s something like goulash or spätzle and you think, absolutely no way he’ll win - and then he does. (I saw through an unreliable source that Bobby only has a 65% winning record over 18 seasons, but the only explanation I have for this is that he must have gotten better over time and his winning rate is much, much higher in recent seasons.)
If you don’t know the show, you should probably stop reading this and go watch it right now. I can wait.


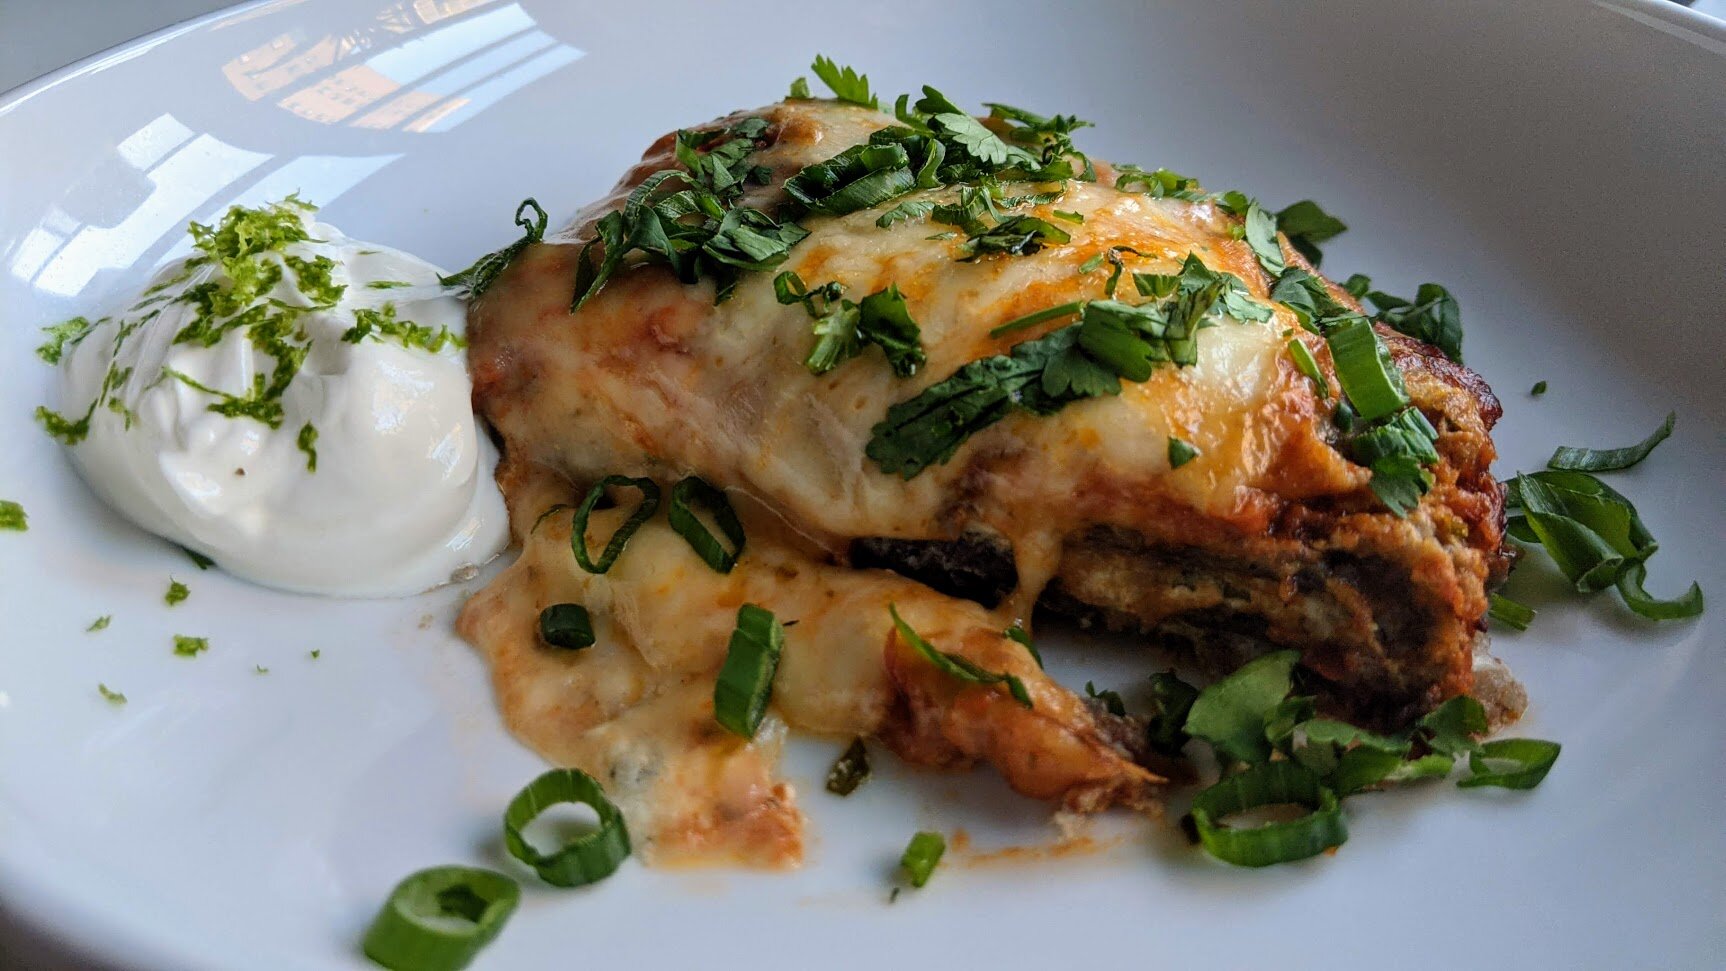
So, for no particular reason, I was looking into Bobby Flay’s recipes and am happy to share this goat cheese-enchiladas-turned-casserole. I know goat cheese enchiladas sound strange, but if you like cheese (I do) and if you’re okay with this being pretty rich (I am), then you’re going to like this recipe. The goat cheese is spiked with lime juice and garlic and blended until light and fluffy, then folded with spices and herbs. That goat cheese delight is stacked with blue corn tortillas in a casserole dish, smothered in a homemade tomato-chile sauce, and tucked into a cozy blanket of Monterey jack cheese. (I did warn you that it’s rich.)


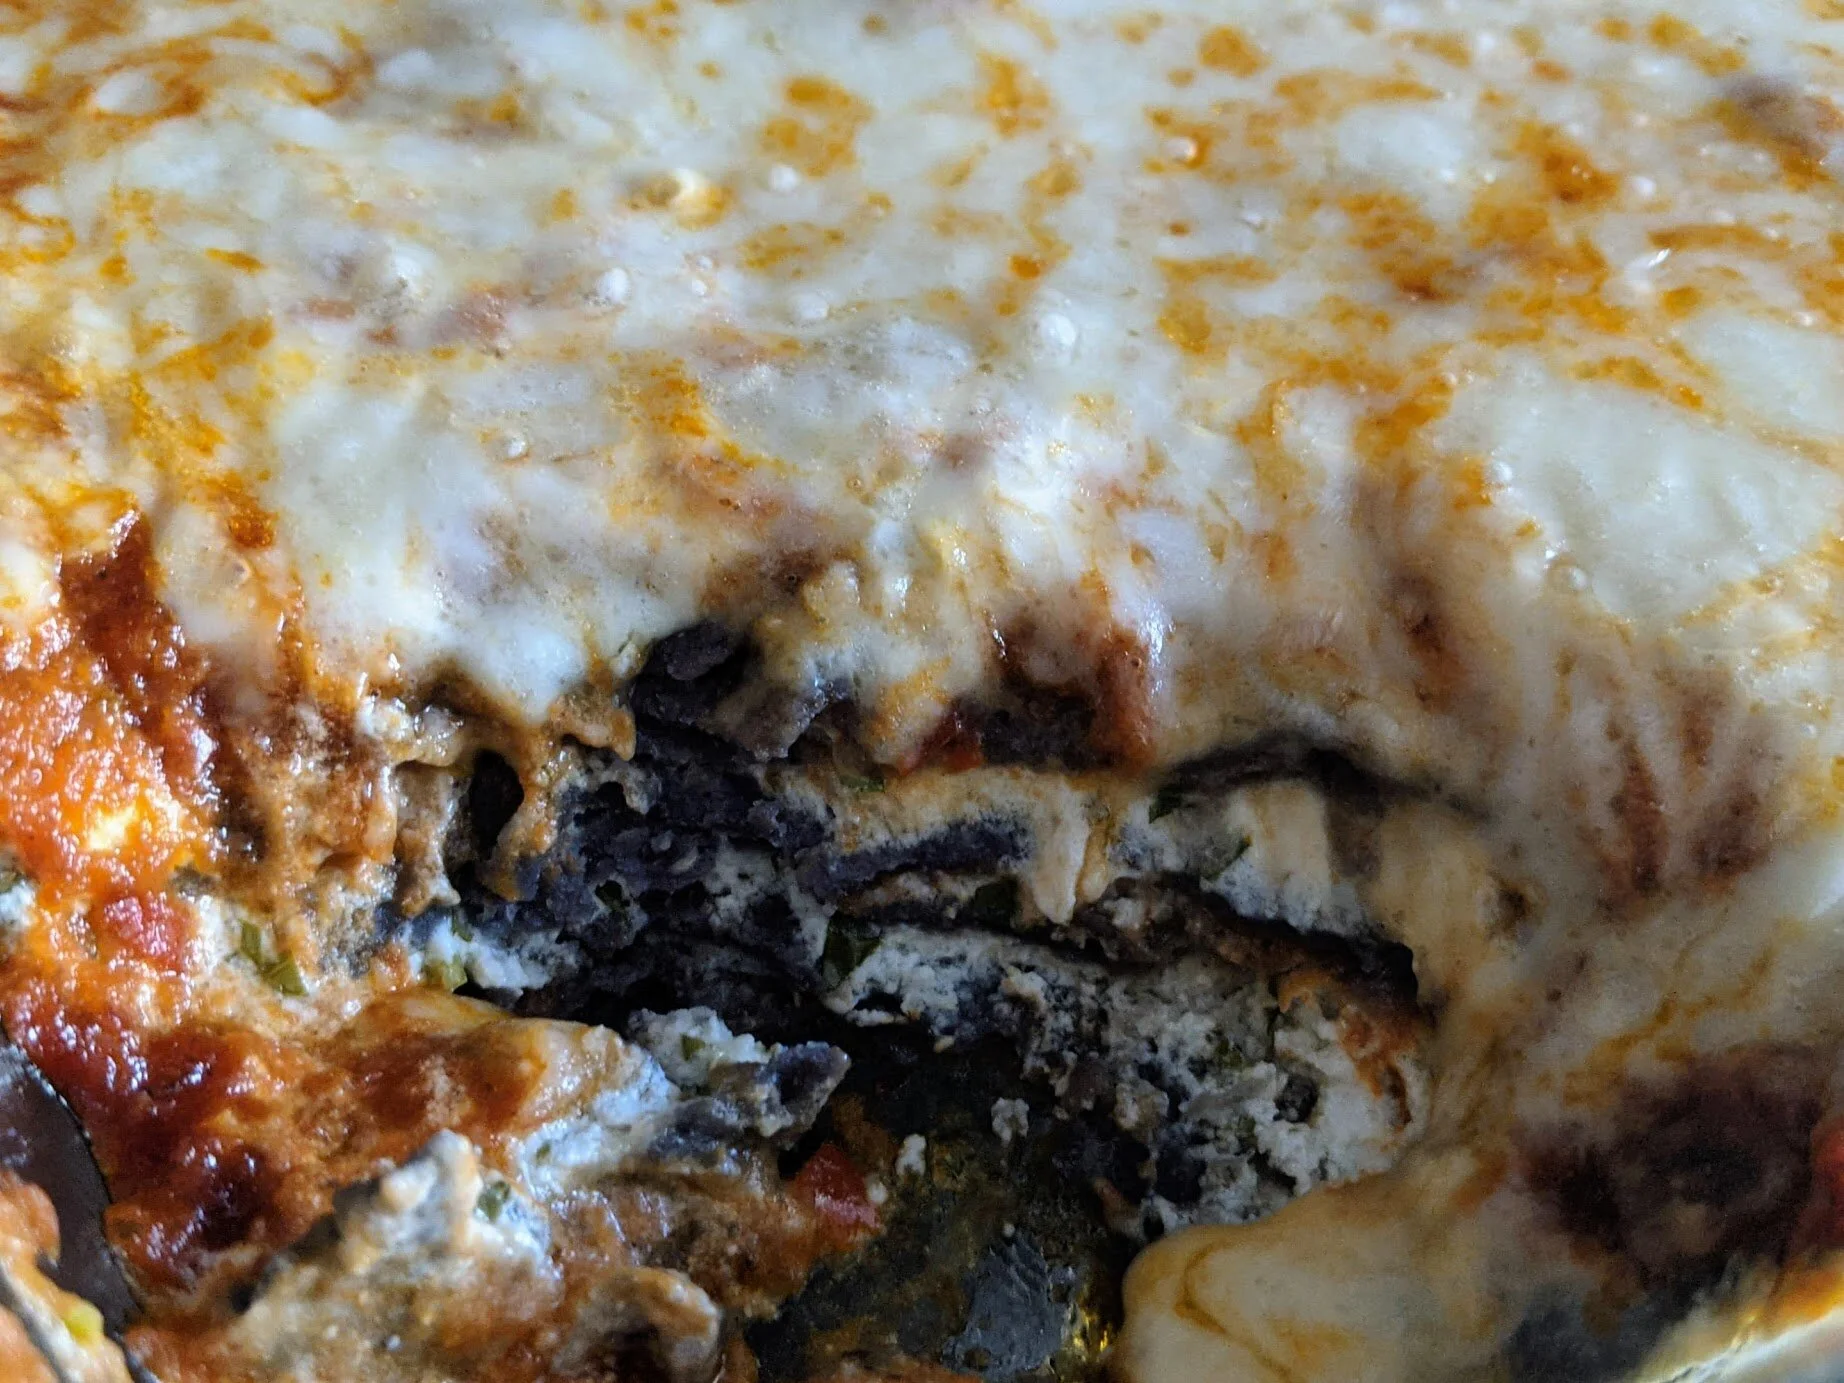
This dish is a bit of an effort - there are two components to make before you assemble the casserole - but it’s worth it for the ooey gooey cheesy outcome. Rice and beans are highly recommended as a side, as is a green salad with a bright dressing to cut the richness.
Goat Cheese Tortilla Casserole
Time: 1.5 hours + 30 mins inactive || Servings: 4-6 || Source: Adapted from Bobby Flay
For the chile sauce:
Ancho chiles - 3
Vegetable oil - 3 tbsp
Red onion - 1 large, finely chopped
Garlic cloves - 3, chopped
Cumin - 1 tbsp
Mexican oregano or regular oregano - 1 tbsp
White wine - 1 cup
Canned tomatoes - 2 cans, 28 oz
Chicken or vegetable stock - 3 cups
Honey - 1-2 tbsp
For the filling:
Soft goat cheese - 1 1/4 lb
Garlic - 3 cloves, coarsely chopped
Cotija cheese - 1/4c, grated
Lime juice - 2 tbsp, more to taste
Cilantro leaves - 1/4c, finely chopped
For assembly:
Blue corn tortillas - 12
Monterey jack - 8 oz, grated
Cilantro - 3 tbsp, chopped
Sour cream, for garnish (mix with lime zest if you’re feeling fancy)
Scallions, sliced thinly, for garnish
Limes, for garnish
Make the chile sauce.
In a small saucepan, bring 2 cups of water to a boil. When boiling, remove from heat and add chiles. Let sit for 30 minutes (longer is okay, if needed). Remove the stems and seeds from the chiles, then place them in a food processor or blender with 1/4 cup of the soaking liquid. Puree until smooth.
In a medium skillet, heat vegetable oil over medium-high. Add onion and cook until soft, 5-7 minutes. Add garlic and cook for another minute, until fragrant. Lower heat if necessary to prevent it from burning. Add cumin and oregano and cook for another minute, until fragrant. Add the ancho puree and cook for another 3 minutes. Add wine, canned tomatoes, and stock to the pan. Raise the heat to bring to a boil and then reduce to a simmer. Allow to simmer for 30 minutes, until slightly thickened. Add salt and pepper, then taste. Add more seasoning as necessary, as well as honey, until you’re satisfied with the flavor.
You can leave the sauce as is if you like it chunky, or puree in a food processor, blender, or with an immersion blender for a smoother texture.
Make the filling.
Place the goat cheese, garlic, cotija cheese, and lime juice in a food processor or blender. Process until smooth and fluffy; this may take a few minutes. Season with salt and pepper, and fold in the chopped cilantro. Taste and adjust seasoning.
Assemble the casserole.
Heat the oven to 375°F.
Spread 1/2 cup or so of the chile sauce on the bottom of a casserole dish. Place three tortillas in the pan, slightly overlapping. You may want to cut the tortillas to get more pan coverage, but this isn’t strictly necessary. Spread 1/2 cup of the sauce over the tortillas, then spread the goat cheese. Top with two more layers, repeating tortillas, sauce, and cheese. Top with a final layer of tortillas, another generous layer of sauce, and the Monterey jack cheese.
Bake for 20 to 30 minutes, until the enchiladas are heated through and the cheese is melted. Remove from the oven. Serve sprinkled with cilantro and scallions, a dollop of sour cream, and a lime wedge.

Roasted Chicken Legs and Cauliflower with Yogurt
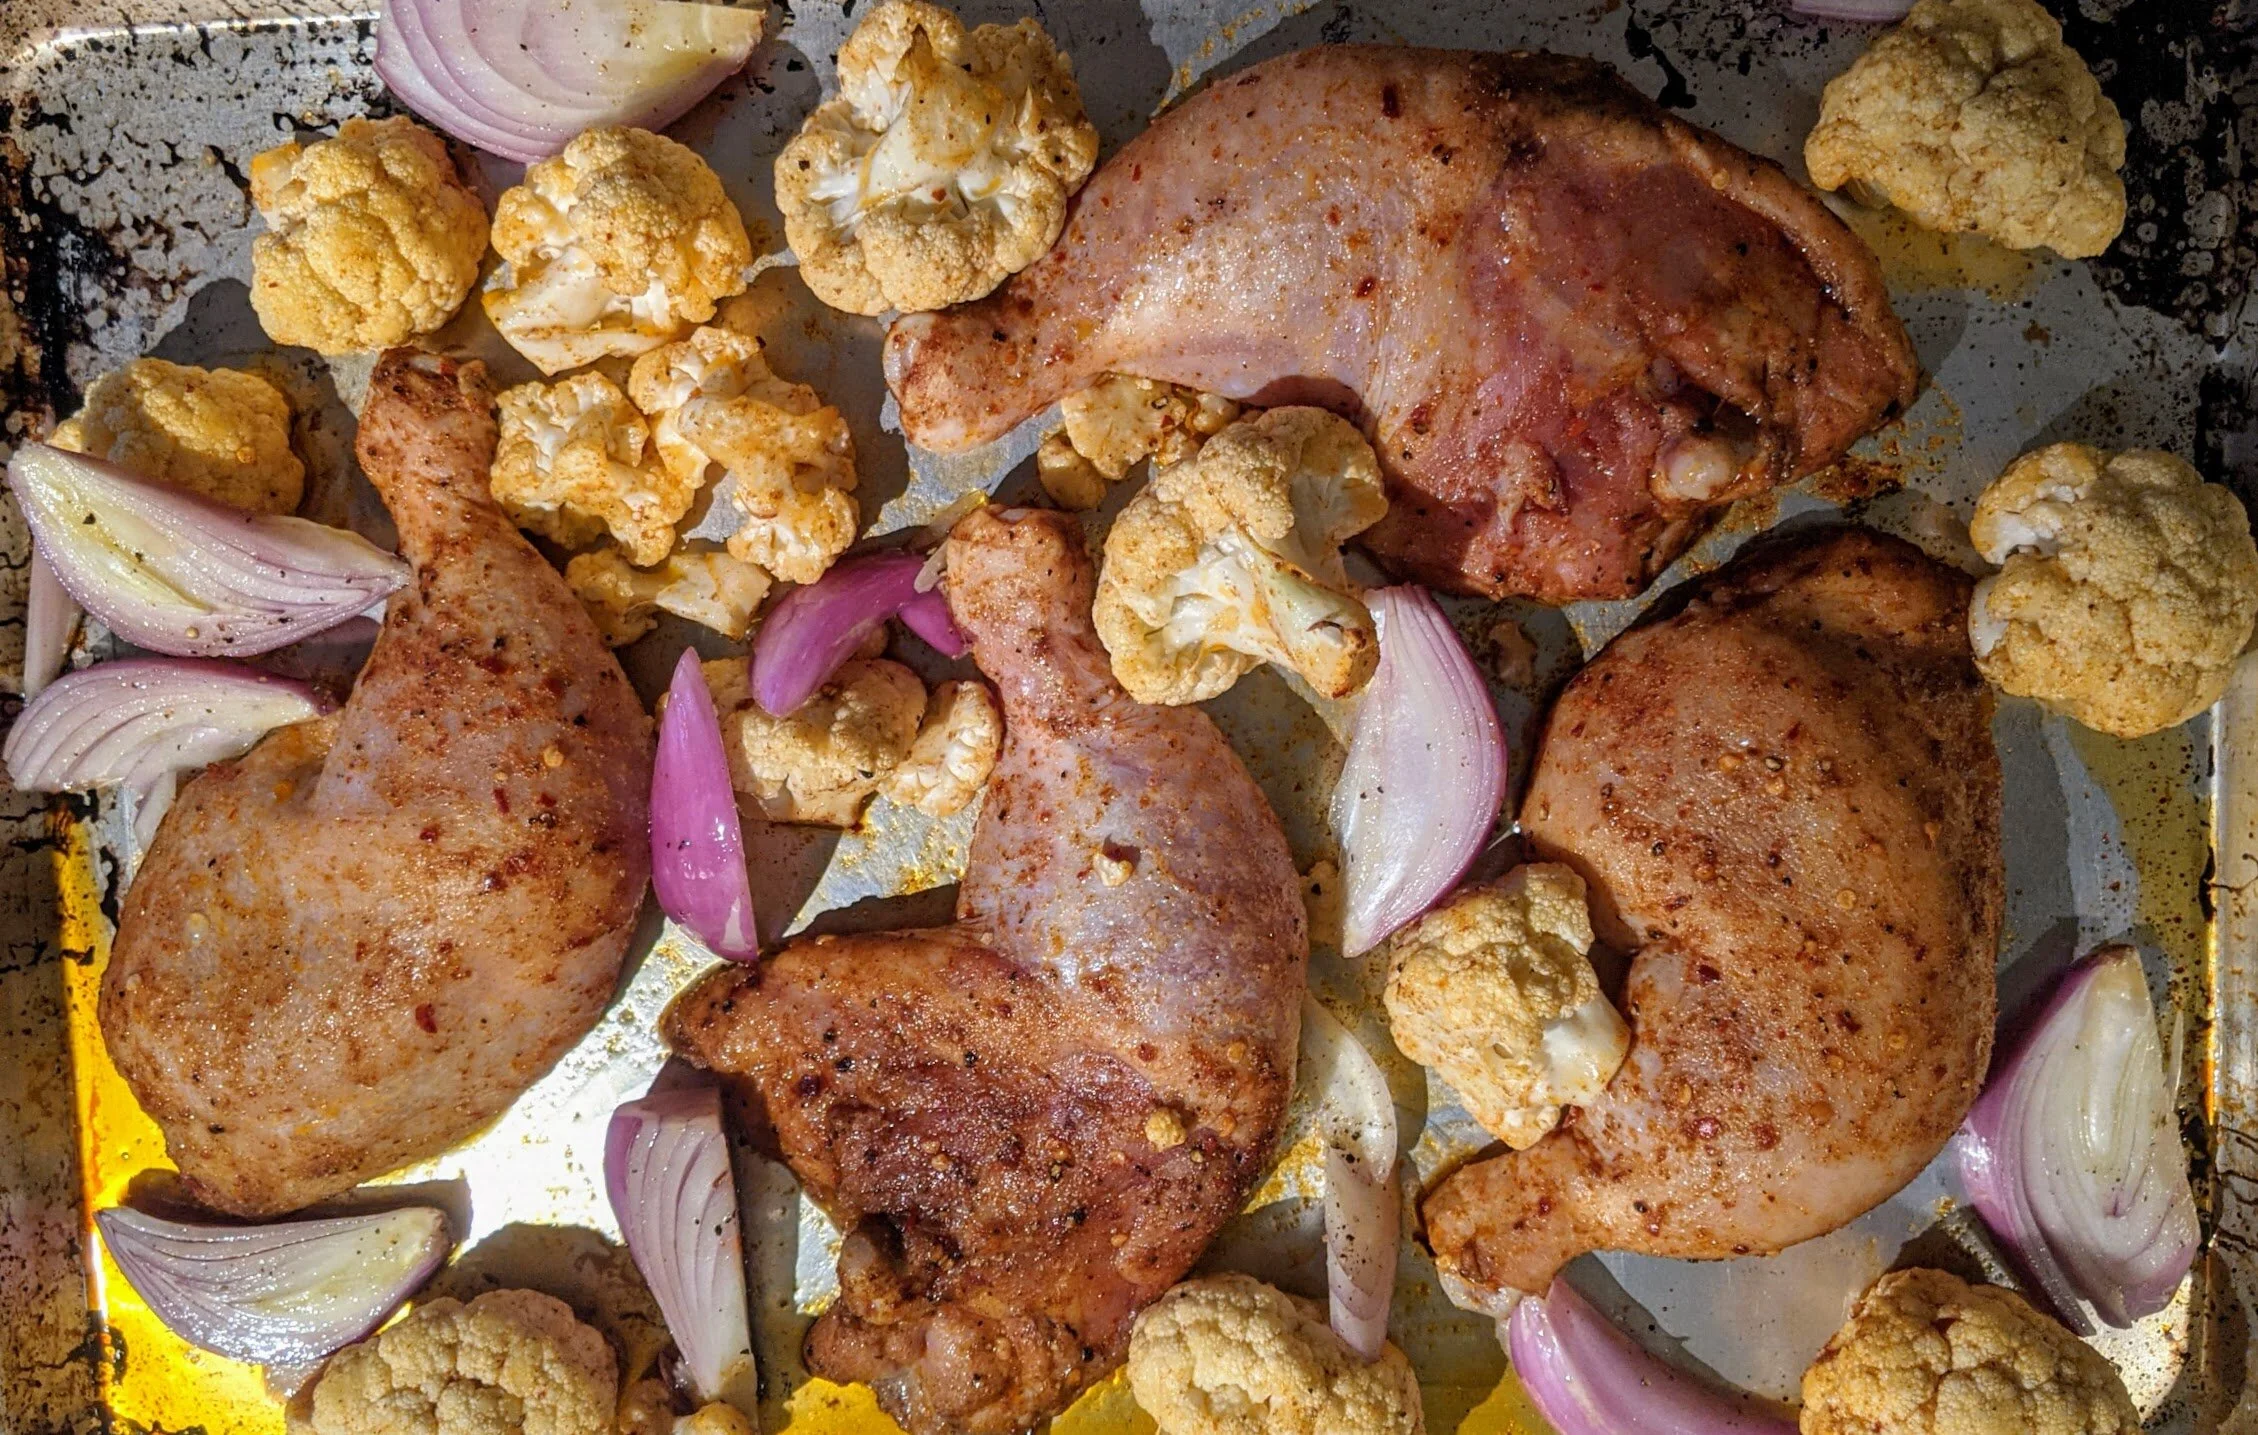
This is a really simple weeknight dinner type of dish - but I wouldn’t have any qualms about serving this for guests. Coat chicken, cauliflower, and some quartered shallots in a warm spice mix and put it in the oven - 40 minutes later, you have dinner! An herby greek yogurt with bright lemon and garlic cuts the heat and adds a tangy contrast.

This is a really simple weeknight dinner type of dish - but I wouldn’t have any qualms about serving this to guests. Coat chicken, cauliflower, and some quartered shallots in a warm spice mix and put it in the oven - 40 minutes later, you have dinner! An herby greek yogurt with bright lemon and garlic cuts the heat and adds a tangy contrast.
The chicken here is marinated in a spicy rub as much as a day ahead, if possible, or even just an hour. If you don’t have the forethought to do it earlier, just rub it on and under the skin for maximum flavor when you’re ready to cook. The dregs of the marinade coat the cauliflower and shallots, continuing our simplicity theme. Cauliflower is a nice vehicle for the spices, but you could substitute broccoli or maybe even zucchini in the summer.


I found this quite filling on its own, but if you want to round it out, feel free to double the marinade and toss some potatoes (fingerlings, chopped yellow potatoes, chopped sweet potato) in with the rest of the vegetables. Rice (maybe mixed with some parsley and lemon zest) would be another great option to bulk this out.
Roasted Chicken Legs and Cauliflower with Yogurt
Time: 1 hour || Servings: 4 || Source: Adapted from Yossy Arefi at NYT
Coriander, ground - 1 tsp
Smoked paprika - 1 tsp
Red pepper flakes - 1/2 tsp
Olive oil - 3 tbsp
Chicken legs, bone-in, skin-on - 4
Cauliflower - 1 small head, about 1 1/2 lb
Shallots - 3
Greek yogurt - 1 cup
Mint - 2 tbsp, chopped
Cilantro - 2 tbsp, chopped
Lemon juice, freshly squeezed - 2 tbsp
Garlic clove - 1
Up to a day before you plan to cook, marinate the chicken. In a container with a cover large enough to hold the chicken (or a gallon bag), combine 1 tbsp of olive oil with the coriander, smoked paprika, and red pepper flakes. Add a generous pinch of salt and several grinds of pepper. Add chicken and coat it well in the marinade. If you’re using a gallon bag, push the air out of the bag and seal, and then vigorously rub the chicken to coat it. Refrigerate chicken until you’re ready to cook.
Note: If you don’t get this done the day before, you can rub the marinade on and under the skin to help the flavors soak in - in any case, it’ll still taste great.
When you’re ready to cook, heat the oven to 425°F. Peel the shallots and cut into quarters. Separate the cauliflower into florets no bigger than 2 inches.
Take the chicken out of the marinade and place on a sheet pan. Add another 2 tbsp of olive oil to the container that held the chicken. Toss the cauliflower and shallots in the olive oil, adding a pinch each of salt and pepper, then distribute onto the sheet pan around the chicken.
Place pan in the oven and roast for 40 minutes. Check about halfway through and give the vegetables a stir. The chicken is done when it’s browned and cooked through (165°F). This might be a little before the time is up - if that’s the case, pull the chicken out and cover to keep warm, and let the vegetables continue to roast until tender.
Make the yogurt sauce - this could be done ahead in the day, or while the chicken’s cooking. Whisk together the yogurt, mint, cilantro, and grated garlic. Add lemon juice, a pinch of salt and pepper, then taste and adjust.
Serve topped with juices from the sheet pan, a squeeze of lemon, a few cilantro leaves, and a large dollop of yogurt sauce.
Marcella Hazan’s Bolognese
My one year old will try and mostly eat just about anything so far — she likes pickles, she’s ravenous for beets, she thinks broccoli is great, she devours sourdough like a fiend. But she is picky in terms of quality. She won’t eat bits and pieces of cobbled together leftovers, she knows and handily rejects beans that are stale, she notices if her food is different from the adults’. Purees are out of the question (even mashed potatoes are too suspiciously like baby food for her taste).
Even with all of her food enthusiasm, I have never, ever, seen her eat with as much gusto as she ate Marcella Hazan’s bolognese.

My one year old will try and mostly eat just about anything so far — she likes pickles, she’s ravenous for beets, she thinks broccoli is great, she devours sourdough like a fiend. But she is picky in terms of quality. She won’t eat bits and pieces of cobbled together leftovers, she knows and handily rejects beans that are stale, she notices if her food is different from the adults’. Purees are out of the question (even mashed potatoes are too suspiciously like baby food for her taste).
Even with all of her food enthusiasm, I have never, ever, seen her eat with as much gusto as she ate Marcella Hazan’s bolognese. (Close second: this beef stew.) Between industrious slurps, punctuated by “MMM”s, there was impatient huffing and flailing fists while she waited for her fork to be loaded. She is head over heels for this dish, and with good reason: it’s delish.


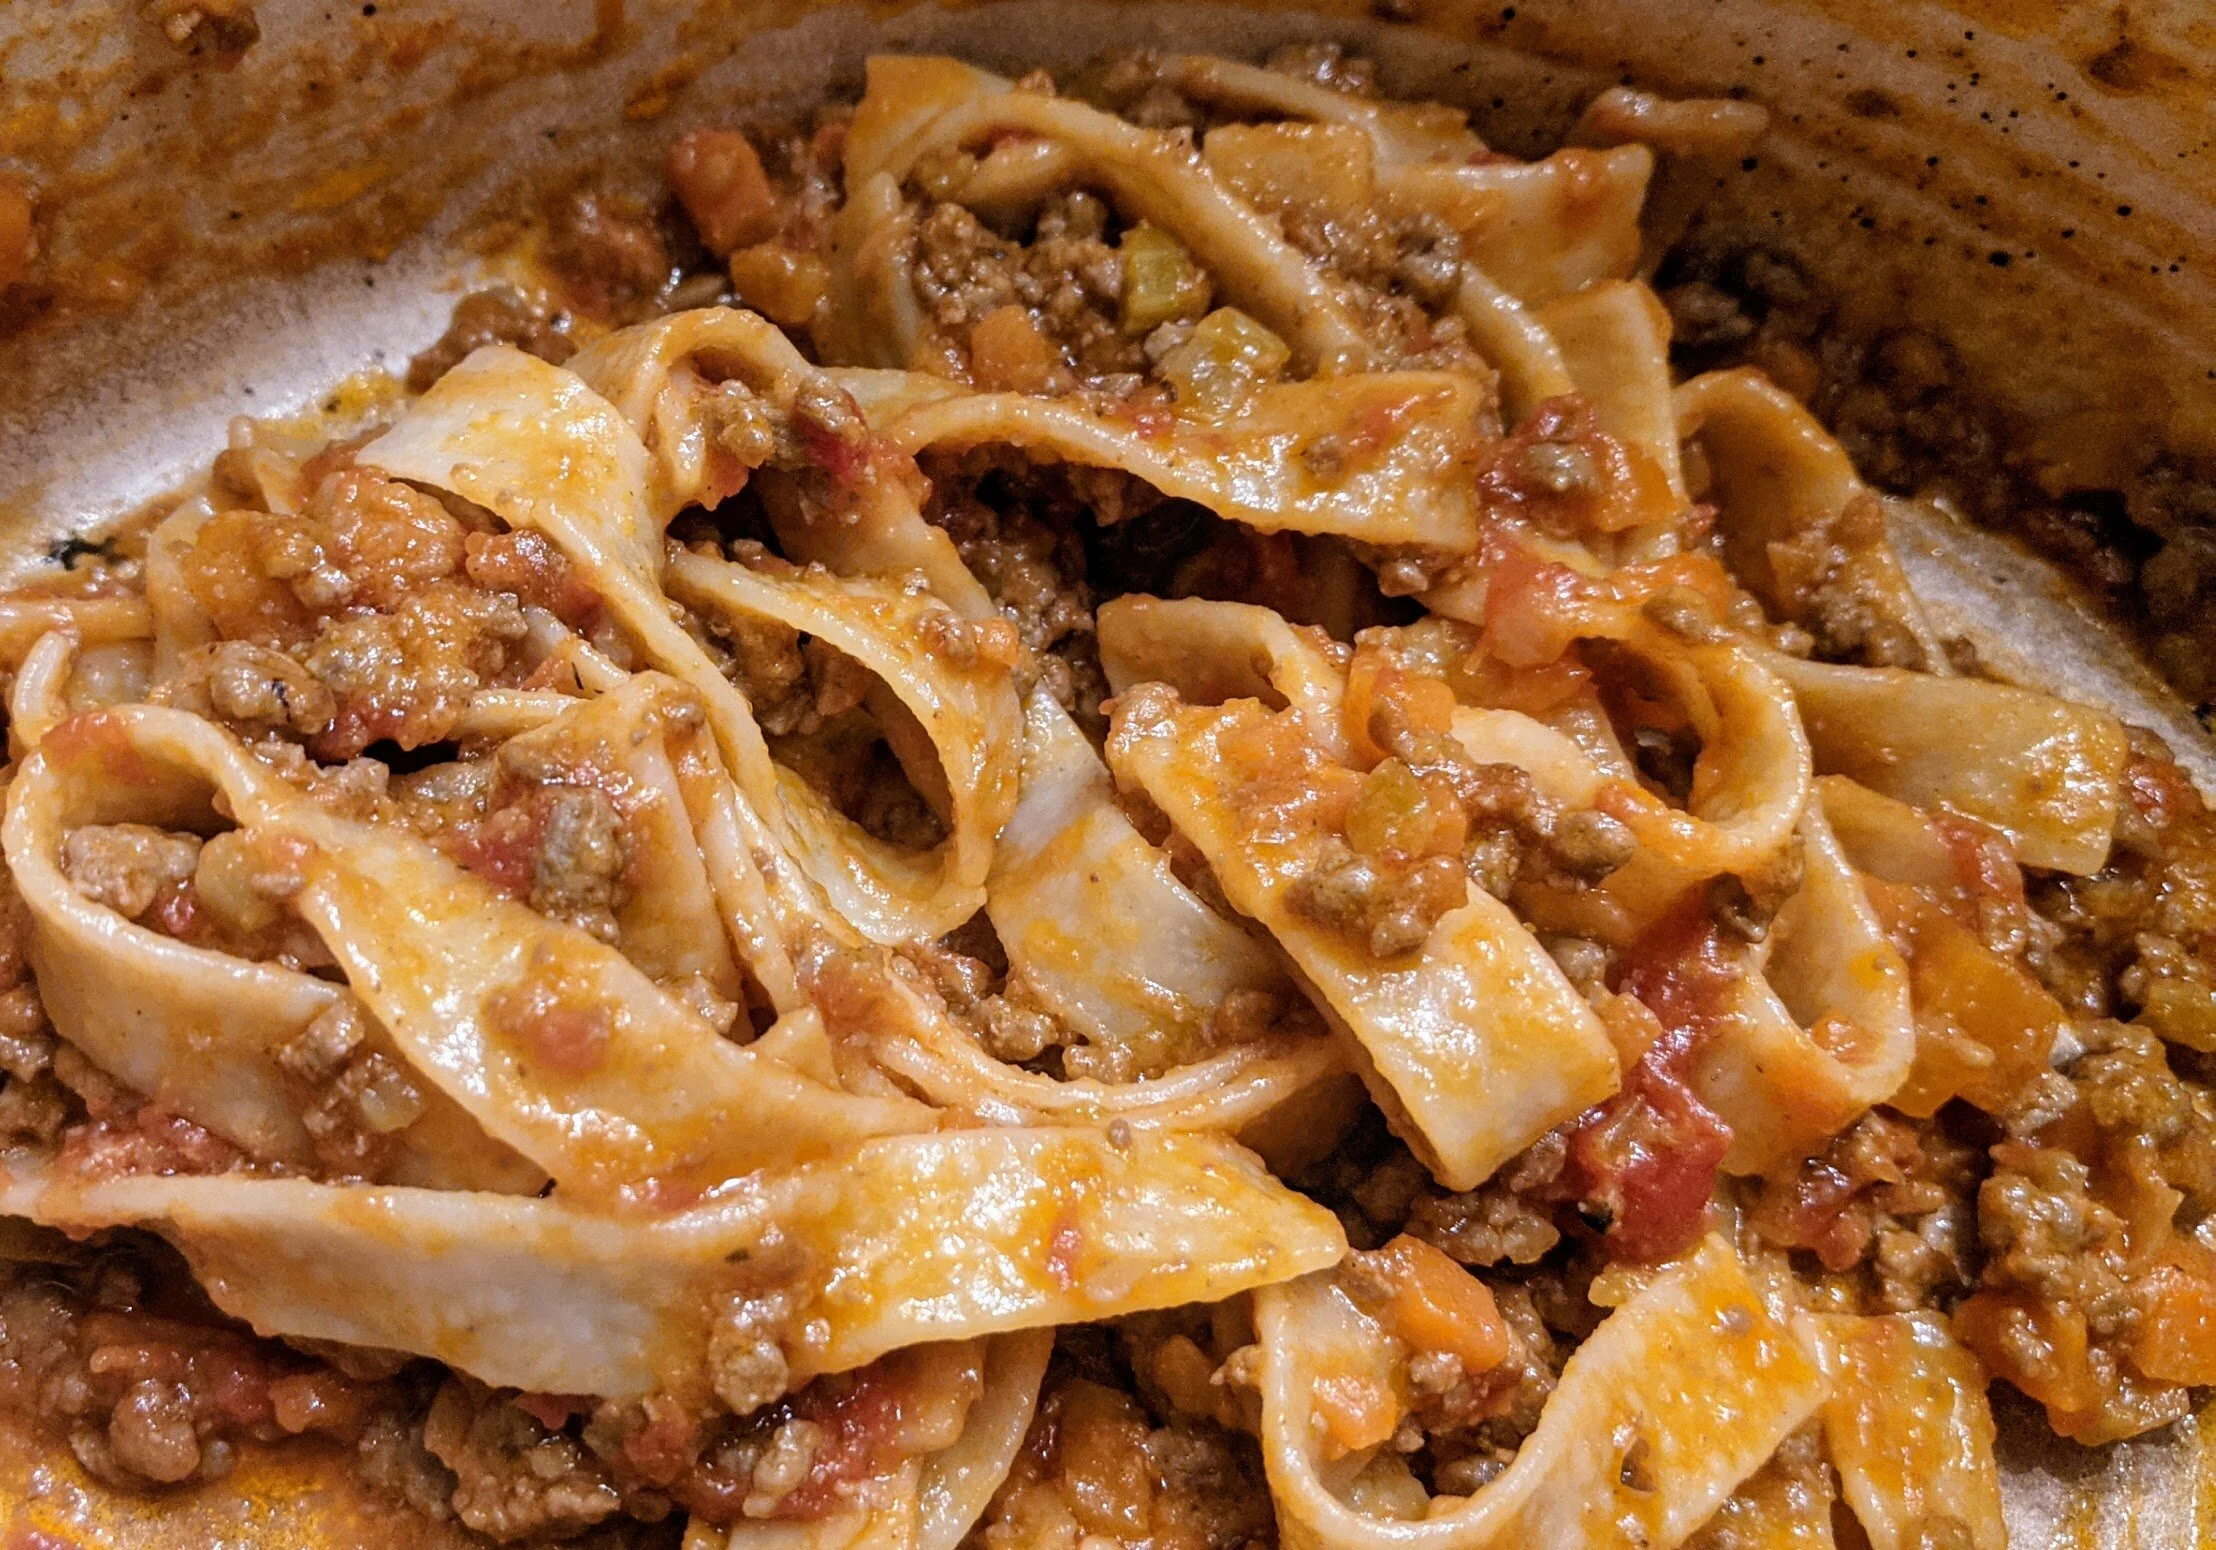
This is a pretty straightforward bolognese: a soffritto (carrot, onion, celery sauté) base with ground beef gently simmered in milk and then tomatoes. It requires patience - this isn’t a difficult dish in terms of chopping or technique, but it is absolutely a waiting game. Make sure you let the milk fully evaporate before adding the tomatoes, and then let those tomatoes just barely bubble all afternoon. The wait is so worth it for the outcome: creamy, decadently rich sauce tossed with steaming pasta.

Marcella Hazan’s Bolognese
Time: 1 hour active, several hours simmering || Servings: 6 || Source: Essentials of Classic Italian Cooking by Marcella Hazan
Vegetable oil - 1 tbsp
Butter - 4 tbsp
Onion - 1/2 cup, chopped
Celery - 2/3 cup, chopped
Carrot - 2/3 cup, chopped
Ground beef chuck - 3/4 lb (a higher fat content will make a sweeter sauce)
Whole milk - 1 cup
Whole nutmeg, for grating
White wine - 1 cup
Canned tomatoes - 1 1/2 cup, cut up or crushed with their juices
Pasta - 1 1/2 pounds, typically tagliatelle
Parmesan for garnish
Salt & pepper
In a dutch oven or other heavy bottomed pot, heat the oil and butter over medium. Place the onion in the pot and cook until tender and translucent, about 10 minutes. Add celery and carrot and cook for an additional 2 minutes, stirring.
Add the ground beef, a large pinch of salt (don’t be shy), and several grinds of pepper. The salt will help to release the juices of the beef, dispersing flavor into the sauce. Break up the beef as it cooks, until it’s started to brown - some pinkness is fine.
Add the milk. Simmer, stirring regularly, until the milk has simmered away completely. This will take time - as long as 20 minutes in my experience. If you keep the heat low, you can just stir now and then as you pass through the kitchen, perhaps opening and sipping the wine you’re about to use. When the milk has evaporated, add a few gratings of nutmeg to the pot and stir.
Add the wine and, as with the milk, let it simmer until evaporated.
Add the tomatoes to the pot. Rather than chop them, I usually crush them with my hands as they go into the pot. Stir thoroughly, then bring to a lazy, barely bubbling simmer. Cook, uncovered, for a minimum of 3 hours and longer if you have time - up to 5, 6 hours. (You can shut off the heat and resume cooking again later within the same day if you don’t have several continuous hours to keep an eye on it.) Stir every once in a while, adding 1/2 cup water if the sauce looks dry; typically, I have to do this a few times over the course of cooking. When you’re ready to take the sauce off of the heat, make sure all of the water has evaporated. Toss with cooked, drained pasta (tagliatelle is classic) and one tablespoon of butter. Serve with parmesan cheese on the side.
This sauce works well made a few days ahead and freezes well - if cold, simmer for 15 minutes before using.

Beef Stew
I can’t say enough about this beef stew from Alice Waters. This is a winter staple in my home because it’s simply delicious. A typical beef stew, in my experience, is thick with potatoes and peas. This is not that stew. This has savory tender beef, time-mellowed garlic, sweet onions, carrots, and tomatoes, spiced cloveyness (new word), orange brightness. I’ve been making this stew for years, and I still find myself stealing tastes checking the quality while it simmers all afternoon. And, although this a generously sized stew, I’ve learned not to expect much in the way of leftovers.

I can’t say enough about this beef stew from Alice Waters. This is a winter staple in my home because it’s simply delicious. A typical beef stew, in my experience, is thick with potatoes and peas. This is not that stew. This has savory, tender beef, time-mellowed garlic, sweet onions, carrots, and tomatoes, spiced cloveyness (new word), orange brightness. I’ve been making this stew for years, and I still find myself stealing tastes checking the quality while it simmers all afternoon. And, although this a generously sized stew, I’ve learned not to expect much in the way of leftovers.


I’d recommend using high quality beef stock, homemade if possible… but the honest truth is I’ve used both amazingly good stock and, in a pinch, so-so stock filled out with water and this always turns out amazing. The flavors here are solid, in part because Alice recommends you sear everything before you toss it in the pot. It’s a little extra work, but it makes a difference — instead of muddled flavors, you get depth and nuttiness from the browning. If you use a cast iron, you can deglaze (and sip) with some red wine, then just wipe it out and move on with your life, making this an almost-one-pot recipe.


I’m including the recipe as Alice designed it here, but I find that I skimp at the beginning and end of the recipe. Very rarely do I render the bacon or add raw garlic as a garnish. I’ve tried both, and they’re great - but sometimes I just don’t have bacon on hand and quite often I’m too impatient to chop garlic before digging into my bowl. One thing I am loyal to is the orange peel; it’s small but adds significant brightness to the dish.
Beef Stew
Time: 1 hour active, 2-3 hours simmering || Servings: 4 || Source: The Art of Simple Food by Alice Waters
Beef chuck - 3 pounds, cut into 1.5 inch cubes
Olive oil - 2 tbsp
Bacon - 3 slices, cut into 1/2 inch pieces (optional)
Onions - 2, peeled and quartered
Cloves - 2, stuck into onion quarters
Carrots - 2, cut into 2 inch pieces
Thyme, savory, parsley - 2 sprigs each
Bay leaf - 1
Peppercorns - a few, 5ish
Red wine - 1 3/4 cup
Diced tomatoes - 3, fresh or canned
Garlic - 1 small head, peeled and roughly chopped, plus a couple more finely chopped
Parsley - 1 tbsp, chopped
The day before you plan to cook, salt the beef generously and refrigerate.
Pull out a cast iron or other heavy bottomed pan and place it over medium-high heat. Also pull out a dutch oven or braising dish and place nearby. You’ll be cooking ingredients in the cast iron and then transferring them to the dutch oven to braise into deliciousness.
Put olive oil into the cast iron. When it shimmers but isn’t smoking, add bacon, if using, and cook until the fat has rendered and it’s lightly brown but isn’t crispy. Remove from cast iron and place in dutch oven.
Place beef cubes in the cast iron without crowding. You’ll probably need to cook the beef in multiple batches. Turn beef every few minutes until browned on all sides. The beef will not be fully cooked; it’ll cook through when it’s braising. When browned, transfer beef to the dutch oven.
Turn down the heat. Pour off most of the fat from the cast iron, leaving a thin layer; add more oil if the pan is dry. Add onion, cloves, carrots, herb sprigs, bay leaf, and peppercorns to pan and cook until lightly browned, turning every now and then. This is just for additional flavor - they’ll get plenty of cooking time as they braise. When lightly browned, transfer to dutch oven.
Raise the heat to high. Pour red wine into the cast iron and let it bubble down by two-thirds. While it’s boiling, use a wooden spoon to scrape up all the yummy bits stuck to the bottom of the pan. When reduced, pour into the dutch oven over the beef and vegetables.
Add the tomatoes, roughly chopped garlic, orange zest, and stock to the dutch oven. The liquid should come at least three-quarters of the way up the beef and vegetables. If not, add more - water is fine if you don’t have more stock on hand.
Bring the stew to a simmer and cover. At this point, you can reduce the heat and let it barely simmer on the stovetop, or transfer to a 325° oven. Let stew barely simmer for 2-3 hours, checking occasionally to make sure the heat isn’t too high and to add more liquid if needed.
When the beef is tender and your home smells amazing, remove the stew from the heat. Allow to sit for a few minutes so the fat will settle on top, then skim as well as you can. If you can fish them out, discard the bay leaf, cloves, and peppercorns (I usually just warn eaters and let them gamble with getting a spicy bite). Taste and add salt if needed. Garnish with parsley and finely chopped garlic, and then tuck in.
Variation: You can make this as a pot roast by keeping the meat whole and cooking for an additional hour. In this case, the liquid only needs to come halfway up the beef and vegetables.

Omelettes
Folks, we’ve had a breakthrough. My amazing, darling, spectacular daughter slept through the night last night. After months of groggy, delirious mornings with conversation limited to grunts, it was like the sun peeked through the clouds. There’s an end in sight! In a 2020 that’s been dark in so many ways, this small but critical change was quite possibly the best thing that’s happened to my family in months. Breakfast for us has been recently restricted to whatever is quick, straightforward, and goes with coffee — generally the realm of yogurt, oatmeal, and bagels. But I was in such a good mood this morning that I decided to go big for breakfast: omelettes.

Folks, we’ve had a breakthrough. My amazing, darling, spectacular daughter slept through the night last night. After months of groggy, delirious mornings with conversation limited to grunts, it was like the sun peeked through the clouds. There’s an end in sight! In a 2020 that’s been dark in so many ways, this small but critical change was quite possibly the best thing that’s happened to my family in months. Lately, breakfast for us has been restricted to whatever is quick, straightforward, and goes well washed down with a gallon of coffee — generally the realm of yogurt, oatmeal, and bagels. But I was in such a good mood this morning that I decided to go big for breakfast: omelettes.


There was a time several months ago when I made omelettes almost daily for breakfast or lunch. I was on a mission to perfect my omelette-making technique, which isn’t that difficult but definitely takes some experience to know when the eggs are looking right. I’d greedily store up the odds and ends from dinner - onion ends, the tiny bit of scallion that didn’t get used, pepper scraps - for the omelette filling.
I remember reading somewhere (Julia Child, queen of omelettes, comes to mind as a possible source) that the best way to learn to make an omelette is to have someone show you how. I use maybe a less than perfect technique, especially if you compare it to Julia’s, but it works for me, and there’s never much left on the plate after a meal. That seems like success to me.


I generally use two eggs per omelette, which is typically enough with fillings and some toast. To do this right, you need a decent non-stick pan. Mine is 10 inches, so my omelettes come out a little thinner and more delicate than they would in a more typical 8 or 9 inch pan, but I like them that way. The only other tool you need is a rubber spatula so that you don’t harm your pan and so you can easily slide under the omelette to lift it. And butter.
Once you get the hang of it, omelettes are a pretty quick breakfast, lunch, or dinner. But they feel kind of special compared to cereal, and your fellow diners will definitely be impressed by your kitchen skills.

Despite my full night of sleep (bliss), I went lazy - a.k.a. no-cook - on the filling. Goat cheese and chives is classic, delicious, and easy - but use whatever you have hanging around. Ready?
Omelettes
Servings: 1 || Time: 10 mins || Inspiration: A full night of sleep
Butter - 1 tbsp
Eggs - 2, whisked until just combined
Salt & pepper
Filling of your choice - in this case, 1 tbsp goat cheese and chives
Prepare your filling - in this case, get out your goat cheese and chives. Take a sip of coffee or beverage of choice (no judgement).
Heat butter in 8, 9, or 10 inch non-stick pan over medium heat until it foams.
Get your spatula ready, and pour eggs into the pan. Turn heat to low. Immediately stir eggs in a steady figure-8 pattern until they begin to set, about two minutes. You may need to push the sides down to avoid crispy thin egg edges. Once egg begins to set, stop stirring the eggs - if you keep going, you’ll have delicious scrambled eggs, but not an omelette.
Continue cooking eggs over low until the top is somewhat moist but no longer wet - the eggs shouldn’t run when you tilt the pan. (If they do, lift the edge of the omelette and tilt the pan to allow the wet egg on top to slide under the cooked egg.) Turn off the heat.
Slide a spatula under the omelette to ensure it’s loose from the pan. Season with salt and pepper.
About a third of the way into the egg disc, perpendicular to the pan handle, create a line of filling. Lay down the goat cheese, and then snip chives over the top. With a nonstick spatula, tip the edge of the eggs closest to the handle over the filling. Roll one more time, until you have a little omelette roll with a lip.
Tilt pan over a plate and, using your spatula, roll omelette a final time off the pan and onto the plate. Top lightly with butter (for shine, if you want to get fancy) and season with salt and pepper.

Halibut “Puttanesca”
As you may have noticed, we’re eating a tad more than average amount fish (or at least more than average for us). One of the main reasons is that I signed up for a fish subscription, which has been slightly less overwhelming and a lot more fun that I expected. We’re getting a lot of variety and, with some minor bumps along the way, I’m learning all the different ways to prepare and dress up fish.

As you may have noticed, we’re eating a tad more than average amount fish (or at least more than average for us). One of the main reasons is that I signed up for a fish subscription, which has been slightly less overwhelming and a lot more fun that I expected. We’re getting a lot of variety and, with some minor bumps along the way, I’m learning all the different ways to prepare and dress up fish.
One thing I haven’t quite figured out is how to manage leftover fish well. We get four portions of each fish, and there are two adults and the baby - and although she eats a LOT (mostly blueberries), she’s not quite up to adult portion size yet. So we end up having a couple of portions left, and reheating in the oven or in the microwave doesn’t seem to do it justice. (Any thoughts on this would be well appreciated in the comments!)

This week’s delivery was halibut. I was pretty excited because this is a fish I have a bit of experience with, which I couldn’t say for the porgy or skate or catfish we’ve received in other weeks. Halibut is a pretty firm white fish that doesn’t get incredibly delicate and fall apart when cooked, although it is fork-tender. It’s pretty mild and sweet as far as fish goes, and it stands up well to strong flavors.


I’ve been playing a lot with Mediterranean flavors, so I decided to throw a classic set of strong Mediterranean flavors at it and I ended up pretty pleased with the result. I pan seared the halibut to get some color, and then made a quick pan sauce with green olives, garlic, anchovies, capers, and white wine. It smelled amazing - stop and put your face over the pan and breathe amazing. I turned the fish in the sauce, garnished with a little lemon and parsley, and there we had it - dinner.
I’ve been kind of thinking of this as a halibut puttanesca… it’s got all the flavors, minus the tomato. Tomato actually wouldn’t be out of place here, but I found this delightfully briny and satisfying as is.
This recipe is easily modified to suit your tastes - just include a little more of this or a little less of that. I used a green olive, Castelvetrano, but this could be good with black olives, too. If you’re opposed to anchovies, this would still be pretty tasty without them - but they do add a depth of flavor, so give them a try if you’re up for it.
Halibut “Puttanesca”
Servings: 4 | Time: 30 minutes | Inspiration: The Mediterranean Diet Cookbook
Halibut fillets - 1.5 lbs
Olive oil - 3 tbsp
Anchovy - 3 fillets, more or less to taste
Garlic - 2 cloves, minced (about a tablespoon)
Capers - 1 tablespoon, drained
Green olives, like Castelvetrano - 3, pitted
White wine, dry - ½ cup
Lemon juice - 1-2 tsp, to taste
Lemon zest, parsley or chives, for garnish
Season halibut with salt and pepper on both sides.
Heat a medium-large nonstick skillet over medium-high heat. Add two tablespoons of olive oil. When oil shimmers, add halibut to the pan, working in batches if needed to give the halibut space. Sear both sides of the halibut, 2-3 minutes per side. Remove halibut to a plate and cover to keep warm.
Reduce the heat to medium. In the same pan, add the anchovies and cook for a couple of minutes, stirring, until they start to break up. Add the garlic, olives, and capers and cook briefly, long enough to smell the garlic. Add white wine, turn heat to high, and cook until half the wine is evaporated. Add fish back to pan and spoon sauce over to coat in all that deliciousness. Cook a minute or so more, until fish is opaque (you can open the fillet a bit to see that it’s opaque all the way through).
Transfer fish to a plate. Add lemon to sauce, if using, and spoon over the fish. Garnish with chopped parsley or chives and grated lemon zest, if using.

Use-Up-Your-Vegetables Pasta
Sometimes you make something that is just so so good you can’t possibly imagine what else you could be making for dinner because why in the world would you eat something else when you could be eating THIS?
Since this is our third time making this dish this week, I would say we’re pretty solidly in the realm of obsession.

I’ve mentioned previously that we’ve been having a glut of corn, and now the tomatoes have piled up as well. Not that I’m complaining about too much deliciousness cluttering my counter - I know I’ll mock this “problem” of late summer bounty when we’re in the deep dark depths of winter. And yes, yes, I know I can absolutely make a simple tomato sauce that will freeze beautifully and - once rediscovered, thawed, and tossed with pasta one frosty December day - will make my eyes tear up with memories of beach days and tank tops. But that doesn’t so much solve the problem of dinner tonight. And, so was born Use-Up-Your-Vegetables pasta.


Is this really a recipe? I don’t know. Is it an ode to all the flavors of summer, a true honor to corn, eggplant, and tomatoes? YES.
At its core, this “recipe” is no more than sautéing a few gorgeous vegetables - corn, eggplant, onion, garlic, tomato - in olive oil, smothering them with cheese, and tossing them with pasta. Incredibly easy and incredibly satisfying.
“But I don’t have corn,” you say, smugly surveying your gleaming, cornsilk-free countertops. No problem! in the spirit of using up your vegetables, use what you have on hand. Skip the corn, add the green beans. Got zucchini? Wonderful, toss it in! You can’t really go wrong with bright, fresh summer vegetables. I kind of think you’ll be obsessed with this, too.
Use-Up-Your-Vegetables Pasta
Servings: 4-6 || Time: 30 minutes || Inspiration: Late summer vegetable bounty
Olive oil - 2-4 tbsp
Onion, white or yellow - 1 small, diced
Corn kernels - about 1 cup, cut from 2 ears of corn (frozen could work)
Eggplant - 1 medium, diced
Garlic - 2 cloves, minced
Tomatoes - 3 medium, diced
Farfalle pasta or other forkable shape - 1 lb
Parmesan - grated, to taste
Herbs, like basil, parsley, cilantro, or tarragon for garnish
Set a large pot of salted water over high heat to come to a boil.
Meanwhile, set a large skillet over medium heat. Add olive oil and heat until shimmering. Add onion and sauté until it begins to turn translucent. Add corn kernels, season with salt and pepper, and sauté until they start to brown. Add eggplant and season once more. The eggplant will absorb a lot of the oil, so add a bit more if needed to prevent burning. Cook, stirring occasionally, until eggplant is browned. Add garlic, sauté until fragrant, then add tomatoes. Continue to cook, stirring here and there, for 10-15 minutes more while the pasta cooks. Turn down heat as necessary to maintain a low simmer.
Once water is boiling, add pasta and cook until al dente. Drain pasta, reserving 1/2 cup of pasta water, and add to sauce. Toss the sauce and the pasta together. Transfer to a bowl.
Top pasta with Parmesan. Your sauce may need a little help to get saucy and marry with the pasta, especially if you use a less juicy type of tomato, like plum tomatoes. Add pasta water to the bowl, using a 1/4 cup at a time, and toss with pasta until you get a satisfying squelchy sound and the pasta looks well coated with sauce. Top with perhaps a little more cheese (why not?) and the chopped herbs of your choice.